
Pruning
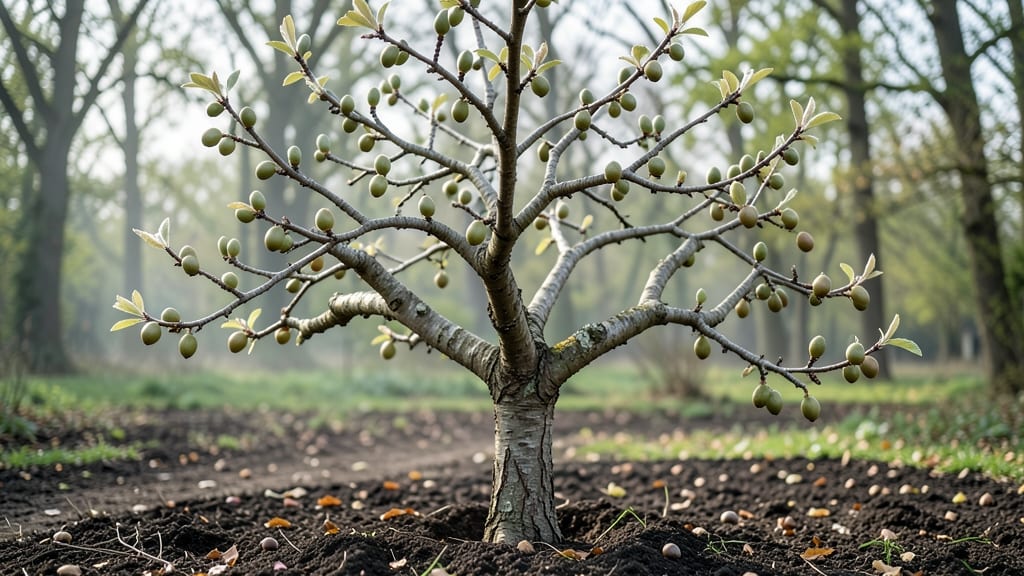
Identifying pear tree fruit buds in winter unlocks the secret to next summer’s harvest. 🌿 Those tiny, plump swellings along last year’s branches are where your pears begin—ignore them at your peril. One wrong cut, and you’ll sacrifice fruit for years to come.
The key is timing: prune during dormant season (late winter) when the tree isn’t actively growing. Focus on 3-5 year old wood—these branches hold the most productive buds. Thin out crowded branches by 20-30% to let sunlight and air reach the center.
You’ll see buds fattening by spring, signaling vigorous growth. A well-trimmed tree produces larger, sweeter fruit with fewer pests. Just avoid cutting into buds themselves—they’re fragile and take years to form. Works for both European and Asian pears, though Asian varieties need slightly later pruning.
Here’s how to do it right without guessing.
📚 In This Guide
- What you need
- Instructions
- Tips and common mistakes
- Wrapping up and next steps
What you need
- ● Pruning shears: Bypass pruners (sharp, 6-8” blades) for clean cuts on small branches. 1 pair (invest in high-quality stainless steel for longevity).
- ● Loppers: Pole loppers (for hard-to-reach branches) or standard loppers (20-24” blades) for thicker branches. 1 pair.
- ● Pruning saw: Folding pruning saw (7-10” blade) for branches thicker than 2”. 1 saw.
- ● Disinfectant: 70% isopropyl alcohol or rubbing alcohol to sterilize tools between cuts. Small bottle.
- ● Gloves: Heavy-duty gardening gloves (cut-resistant, waterproof) to protect hands. 1 pair.
- ○ Pruning sealant (optional): Tree wound pruning paste to prevent disease entry on large cuts. Small tube.
- ● Weather check: Choose a dry, calm day (avoid rain or wind). Ideal temps: 40–60°F (4–15°C).
- ● Safety glasses: ANSI-rated to shield eyes from debris. 1 pair.
- ● Ladder or step stool: Sturdy, non-slip (if tree is >6 ft tall). 1 unit.
- ● Work bag or bucket: To collect pruned branches and debris. Medium-sized.
- ○ Tree identification guide (optional): Field guide or app to confirm pear tree species (e.g., Bartlett, Bosc).
- ● 🔥 Sharpen your tools first! Dull blades tear bark, inviting disease. Use a file or sharpening stone.
- ● 🌡️ Work during dormancy: Late winter (just before buds swell) is prime time for pear trees.
- ● ✨ Label branches: Use twine or tags to mark branches to remove (helps avoid over-trimming!).
How to prune pear tree fruit buds for maximum yield
Winter’s the perfect time to shape your pear tree—here’s how to trim for stronger growth and fruit.
✂️ Step 1: Identify and Remove Dead or Diseased Wood
Start by scanning the tree for branches that are brown, brittle, or hollow—these won’t produce fruit and may harbor pests. Use sharp, clean pruning shears to cut 3-4 inches below the damaged area, angling the cut slightly away from the trunk. This prevents water from pooling and reduces rot risk.
Look for signs of fungal infection like black spots or oozing sap. If you see these, sterilize your tools with rubbing alcohol between cuts. Healthy wood has a smooth, greenish-brown interior when cut—if it’s dark or mushy, remove it entirely. This step ensures your tree focuses energy on new, productive growth.
🌱 Step 2: Thin Out Overcrowded Branches
Pears thrive when branches have room to breathe. Focus on removing suckers (shoots growing from the base) and water sprouts (vertical shoots with no buds). Cut these at the collar, the swollen area where the branch meets the trunk, using a 45-degree angle to avoid tearing the bark.
Next, target branches that cross or rub against each other. These create wounds that invite disease. If two branches compete for sunlight, remove the weaker one—it’s usually the thinner, less vigorous shoot. Leave 6-8 inches of space between branches to improve airflow and fruit development. Think of this as sculpting the tree’s future shape.
☀️ Step 3: Prune for Light Penetration and Fruit Buds
Pear trees produce fruit on spurs—short, stubby branches with clusters of buds. Aim to keep these spurs exposed to sunlight by thinning the canopy. Start at the center of the tree and work outward, removing up to 25% of the total branches to open up the interior. This prevents shading and encourages even bud development.
Look for fruit buds, which appear as plump, rounded swellings along the branches. Preserve these while trimming back excessive growth. Avoid cutting back more than one-third of a branch’s length in a single season—this stresses the tree. After pruning, step back to visualize light paths; you’ll see where buds will thrive.
⏰ Step 4: Shape the Tree for Airflow and Future Growth
Now’s the time to refine the tree’s structure. For young pears, maintain a central leader (main upright stem) and remove competing vertical shoots. For mature trees, encourage a balanced, open vase shape by pruning branches that grow inward. This shape maximizes sunlight exposure and reduces humidity trapped in dense foliage.
Use a hand lens to inspect buds—healthy ones are firm and slightly sticky. If you’ve over-pruned and see sparse buds, leave some longer branches untrimmed to compensate. Finish by cleaning up fallen debris and sterilizing tools again. Your tree is now set for spring’s burst of growth and fruit production.
Tips & tricks for perfect pear tree fruit bud pruning
Pruning pear trees in winter isn't just about cutting branches—it's about strategic shaping that sets the stage for next year's harvest.
Tool Prep: Sterilize your pruning shears with rubbing alcohol between cuts, especially when moving from diseased to healthy branches. I learned this the hard way after seeing new infections appear on previously healthy wood. A quick wipe between cuts prevents cross-contamination that could spread fungal spores throughout your tree.
Visual Cues for Healthy Wood: When making cuts in Step 1, look for the telltale greenish-brown ring inside healthy branches. Dark, stringy, or mushy wood means that branch needs to go entirely. This visual check is more reliable than guessing—healthy wood should snap cleanly rather than tear when bent. Remember, you're not just pruning, you're sculpting the tree's future fruit production.
Branch Spacing Strategy: In Step 2, when creating that 6-8 inch space between branches, think vertically too. The top of your tree should be narrower than the middle—this creates an inverted cone shape that catches sunlight at different angles throughout the day. This isn't just aesthetic; it ensures even bud development from top to bottom.
Bud Inspection Technique: After pruning, use a hand lens to examine buds up close. Healthy fruit buds should feel firm and slightly sticky to the touch. Soft or hollow buds won't develop properly. This close inspection helps you verify your pruning was effective—you should see plenty of these plump buds ready for spring's growth surge.
Pro Tips for Pear Tree Fruit Buds
- Pruning pear trees in winter isn't just about cutting branches—it's about strategic shaping that sets the stage for next year's harvest.
- Tool Prep: Sterilize your pruning shears with rubbing alcohol between cuts, especially when moving from diseased to healthy branches.
- Visual Cues for Healthy Wood: When making cuts in Step 1, look for the telltale greenish-brown ring inside healthy branches.
Frequently asked questions
Got questions about pear tree fruit buds and dormant-season pruning?
You’re not alone! Here are answers to the most common concerns—so you can trim with confidence and set your tree up for a fantastic harvest.
When should I prune pear trees for fruit buds?
Prune pear trees during dormancy—typically late winter or early spring (before buds swell). For most varieties, aim for February to March in colder climates or January to February in milder zones. Avoid pruning after buds break, or you risk damaging next year’s fruit production. Pro tip: Check your local frost dates to time it right!
What if my pear tree buds are already swollen?
If buds are swollen or leaves are emerging, wait to prune—you could harm the tree’s energy reserves. Focus on light shaping or cleanup cuts instead. Heavy pruning should wait until full dormancy next season. Think of it like waking a bear too early—patience pays off!
How do I tell the difference between fruit buds and vegetative buds?
Fruit buds are fatter, rounder, and clustered (often in groups of 2–5), while vegetative buds are pointier and solitary. Fruit buds also have a slightly woody texture. If unsure, snap one open—fruit buds contain tiny flower structures, while vegetative buds hold leaves. Visual guide: [Insert link to bud comparison image].
Will pruning too much reduce my pear harvest?
Pruning correctly (removing <15–20% of the canopy) actually boosts fruit quality and yield by improving airflow and sunlight. Over-pruning (>30% of branches) can stress the tree, reducing buds. Rule of thumb: Focus on dead, diseased, or crossing branches first—let the tree guide you!
What if my fruit buds are dying or falling off?
Dying buds often signal fungal disease (e.g., fire blight), frost damage, or pest infestation. Prune below the damaged area by 6–12 inches to remove infected tissue. Sterilize tools with rubbing alcohol between cuts. For pests, apply dormant oil in late winter. Prevention tip: Remove fallen buds/debris promptly to stop spread.
Can I prune pear trees in fall instead of winter?
Fall pruning is risky—it can stimulate new growth that’s vulnerable to late frost or disease. If you must prune in fall, do so 4–6 weeks before frost and keep cuts minimal. Winter pruning (dormant season) is always the safest choice for pear trees. Exception: Light cleanup after harvest is fine!
| Quick Troubleshooting |
|---|
|
Problem: No fruit buds appearing? Solution: Your tree may be too young (<3 years) or needs thinning young trees to encourage bud formation. Also, check for poor pollination (plant a second variety nearby if needed). |
|
Problem: Buds forming but no fruit? Solution: Ensure proper fertilization (balanced NPK) and watering. Some pears need cross-pollination—verify your tree’s variety requirements. |
Wrapping up and next steps
Mastering the art of trimming pear tree fruit buds during dormancy is your secret weapon for a bountiful, healthier harvest next season. By following the right techniques—like timing, tool selection, and proper cuts—you’re not just pruning; you’re investing in your tree’s future.
Now that you’re armed with knowledge, grab those shears and give your pear tree the care it deserves! Next up: Monitor your tree’s growth in spring and adjust as needed—your delicious pears are just around the corner! 🌱🍐