
Pruning
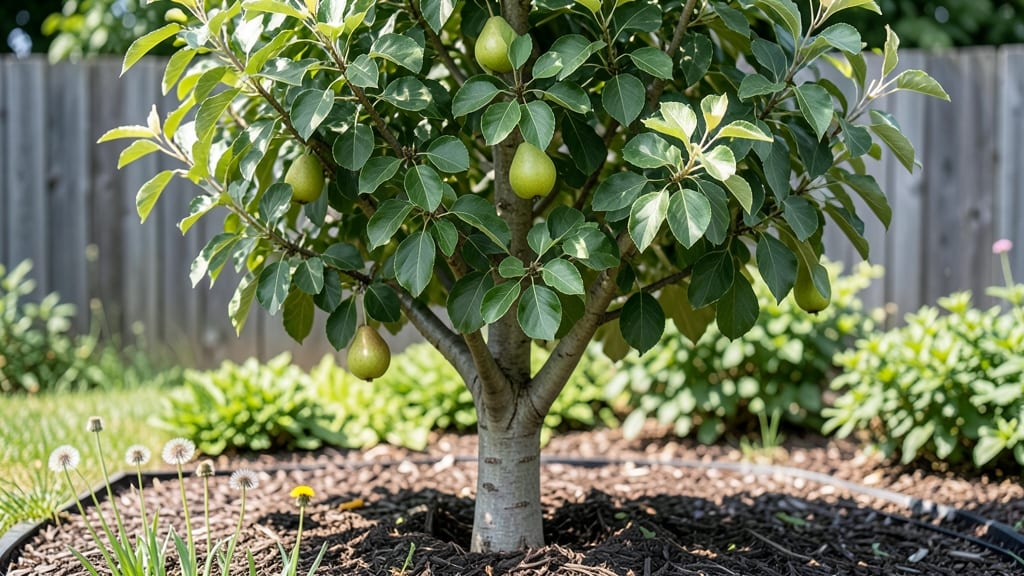
Caring for oriental pear trees transforms your yard into a fragrant orchard with juicy fruit and elegant branches—if you prune them right. 🌳 I learned the hard way that skipping pruning leads to sparse harvests and tangled growth, but mastering the annual cuts turns these trees into productive, picturesque centerpieces.
The key is year-round maintenance: light pruning after harvest to shape the tree, winter cuts to remove dead wood, and spring thinning to improve airflow. Oriental pears respond beautifully to attention, producing sweeter fruit and a more open canopy when you follow this rhythm.
Even in small yards, these trees thrive with the right care.
You’ll end up with a tree that bears 20-30% more fruit each season while staying compact enough for suburban spaces. The branches develop that signature elegant arch, and the scent of blossoms in spring becomes the highlight of your neighborhood. The effort pays off in both beauty and harvest.
Works equally well in containers for patios or planted in-ground in full sun. Here’s how to keep yours healthy year after year—no green thumb required, just consistent care.
📚 In This Guide
- What you need
- Instructions
- Tips and common mistakes
- Wrapping up and next steps
What you need
- ● Pruning shears: Bypass pruners (sharp, clean, and disinfected with rubbing alcohol or bleach solution). Quantity: 1 pair (for small branches).
- ● Loppers: Heavy-duty bypass loppers (for branches ½–2 inches thick). Quantity: 1 pair.
- ● Pruning saw: Curved-tooth pruning saw (for branches 2+ inches thick). Quantity: 1.
- ● Glove set: Heavy-duty gardening gloves (cut-resistant, waterproof). Quantity: 1 pair.
- ● Disinfectant: 70% isopropyl alcohol or 10% bleach solution (to prevent disease spread). Quantity: Small spray bottle or wipe.
- ● Sealing wax: Pruning sealant (for cuts larger than ½ inch to prevent infection). Quantity: Small tube.
- ○ Ladder: Sturdy, extendable ladder (if tree exceeds 6 feet tall). Quantity: 1 (optional for ground-level pruning).
- ● Tree tie or twine: For securing branches during heavy fruit loads.
- ● Handheld leaf blower: Clears debris post-pruning (saves time!).
- ● Pruning guide: Printed or digital reference for oriental pear tree care techniques.
- ● Safety goggles: Protects eyes from flying debris.
Step-by-step guide to pruning an Oriental pear tree
Mastering pruning transforms your Oriental pear into a productive, disease-resistant powerhouse.
✂️ Step 1: Time Your Cuts for Maximum Growth
Prune your Oriental pear tree in three key windows: late winter (before buds swell), early summer (after harvest), and light maintenance during dormancy. Late winter cuts encourage vigorous spring growth, while summer pruning redirects energy to fruit development. Avoid pruning when the tree is under stress—like during drought or extreme heat.
Use a sharp pruning saw for branches thicker than ½ inch and bypass pruners for smaller limbs. Always cut just outside the branch collar (the swollen area where the branch meets the trunk) to prevent unsightly stubs. I like to mark my cuts with a piece of chalk first—this helps visualize the final shape before making any permanent cuts.
✂️ Step 2: Remove Dead, Diseased, or Crossing Branches
Start by eliminating dead wood (branches with no green bark or leaves) and diseased limbs (look for cankers, fungal growth, or oozing sap). These cuts improve airflow and reduce pest entry points. Next, remove crossing branches that rub against each other—these create wounds that invite rot and weaken the tree's structure.
For diseased branches, sterilize your tools with rubbing alcohol between cuts to prevent spreading pathogens. If you spot fire blight (blackened, wilted branches), prune 6-12 inches below the infected area to ensure the disease doesn’t resurface. I always bag and dispose of infected debris immediately—never compost it.
☀️ Step 3: Thin the Canopy for Sunlight and Airflow
Target 25-30% of the tree’s total branches for removal to maintain an open, light-filled center. Focus on water sprouts (fast-growing, vertical shoots) and suckers (shoots from the base)—these steal energy from fruit production. Aim to create a vase-like shape with a dominant central leader and evenly spaced scaffold branches.
Step back frequently to check your progress. The goal is sunlight reaching the inner canopy—this prevents fungal diseases like powdery mildew. I use a string line to visualize the ideal branch angle (typically 45-60 degrees from the trunk). Prune back to a bud facing outward to encourage future growth in the right direction.
⏰ Step 4: Shape for Fruit Production and Structure
Oriental pears thrive with a balanced, open-grown shape. Prune to maintain 6-8 main scaffold branches spaced 12-18 inches apart along the trunk. Remove competing leaders (competing vertical stems) to avoid a weak, multi-trunked tree. For horizontal branches, cut back to ⅓ of their length to encourage fruiting spurs.
Pay special attention to fruit clusters—thin out overcrowded branches to improve fruit size and quality. A good rule of thumb: leave 6-8 inches between clusters. If you’re unsure which branches to keep, prioritize those with healthy buds and good sunlight exposure. I like to sketch a rough diagram of the tree’s structure before pruning—it keeps me from overcomplicating things.
🌱 Step 5: Post-Pruning Care for Recovery
After pruning, water deeply to help the tree recover, especially if you’ve made large cuts. Apply a 2-3 inch layer of mulch (like wood chips) around the base, keeping it 6 inches away from the trunk to prevent rot. This retains moisture and regulates soil temperature. Avoid heavy fertilization immediately after pruning—wait until new growth appears (usually 4-6 weeks later).
Monitor the tree for epicormic shoots (small shoots sprouting along the trunk)—these often appear after pruning. Remove them promptly to maintain the tree’s shape. If you notice bleeding sap from cuts, don’t panic—it’s normal and won’t harm the tree. Just keep the area clean and dry to prevent infection.
Tips & tricks for pruning an Oriental pear tree
Between us, pruning an Oriental pear tree isn't just about cutting branches—it's about sculpting a future harvest. These refined techniques will help you avoid common pitfalls and achieve that perfect balance of form and function.
Seasonal Timing is Everything: The three pruning windows—late winter, early summer, and light maintenance—are non-negotiable for Oriental pears. Late winter cuts (before buds swell) stimulate vigorous spring growth, while summer pruning (after harvest) redirects energy to fruit development. I've seen trees stressed by summer pruning fail to produce quality fruit the following year, so always time your cuts right. If you're in a warm climate where winter isn't dormant, focus on late winter and summer windows exclusively.
Tool Sterilization Prevents Disaster: When dealing with diseased branches like fire blight, sterilizing your tools between cuts is absolutely critical. I use rubbing alcohol on a cloth or disposable wipes—it's fast and effective. The 6-12 inch cut below infected areas isn't just a suggestion; it's how you prevent the disease from resurfacing. I've had to completely remove trees that were infected and not properly sterilized, so don't skip this step. Also, never compost diseased debris—it's the fastest way to spread pathogens to other plants.
Visualize Before You Cut: Sketching a rough diagram of your tree's structure before pruning is a game-changer. I use a simple pencil and paper to map out where I'll make cuts, especially when dealing with complex branch structures. This helps prevent over-pruning and ensures you maintain that vase-like shape with evenly spaced scaffold branches. For branch angles, a string line is my secret weapon—it helps me visualize the ideal 45-60 degree angle from the trunk before I make any cuts. The goal is sunlight reaching the inner canopy, not just random cuts.
Post-Pruning Care is Where Results Appear: After you've finished pruning, the work isn't done. Deep watering is essential, especially after large cuts, and that 2-3 inch layer of mulch (kept 6 inches from the trunk) makes all the difference in recovery. I've seen trees struggle after pruning because people didn't follow up with proper care. Wait those 4-6 weeks before fertilizing—new growth is your signal that the tree is ready for nutrients. And those epicormic shoots? Remove them promptly—they'll steal energy from your fruit production if left unchecked.
Pro Tips for Oriental Pear Tree Care
- Between us, pruning an Oriental pear tree isn't just about cutting branches—it's about sculpting a future harvest.
- Seasonal Timing is Everything: The three pruning windows—late winter, early summer, and light maintenance—are non-negotiable for Oriental pears.
- Tool Sterilization Prevents Disaster: When dealing with diseased branches like fire blight, sterilizing your tools between cuts is absolutely critical.
Frequently asked questions
Got questions about keeping your Oriental pear tree thriving? Here are some of the most common concerns—and their answers—to help you grow a fruitful, beautiful tree with ease!
When is the best time to prune an Oriental pear tree for fruit production?
The ideal time is late winter or early spring (before buds swell) to shape the tree and remove dead wood. For fruit production, prune again in summer (June–July) to thin out excess fruit and improve air circulation. Avoid heavy pruning in fall—it can stimulate late growth vulnerable to frost damage.
How do I protect my Oriental pear tree from late-season frost?
Oriental pears are frost-sensitive! If frost is forecasted, use frost cloth or row covers to shield blossoms (which form fruit). For young trees, wrap the trunk with burlap to prevent sunscald in winter. Water deeply before cold snaps to help roots insulate the tree. Mulch with 2–3 inches of organic matter (like straw) to retain warmth.
Why aren’t my Oriental pears ripening fully, even though they’re on the tree?
Incomplete ripening often stems from poor pollination (plant a second variety nearby) or insufficient sunlight (ensure 6+ hours daily). Overcrowded branches can also block light—prune to open the canopy. Thin fruit early (leave 6–8 inches between pears) to avoid overburdening the tree, which stresses it and delays ripening.
Can I prune an Oriental pear tree in summer, and if so, how much?
Yes! Summer pruning (after harvest) helps control size and improve fruit quality. Limit cuts to 25% of the tree’s foliage—focus on removing water sprouts, crossing branches, and suckers. Avoid heavy pruning; it can stress the tree and reduce next year’s bloom. Always use sterilized tools to prevent disease.
What pests or diseases should I watch for in Oriental pear trees?
Common issues include:
- Pear psylla: Tiny insects causing curled leaves—spray with neem oil or insecticidal soap.
- Fire blight: Blackened, oozing branches—prune infected areas 6 inches below damage and sterilize tools.
- Codling moths: Worms in fruit—use pheromone traps or organic sprays like Bt (Bacillus thuringiensis).
Wrapping up and next steps
Caring for your oriental pear tree is a rewarding journey that blends artistry with practicality—every well-placed cut shapes not just the tree, but the future of its bounty! 🌿 With the right tools, timing, and techniques, you’ll nurture a thriving tree that delivers both stunning blooms and delicious fruit.
Remember: patience and consistency are your allies, and even small adjustments make a big difference over time.
Ready to transform your tree into a masterpiece? Start by scheduling your next pruning session—whether it’s summer thinning or winter shaping—and watch your hard work bloom into beauty (and harvests!) year after year. You’ve got this! 🌱✨