
Pruning
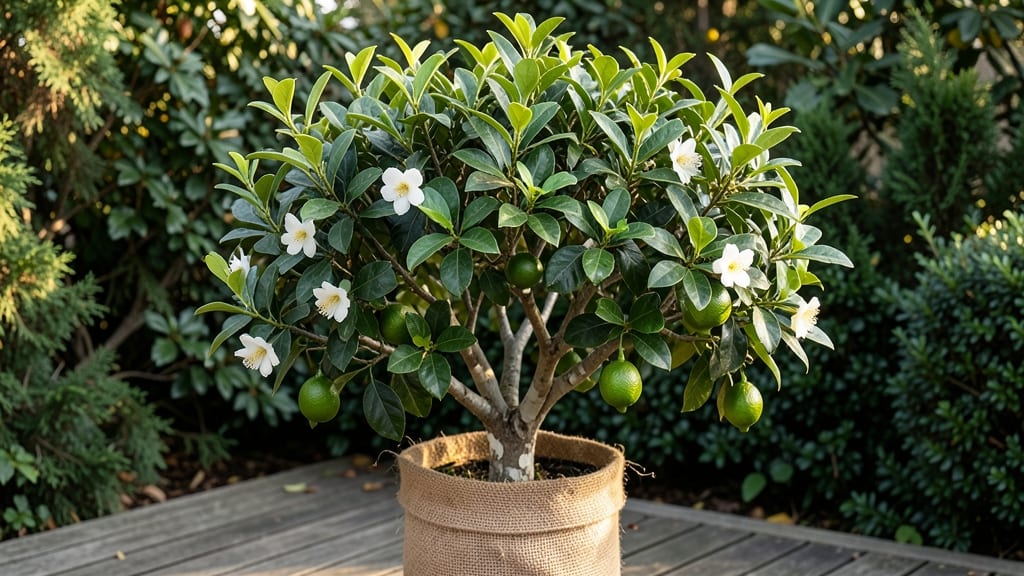
Your lime tree’s zone determines whether it thrives or wilts—especially when frost rolls in. 🌿 I’ve learned the hard way that even a single night below 20°F can devastate a citrus tree unless you prune and protect strategically.
The key isn’t just knowing your USDA zone (think 8-11 for outdoor lime trees) but also how microclimates—like sunny walls or sheltered spots—can push limits in colder areas.
Most lime trees (Citrus aurantifolia or Citrus limon) need year-round warmth, but container-growing extends their range to zone 7 with winter moves indoors. The right variety matters too: Meyer lemons handle cooler temps better than key limes, while dwarf varieties stay manageable in pots.
Pruning in late winter removes dead wood and opens airflow to prevent fungal rot—a common issue when humidity spikes after frost.
By summer, you’ll see the payoff: glossy, fragrant leaves and branches heavy with fruit. The trick is light pruning after harvest to shape growth, not heavy cuts that stress the tree. Even in zone 10, where frost is rare, pruning at the right time keeps branches strong and productive.
Container growers get an extra advantage—they can roll their trees to safety before cold snaps hit.
Whether you’re in Florida’s heat or Southern California’s mild winters, the same principles apply: prune for airflow, protect from cold, and choose the right variety.
Next time frost threatens, you’ll know exactly how to shield your tree—and keep those limes coming. Here’s how to do it right, step by step.
📚 In This Guide
- What you need
- Instructions
- Tips and common mistakes
- Wrapping up and next steps
What you need
- ● Pruning shears (bypass pruners): Sharp, high-quality shears (e.g., Felco F-2 or Gonicc) for cuts up to ½-inch thick.
- ● Loppers: For branches ½-inch to 2-inches thick (e.g., Fiskars X27).
- ● Pruning saw: For thicker branches (2+ inches), like a bow saw or pruning saw.
- ● Disinfectant (70% isopropyl alcohol or bleach solution): 1 part bleach to 9 parts water to sterilize tools between cuts.
- ● Garden gloves: Heavy-duty, cut-resistant gloves (e.g., Wright & McGill) to protect hands.
- ● Ladder or step stool: Sturdy and tall enough to reach the tree’s highest branches safely.
- ● Heavy-duty trash bags: For collecting pruned branches and debris.
- ● Rag or paper towels: To clean tools and wipe sap.
- ● Hand pruners with a bypass blade: For precision cuts on small branches.
- ○ Tree wound dressing (optional): Pruning sealant (e.g., Tanglefoot Tree Wound Pruning Seal) for large cuts (controversial—skip if unsure!).
- ● Safety glasses: To shield eyes from debris.
- ● Long-sleeve shirt and pants: Protects against sap and thorns.
- ● Notebook & pen: To jot down notes on branch placement or health concerns.
- ● Water spray bottle: For rinsing off sap sticky residue.
- ● Check the weather forecast: Prune on a dry, cloudy day to avoid stressing the tree.
- ● Identify dead, diseased, or crossing branches to prioritize removal.
- ● Have a clear workspace: Remove obstacles and lay down a tarp if needed.
- ● Know your lime tree’s growth habits: Dwarf varieties need less aggressive pruning than standard trees.
Step-by-Step guide to pruning your lime tree for year-round health
Here's how I keep my lime trees thriving with precise pruning—no guesswork, just science-backed techniques.
✂️ Step 1: Identify the Right Pruning Zones
Lime trees respond best when you prune at the node, where branches meet the trunk or larger limbs. Look for the small bump or swelling—this is where new growth emerges. Cutting just above a node ensures the tree directs energy to healthy new shoots rather than wounding itself. I always use clean, sharp pruners to make cuts at a 45-degree angle, about ¼ inch above the node.
Real talk: If you cut too close, you risk damaging the bud; too far, and you leave a stub that invites disease. The 45-degree angle also helps water run off the cut instead of pooling. For thicker branches over ½ inch, I make a second cut slightly deeper to remove the remaining stub later—this prevents unsightly regrowth.
🌿 Step 2: Remove Dead, Diseased, or Crossing Branches First
Start by scanning the tree for dead wood—branches that snap easily, lack bark, or appear brown inside when cut. Next, target crossing branches where limbs grow toward each other, creating weak points and rubbing wounds. Remove the smaller of the two to maintain the tree’s natural shape. I also cut out any branches growing straight upward (called water sprouts) since they drain energy from fruiting limbs.
Don’t skip this step—it’s the foundation of healthy growth. I prune these first because they’re the easiest to spot and remove without stressing the tree. If a branch is diseased (look for black spots, ooze, or fungal growth), sterilize your pruners with rubbing alcohol between cuts to prevent spreading pathogens.
☀️ Step 3: Thin the Canopy for Light and Airflow
Lime trees need 6-8 hours of sunlight daily, so aim to open the canopy by removing 10-20% of the foliage in one session. Focus on branches growing inward or downward—they block light and airflow, creating humid pockets that invite pests. I start at the outer edges and work my way in, cutting back to the nearest node where light can penetrate.
You’ll know you’re doing it right when you see more sunlight reaching the inner branches and the tree’s shape becomes more open and vase-like. Avoid over-pruning—never remove more than 25% of the canopy in a single season, or you’ll shock the tree. If the tree is young (<3 years), limit pruning to light shaping to encourage strong structural growth.
⏰ Step 4: Time Pruning for Optimal Growth
Prune lime trees in late winter or early spring (just before buds swell) for the best results. This timing lets the tree heal before the growing season kicks in. For light maintenance pruning, you can also trim in summer after fruiting to shape the tree and encourage new growth. Avoid heavy pruning in fall or winter—the tree won’t have time to prepare for dormancy or spring growth.
Here’s the thing—lime trees are evergreen, so they grow year-round in warm climates. If you live in a USDA Zone 9-11, you can do light pruning anytime, but stick to the late winter/early spring rule for major cuts. After pruning, apply a balanced fertilizer (like 6-6-6) to replenish nutrients lost during the process.
🌱 Step 5: Post-Pruning Care for Rapid Recovery
After pruning, water deeply to help the tree recover, especially if it’s been dry. Mulch the base with 2-3 inches of organic mulch (like wood chips) to retain moisture and regulate soil temperature. Avoid piling mulch against the trunk—keep it 2-3 inches away to prevent rot. I also monitor the tree for new growth within 4-6 weeks; if you don’t see fresh leaves emerging from the nodes, the cuts may have been too severe.
This is the moment that matters: seal larger cuts (over ½ inch) with pruning sealant to protect against pests and disease. For smaller cuts, let them callus naturally—sealant isn’t always necessary and can trap moisture. If you notice yellowing leaves or wilting, it’s a sign of stress; adjust watering and give the tree a few weeks to adjust.
Tips & tricks for perfect lime tree zone pruning
Here's what nobody tells you about keeping your lime tree thriving year after year.
Precision Cutting Technique: The 45-degree angle in Step 1 isn't just about aesthetics—it's about wound healing. When you make cuts at this angle just above the node, you create a sloping surface that allows water to run off rather than pool, which drastically reduces the risk of fungal infections. For branches over ½ inch thick, follow through with a second cut to remove the remaining stub completely—this prevents those ugly regrowth stubs that can form later. I've seen many gardeners skip this detail, only to deal with stubborn regrowth months later.
Disease Prevention Strategy: In Step 2, when you encounter diseased branches, sterilizing your pruners between cuts with rubbing alcohol is non-negotiable. I learned this the hard way after accidentally spreading fungal spores to healthy branches. For extra protection, I keep a small bottle of 70% isopropyl alcohol in my gardening toolkit. Also, never compost diseased branches—burn them instead to prevent spreading pathogens to other plants.
Canopy Management Insight: The 10-20% foliage removal target in Step 3 might seem arbitrary, but it's based on the tree's ability to regenerate. Removing more than 25% in one session can shock the tree, especially young specimens under 3 years old. I recommend working in small sections—start with the outer edges where sunlight naturally enters first, then gradually work inward. This gradual approach helps maintain photosynthesis while still improving airflow throughout the canopy.
Seasonal Timing Nuances: While late winter/early spring is ideal for major pruning, don't overlook the summer maintenance window mentioned in Step 4. After your tree fruits, take time to remove any water sprouts that may have appeared during the growing season. These vertical shoots compete with fruiting branches for energy. In warmer climates (USDA Zones 9-11), you can actually do light pruning year-round, but always prioritize the late winter/early spring session for major structural work.
Pro Tips for Lime Tree Zone
- Here's what nobody tells you about keeping your lime tree thriving year after year.
- Precision Cutting Technique: The 45-degree angle in Step 1 isn't just about aesthetics—it's about wound healing.
- Disease Prevention Strategy: In Step 2, when you encounter diseased branches, sterilizing your pruners between cuts with rubbing alcohol is non-negotiable.
Frequently asked questions
about pruning in the lime tree zone—get quick answers to keep your trees thriving year-round!When is the best time to prune lime trees in the lime tree zone?
The ideal time is late winter or early spring (just before new growth starts). For tropical lime varieties, you can prune lightly year-round, but avoid heavy cuts during extreme heat or cold. Pro tip: Prune after harvest to maintain shape and encourage fruit production!
Can I prune lime trees in summer or fall?
Summer pruning is possible but risky—it stresses the tree and attracts pests. Fall pruning is better, but avoid heavy cuts after Labor Day (in the Northern Hemisphere) to prevent new growth from being damaged by frost. Light shaping is fine, though!
How do I know if I’m over-pruning my lime tree?
Over-pruning shows through stunted growth, fewer flowers/fruit, or leggy, weak branches. Never remove more than 25% of the canopy in one session. For mature trees, spread pruning over 2–3 years. Watch for: yellowing leaves or excessive sap—signs of stress!
What’s a good alternative if my lime tree is too small to prune?
If your tree is young (<3 years old), focus on training rather than pruning. Pinch back new growth to encourage bushier growth, and remove only dead or crossing branches. Avoid heavy cuts—let the tree establish its structure naturally!
Why do my lime tree’s branches look weak after pruning?
Weak branches often mean over-pruning or nutrient deficiency. After pruning, fertilize with a balanced citrus mix (high in nitrogen) and water deeply. If branches are thin and rubbery, they may need support stakes or a light pruning pause to recover.
Wrapping up and next steps
Mastering the lime tree zone pruning secrets means unlocking year-round growth and vibrant health for your tree! 🌿 With the right tools, timing, and techniques, you can shape your lime tree into a thriving, fruit-bearing powerhouse. Remember, consistency is key—regular checks and gentle trims keep your tree happy and productive.
Ready to take action? Start small: schedule your next pruning session this weekend and observe how your lime tree responds. Over time, you’ll build confidence and see the rewards of your efforts—sweet, juicy limes and lush foliage!
Happy pruning! 🌱✨