
Pruning
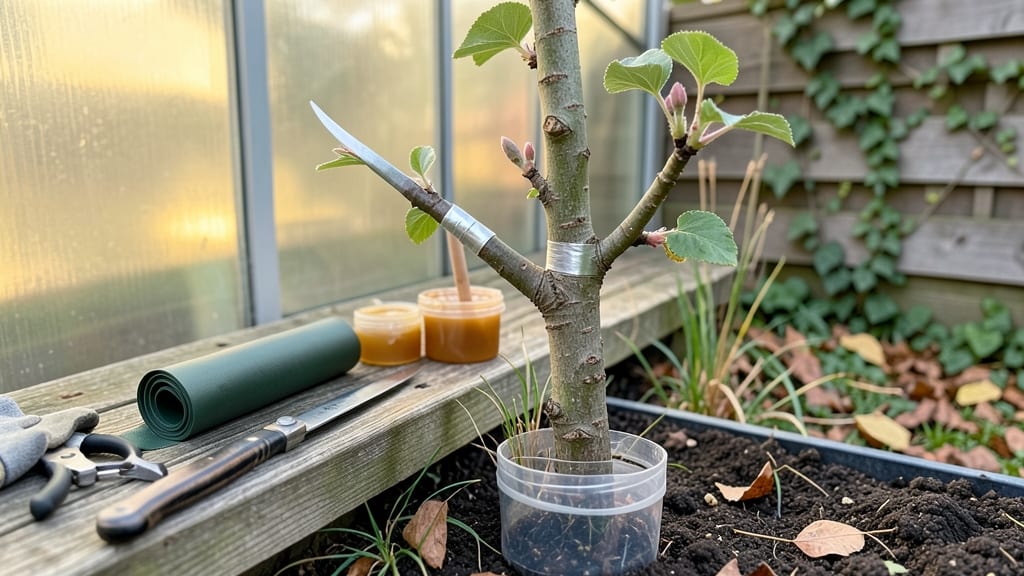
Tree grafting before and after reveals the magic of turning a struggling tree into something spectacular. ✨ I’ve seen scrawny apple branches become heavy with fruit, or a bare maple sprout vibrant new growth—all by carefully joining two plants.
The transformation isn’t instant, but with the right technique, you’ll see dramatic changes in just a few growing seasons.
Most people assume grafting is complicated, but it’s all about matching compatible wood and making clean cuts. You’ll need basic tools—a sharp knife, grafting tape, and a little patience—and the right timing (late winter or early spring).
The key is ensuring the cambium layers align perfectly so the two plants can fuse naturally. I’ve grafted everything from fruit trees to ornamentals, and the results always surprise me.
By summer, you’ll spot new shoots emerging where the graft took hold—a sure sign it worked. Within a year, the original tree’s weak structure will support a stronger variety, with better fruit, flowers, or even disease resistance.
It’s like giving your tree a genetic upgrade, and the before-and-after photos always make it worth the effort.
Works best for fruit trees, roses, and ornamental varieties, but even stubborn trees can respond with the right care. The secret? Pay attention to the union, protect it from pests, and give it time. Let’s get started—your tree’s transformation begins here.
📚 In This Guide
- What you need
- Instructions
- Tips and common mistakes
- Wrapping up and next steps
What you need
- ● Scion Wood: 1–3 healthy, disease-free shoots (3–6 inches long) from the desired tree variety (e.g., fruit, flower, or ornamental).
- ● Must include at least 3–4 buds and be freshly cut (store in a damp paper towel in a plastic bag if not grafting immediately).
- ● Rootstock: 1 mature, compatible tree (e.g., apple, peach, or citrus rootstock) with a healthy trunk (2–4 inches in diameter).
- ● Ensure the rootstock is disease-free and thriving.
- ● Grafting Tools: 1 sharp grafting knife or pruning shears (sterilized with rubbing alcohol).
- ● 1 grafting tape or parafilm (1–2 rolls, 1-inch wide).
- ● 1 sealant (e.g., grafting wax or tree paint).
- ● Safety Gear: 1 pair of gloves (nitrile or leather).
- ○ 1 face shield (optional, for protection from sap or debris).
- ● 1 humidity dome or plastic bag (to retain moisture around the graft).
- ● 1 spray bottle (for misting the graft site).
- ● 1 labeling tags and marker (to track grafted varieties).
- ● 1 pruning saw (if rootstock requires larger cuts).
- ● 1 disinfectant (e.g., bleach solution or hydrogen peroxide).
Step-by-Step instructions for tree grafting success
Here's how to transform weak trees into strong, productive varieties with precision cuts and proper technique.
🪴 Step 1: Prepare Your Tools and Grafting Site
Gather a sharp grafting knife, clean pruning shears, and a roll of rafting tape. Sterilize your tools with rubbing alcohol to prevent disease transmission. I always work on a clean, flat surface like a table or bench covered with a plastic sheet—this keeps everything organized and prevents cross-contamination.
Choose a healthy, disease-free scion (the variety you want to grow) and rootstock (the established tree). The rootstock should be about 1-2 inches in diameter at the grafting point. Test the bark's flexibility by gently pulling it—it should peel back slightly without tearing. This ensures the graft will take properly.
✂️ Step 2: Make Clean Cuts for Perfect Alignment
Start with the rootstock by making a 1-2 inch horizontal cut through the bark and cambium layer (the green layer just under the bark). The cut should be smooth and clean—no jagged edges. Angle the cut slightly downward to create a flat surface. This is where the scion will sit, so precision matters.
Next, prepare the scion by making a matching cut at the base. The scion's cut should expose the same amount of cambium as the rootstock. Hold both pieces together and check for alignment—the cambium layers should match perfectly. If they don't align, trim again until they do. This ensures the graft heals properly and forms strong connections.
🌱 Step 3: Join the Scion and Rootstock
Place the scion into the rootstock cut, pressing gently until the cambium layers align completely. The scion should fit snugly—no gaps. Wrap the graft union tightly with rafting tape, starting just below the graft and working upward. Overlap the tape slightly with each wrap to seal the union and prevent drying.
Leave the top of the scion exposed—it needs light to grow. Cover the entire graft with a plastic bag or rafting sealant to retain moisture and create a humid environment. This encourages the scion to sprout new growth within 4-6 weeks. Check the graft weekly to ensure it stays moist but not waterlogged.
☀️ Step 4: Monitor and Maintain the Graft
Keep the grafted tree in a shaded, protected area for the first 2-3 weeks to reduce stress. Water lightly at the base but avoid soaking the graft union—excess moisture can cause rot. You'll know the graft is taking if you see new growth emerging from the scion within 4-6 weeks.
Once new leaves appear, gradually move the tree to more sunlight over 1-2 weeks. Remove the plastic bag or sealant once the graft union is fully healed and the scion is actively growing. Prune any suckers (shoots growing below the graft) to direct the tree's energy upward. This ensures the scion becomes the dominant growth.
⏰ Step 5: Finalize and Care for the New Variety
After 6-8 weeks, inspect the graft union. If it looks healed and the scion is thriving, you can remove the grafting tape. The union should appear smooth and integrated—no visible gaps or dead tissue. If the graft fails (no new growth or signs of rot), try again with fresh materials.
Continue caring for the tree as you would any other, focusing on proper watering, pruning, and fertilization. The grafted tree should now produce fruit or flowers matching the scion variety. With patience and care, you'll transform a weak tree into a thriving, productive specimen.
Tips & tricks for perfect tree grafting
Precision and patience are everything when transforming weak trees into thriving varieties. Here's what I've learned from years of trial and error in the orchard.
Tool Preparation is Non-Negotiable: I can't stress enough how critical it is to sterilize your grafting knife and pruning shears with rubbing alcohol before you begin. Even a tiny bit of old sap or dirt can introduce pathogens that'll ruin your entire graft. I also recommend sharpening your knife just before use—dull tools create jagged cuts that won't heal properly, and those 1-2 inches of clean cut in Step 2 make all the difference.
Bark Flexibility Test: That simple bark test in Step 1 where you gently pull the bark is your first quality check. If the bark tears easily, your rootstock isn't ready for grafting yet. Look for bark that peels back slightly like a potato chip—this indicates the cambium layer is active and ready to bond. Confession: I skipped this test for years and wondered why so many grafts failed. The bark test saves you from wasted effort and materials.
Cambium Layer Alignment: When you're checking alignment in Step 2, don't just look—feel it. The cambium layers should match like puzzle pieces when you press the scion against the rootstock. I've found that holding both pieces up to natural light helps reveal any misalignments you might miss by eye alone. This is where most beginner mistakes happen, so take your time here—rushing leads to poor connections that won't survive the healing process.
Pro Tips for Tree Grafting Before And After
- Precision and patience are everything when transforming weak trees into thriving varieties. Here's what I've learned ...
- Tool Preparation is Non-Negotiable: I can't stress enough how critical it is to sterilize your grafting knife and pru...
- Bark Flexibility Test: That simple bark test in Step 1 where you gently pull the bark is your first quality check. If...
Frequently asked questions
Got questions about tree grafting? You’re not alone! Here are some of the most common concerns—plus straightforward answers to help you get started with confidence.
When is the best time to graft a tree?
The ideal time is during the tree’s dormant season (late winter to early spring), when sap flow is minimal. This reduces stress on the plant and improves success rates. Avoid grafting during extreme heat or cold—aim for 40–60°F (4–15°C) temperatures for best results.
Can I graft any two trees together?
No! Only trees that are compatible (same or closely related species) should be grafted. For example, apple varieties graft well together, but an apple won’t take to an oak. Check compatibility guides or consult local nurseries for safe pairings.
How long does it take to see results after grafting?
Patience is key! Grafted trees may take 1–3 years to show visible growth, depending on the tree type and conditions. Focus on proper care (watering, pruning, and protecting the graft union) during this time—results will come.
What if my graft fails? What are my alternatives?
Failed grafts happen, but don’t give up! Try these fixes:
- Check the union: Ensure the cambium layers aligned properly.
- Inspect for rot/disease: Trim damaged areas and reapply grafting tape.
- Alternative methods: Consider layering or budding for smaller plants.
How do I protect my graft from pests or weather?
Use grafting tape or sealant to secure the union, and wrap the area with tree wrap or bubble wrap to shield from sun/snow. Avoid plastic bags—they trap moisture and encourage rot. Monitor for pests (like aphids) and treat early with neem oil if needed.
Wrapping up and next steps
Tree grafting is a game-changer for reviving weak trees or cultivating rare varieties—with patience and precision, you can unlock stunning transformations! 🌱 Whether you're a beginner or a seasoned gardener, the before-and-after results speak for themselves: stronger roots, vibrant growth, and the joy of nurturing a tree into something extraordinary.
Ready to take the next step? Start by practicing on a small, healthy tree, and don’t hesitate to experiment with different scions. Your green thumb—and the trees—will thank you!