
Pruning
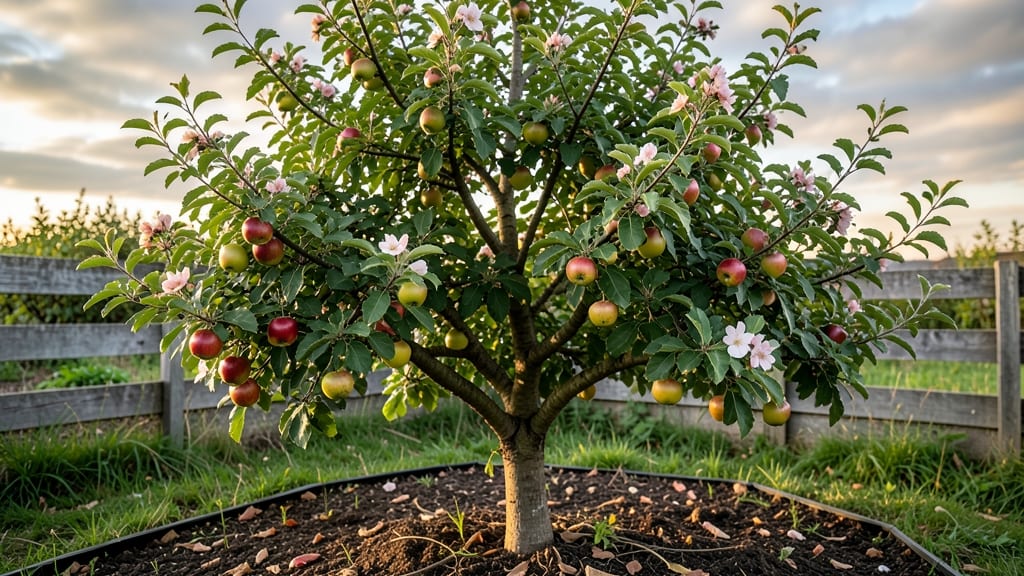
Watching an apple tree time lapse unfold—from a delicate sapling to a towering fruit-laden giant—is like witnessing nature’s slowest, most rewarding masterpiece. 🌱 The first year transforms that fragile seedling into a sturdy 3-foot stick—if you give it the right soil, water, and patience.
I’ve seen my own trees go from bare branches to blossom-covered canopies in just a few seasons, and the key is understanding those growth stages so you don’t miss a single milestone.
Spring’s the real show—buds swell into fuzzy pink blossoms, then heavy fruit sets in summer, turning green to red by fall. The trick to capturing this transformation? A time-lapse camera on a tripod, set to shoot weekly at the same time of day.
You’ll need a notebook to track watering (deep soaks, not light sprinkles) and pruning (thin out crowded branches in late winter) to keep the tree healthy and productive.
By year three, you’ll have a tree that’s not just growing but thriving—branches heavy with fruit, roots spreading deep, and a trunk too thick to wrap your hands around.
The time-lapse footage becomes a year-in-review of your gardening skills, showing how every pruning cut and watering choice shaped the tree’s future. It’s the kind of progress that makes gardening feel like magic.
Works for any apple variety, whether you’re growing from seed, a bare-root sapling, or a potted tree. The only rule? Start documenting early—those first few inches of growth are the most dramatic, and you won’t want to miss a single frame.
📚 In This Guide
- What you need
- Instructions
- Tips and common mistakes
- Wrapping up and next steps
What you need
- ● DSLR or Mirrorless Camera: At least 12 MP (e.g., Canon EOS Rebel, Sony Alpha series). A weather-sealed body is a plus!
- ○ Wide-Angle Lens (10-24mm): Captures the full tree without cropping. A macro lens (60mm+) is optional for close-up details.
- ● Tripod: Sturdy, extendable (60"+), with a ball head for precise adjustments.
- ● Intervalometer: Built-in or external (e.g., Vello ShutterBoss) to automate shots every 5–30 minutes.
- ● Memory Cards: 32GB+ (Class 10 or UHS-I) to store high-res images. Backup cards recommended!
- ● Apple Tree: Healthy, mature (5+ years old) with unobstructed sunlight year-round. Dwarf varieties work for smaller spaces!
- ● Stable Shooting Spot: Flat ground or a platform (e.g., ladder with safety harness) for elevated angles.
- ● Weatherproofing: Rain cover for camera gear (e.g., Lowepro Rain Tote).
- ● UV filter for lens protection.
- ● Time-Lapse Software: LRTimelapse, Adobe Premiere Pro, or free tools like Windows Movie Maker.
- ● Battery Pack: Portable charger (20,000mAh+) for long shoots.
- ● Reflective Markers: Small flags or tape to mark tree growth progress over time.
- ● Drone (Advanced): For aerial shots (ensure FAA compliance!).
How to observe and document an apple tree's yearly development
Watch your apple tree transform through the seasons—here’s what to look for each month.
🌱 Step 1: Early Spring—Dormant Buds Awaken
In late February to March, when daytime temperatures climb above 40°F, your apple tree’s buds will begin to swell. Look for tiny, fuzzy clusters—these are the future blossoms. I like to check weekly by gently pressing a bud between my fingers; if it feels firm but slightly soft, it’s ready to burst open.
This is also when you’ll see new growth emerge from last year’s branches. The first leaves will appear as pinkish buds before unfolding into bright green. Water sparingly—just enough to keep the soil moist but not soggy—since roots are still dormant. A 1-inch layer of mulch around the base helps retain moisture and protect against late frosts.
☀️ Step 2: Late Spring—Bloom to Fruit Set
By April to early May, your tree will explode with white or pink blossoms—a breathtaking sight that lasts about 2 weeks. This is the most critical time for pollination; bees will be buzzing constantly. If you notice buds falling without blooming, it could mean a late frost damaged them. Cover young trees with frost cloth if frost is forecasted.
After blooming, tiny green apples will form. Thin them to 6-8 inches apart when they’re the size of a dime—this ensures larger, healthier fruit. I use pruning shears to snip excess apples at the base. Water deeply once a week during dry spells, focusing on the root zone to encourage strong growth.
🌿 Step 3: Summer—Rapid Growth and Pest Watch
From June to August, your apples will grow rapidly, turning from green to their mature color. This is when you’ll need to monitor for aphids, codling moths, or apple scab. I inspect leaves weekly—look for yellowing, curling, or sticky residue (honeydew). If pests appear, apply neem oil or horticultural soap early in the morning for best results.
Prune any dead, crossing, or overcrowded branches in early summer to improve airflow. Thin out shade-producing branches to let sunlight reach the center of the tree. Water deeply every 10-14 days, soaking the soil 12 inches down—drought stress now can reduce fruit quality.
🍎 Step 4: Fall—Harvest and Preparation for Winter
Harvest time arrives in September to October, depending on your variety. Gently twist apples to test ripeness—they should come off easily. Store them in a cool, dark place (around 35°F) for long-term keeping. I mark the harvest date on my calendar so I don’t miss the window.
After harvest, remove fallen leaves and fruit from the base to prevent disease. Apply a layer of compost around the tree to replenish nutrients. If your tree is young, consider winterizing it with a tree wrap to protect the bark from temperature swings.
⏰ Step 5: Winter—Dormancy and Pruning Prep
During December to February, your tree will be dormant. This is the best time to prune for shape and structure. Remove dead wood, water sprouts, and suckers—these drain energy from the tree. I aim to keep the canopy open to allow sunlight to reach all branches.
Check the soil occasionally—it should stay barely moist unless you’re in a dry climate. Avoid heavy watering now, as roots aren’t active. If you notice cracks in the bark, seal them with pruning sealant to prevent pests from entering.
Tips & tricks for perfect apple tree Documentation
Tracking an apple tree's yearly journey is easier with these practical tips—trust me, I've learned from years of watching my own trees transform.
Visual Documentation: Take photos weekly during each seasonal stage. Use the same camera angle and lighting conditions to create a consistent time-lapse. I set my phone on a tripod at the same spot each week to capture identical perspectives. This helps you spot subtle changes in leaf color, bud development, or fruit ripening that might otherwise go unnoticed.
Seasonal Timing: Remember that the exact timing of each stage varies by climate zone. In colder regions, buds may not swell until April, while warmer areas might see early signs in February. I always check my local frost dates and adjust my expectations accordingly. The key is to observe rather than rely on calendar dates—your tree will tell you when it's ready for each stage.
Pest Prevention: Start your pest monitoring in early summer by inspecting leaves weekly. Look for early signs like yellowing edges or tiny webs. I keep a small magnifying glass handy to spot aphids or mites before they become a problem. Catching pests early makes treatment much more effective—neem oil works best when applied at the first sign of trouble.
Harvest Tracking: Create a simple chart to track apple ripening stages. Note when fruits change color, firmness, and when they release easily from the tree. I use a small notebook to record these observations alongside photos. This helps you predict future harvests and understand your tree's specific ripening patterns over time.
Pro Tips for Apple Tree Time Lapse
- Tracking an apple tree's yearly journey is easier with these practical tips—trust me, I've learned from years of watc...
- Visual Documentation: Take photos weekly during each seasonal stage. Use the same camera angle and lighting condition...
- Seasonal Timing: Remember that the exact timing of each stage varies by climate zone. In colder regions, buds may not...
Frequently asked questions
Got questions about capturing or understanding an apple tree time lapse? You’re not alone! Here are some of the most common queries—plus straightforward answers to help you get the best results.
How often should I take photos for a smooth time-lapse?
For a high-quality time-lapse, aim for photos every 1–3 days during active growth (spring/summer). In slower seasons (fall/winter), stretch it to 1–2 weeks. Consistency is key—use a smartphone timer or intervalometer for hands-free shooting.
Can I use a regular camera instead of a GoPro or DSLR?
A smartphone with a stable tripod works great for basic time-lapses. For pro results, invest in a remote shutter (like a Bluetooth trigger) to avoid shake. Just ensure your camera has manual settings to keep lighting/focus consistent.
Why does my apple tree look different in photos than in real life?
Lighting and angles trick the eye! Shoot at the same time daily (early morning or late afternoon) to avoid harsh shadows. Use a fixed white balance setting and avoid zooming—stick to a wide shot to capture full growth. Pro tip: Clean your lens regularly!
What if my tree loses leaves in winter—should I stop filming?
Not at all! Winter is a critical stage for time-lapses. Keep shooting (even monthly) to document dormancy, bud formation, and early spring awakening. Just protect your gear from frost—use a weatherproof case if outdoors.
How do I edit the time-lapse to look professional?
Start with free tools like CapCut or iMovie. Set your frame rate to 24–30 FPS for smooth playback. Adjust speed to 0.5x–1x (slower = more dramatic). Add soft background music and text overlays for context!
Bonus Tip:
For year-round tracking, pair your time-lapse with a growth journal! Note weather, pruning dates, and fruit yield—it’ll add depth to your project and help troubleshoot issues later.
Wrapping up and next steps
Watching an apple tree transform over a year isn’t just mesmerizing—it’s a testament to patience, care, and nature’s magic. From delicate blossoms to heavy harvests, each stage reminds us that growth takes time, but the rewards are worth it.
Whether you’re a seasoned gardener or a curious beginner, your apple tree’s journey is a living lesson in resilience.
Ready to plant your own story? Start by sketching a simple plan—research your climate, choose the right variety, and mark your calendar for the next pruning season. 🌱 Your future orchard awaits!