
Pruning
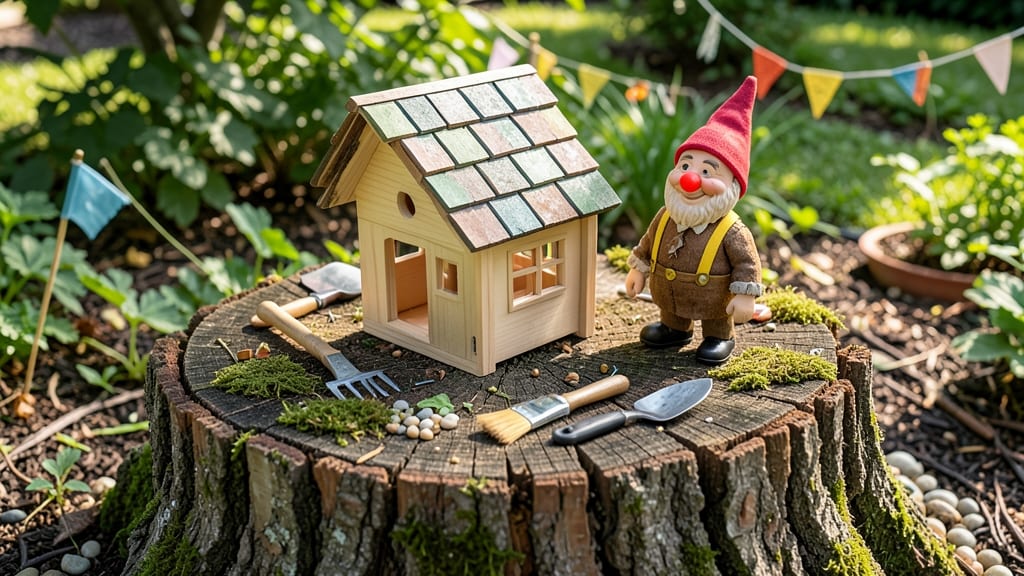
Turn a leftover tree stump into a magical gnome house with just a few simple tools and a dash of creativity. ✨ These kits transform ordinary garden debris into charming focal points that bring fairy-tale whimsy to any outdoor space—whether you're crafting a miniature fairy garden or adding rustic charm to your landscape.
The beauty of these kits is their versatility: you can paint them bright colors for a storybook feel or leave them natural for a woodland aesthetic. I've used mine as conversation starters in my front yard, and neighbors now ask about the "gnome village" every time they visit.
The materials are lightweight and easy to assemble, making it a perfect weekend project.
Once complete, your gnome house becomes an instant garden centerpiece that invites exploration. Add tiny moss seats, pebble paths, or even a miniature bridge nearby to create a complete fairy scene. The possibilities are endless—whether you're styling a fairy garden, whimsical landscape, or rustic decor.
Best of all, this project repurposes something many gardeners would otherwise remove, giving your outdoor space personality while keeping it eco-friendly. Let's bring some magic to that stump! 🌿
📚 In This Guide
- What you need
- Instructions
- Tips and common mistakes
- Wrapping up and next steps
What you need
- ● Tree stump gnome house kit – Pre-cut and pre-sanded wood pieces (check kit for exact quantities, typically 4-6 walls + roof).
- ● Wood glue – Waterproof (e.g., Titebond III) – 1 small bottle (8 oz).
- ● Exterior wood screws – 1/4" x 1" or 1.5" – 20-30 screws (stainless steel for longevity).
- ○ Sawdust or wood shavings – For insulation (optional but cozy!).
- ● Non-toxic wood stain or paint – 1 small can (earthy tones like moss green, bark brown, or pastel blue).
- ● Clear outdoor sealant – 1 small bottle (to protect against moisture).
- ● Small gnome figurine – 1 (or a tiny door handle to "hide" your gnome!).
- ● Screwdriver or drill – For assembling walls and roof.
- ● Sandpaper – 120-grit and 220-grit (to smooth rough edges).
- ● Paintbrushes – 1 small (for details) + 1 medium (for staining).
- ● Measuring tape – 6" (for precision fits).
- ● Clamps – 2 small (to hold pieces in place while glue dries).
- ● Paint tray or disposable container – For mixing stain/paint.
- ● Moss or faux ivy – To add a magical, overgrown look.
- ● Tiny door knocker – A whimsical touch!
- ● LED tea lights – For a glowing fairy effect at night.
- ● Acrylic paint pens – For intricate gnome faces or designs.
- ● Miniature garden tools – Like a tiny rake or broom for the gnome’s "yard."
How to assemble tree stump gnome house kits
Turn a simple stump into a charming fairy garden focal point with these easy assembly steps.
🪴 Step 1: Prepare Your Stump Base
Start by cleaning your stump thoroughly with a stiff brush to remove loose bark, dirt, and debris. I like to use a wire brush for stubborn bits—it gets into crevices better than a regular brush. Once clean, inspect for cracks or soft spots. If you find any, fill them with outdoor wood filler and let it dry completely. This ensures your gnome house stays sturdy and won’t wobble when you add decorations.
Next, sand the surface lightly with medium-grit sandpaper to create a smooth base for your kit. Focus on the top edge where the house will sit—this prevents splinters and helps adhesive materials stick better later. Wipe away all dust with a damp cloth before moving to the next step. A clean, dry surface is key to making everything hold together nicely.
🎨 Step 2: Assemble the Gnome House Structure
Unpack your kit and sort all pieces by size—most kits include a roof, walls, and decorative trim. Start by attaching the walls to the stump using the provided adhesive or screws, depending on your kit’s instructions. I always work from the back to the front so I don’t accidentally block access to pieces I might need later. Press each piece firmly into place and hold for 10-15 seconds to ensure a strong bond.
Once the walls are secure, attach the roof last. Most kits have a slightly angled roof to shed water, so align it properly to avoid pooling. If your kit includes a chimney or door, install these now—just make sure they’re centered for that classic gnome-house look. Let everything dry completely (usually 2-4 hours) before adding any decorative elements. Patience here prevents warping later.
🌿 Step 3: Add Decorative Touches
Now comes the fun part—personalizing your gnome house! Start with the moss or faux turf provided in many kits. Press it firmly into the crevices around the base and up the sides of the walls. For extra texture, I like to tuck in small pebbles or crushed stone along the edges—it mimics a natural fairy garden. If your kit includes tiny mushrooms or flowers, place these near the door or under the eaves for a whimsical touch.
Add any additional decorations like tiny furniture, fairy lights, or weather vanes. If you’re using battery-operated lights, test them now to ensure they work before finalizing the setup. For a magical glow, I often bury the light wires in the moss so they’re hidden but still illuminate beautifully at night. Step back occasionally to check the balance—gnome houses should look cozy, not cluttered.
☀️ Step 4: Weatherproof and Position
To protect your gnome house from the elements, apply a waterproof sealant if your kit doesn’t include one. Focus on the roof and any exposed wood edges—these are the most vulnerable to rain and sun. Let the sealant dry completely (4-6 hours) before moving the house. If your kit uses paint or stains, now’s the time to apply a second coat for extra durability.
Place your finished gnome house in a shaded or partially shaded spot in your garden. Direct sunlight can fade decorations over time, so a spot under a tree or near a shrub works well. If you’re using lights, ensure they’re easily accessible for battery changes. Water the surrounding moss occasionally to keep it vibrant—just enough to dampen it, not soak it. Your gnome house will now become a charming focal point for years to come!
Tips & tricks for whimsical fairy garden centerpieces
Transforming a simple stump into a magical gnome house takes attention to detail—here's how to elevate your project from charming to show-stopping.
Surface Prep Secret: In Step 1, when you're cleaning the stump, don't just focus on the top surface. Scrub the sides lightly too—this creates a larger adhesive surface for any wall pieces that might extend downward. I've found that using a damp cloth after sanding removes even the finest dust particles, which prevents adhesive from grabbing onto grit instead of the wood. This extra step makes all the difference when attaching decorative elements later.
Assembly Efficiency: During Step 2, when attaching the walls, I recommend laying out all pieces in their final positions on a flat surface first. This dry run helps visualize the layout and ensures you won't accidentally glue pieces in the wrong orientation. The 10-15 second press time is critical—use a timer if needed, as this ensures proper bond formation without over-pressing that could damage delicate pieces.
Decorative Balance: For Step 3, when adding decorative touches, remember the 80/20 rule: 80% of the visual impact comes from 20% of the decorations. Focus on placing your largest decorative elements first (like the door or chimney) as these anchor the composition. The 2-4 hour drying time before finalizing decorations is your chance to step back and adjust placement—this prevents that "too cluttered" look many people regret later.
Weatherproofing Wisdom: When applying sealant in Step 4, work in thin layers rather than trying to cover everything at once. The 4-6 hour drying time between coats prevents drips and ensures even protection. I've learned this the hard way—thick sealant layers can trap moisture and cause wood to warp over time. For extra durability, apply the sealant to the underside of the roof pieces before attaching them to the walls.
Pro Tips for Tree Stump Gnome House Kits
- Transforming a simple stump into a magical gnome house takes attention to detail—here's how to elevate your project f...
- Surface Prep Secret: In Step 1, when you're cleaning the stump, don't just focus on the top surface. Scrub the sides ...
- Assembly Efficiency: During Step 2, when attaching the walls, I recommend laying out all pieces in their final positi...
Frequently asked questions
Got questions about turning tree stumps into magical gnome homes? We’ve got answers! Whether you’re a beginner or a fairy-garden enthusiast, these FAQs will help you build with confidence.
How do I choose the right stump for a gnome house kit?
Look for stumps that are dry, flat-topped, and at least 8–12 inches in diameter. Avoid rotten or hollow stumps—they won’t hold paint or decorations well. A slightly weathered stump adds charm, but skip anything with deep cracks or loose bark.
How long does it take to assemble a tree stump gnome house kit?
Most kits take 1–3 hours, depending on your skill level. Pre-cut kits (like those with pre-drilled holes) go faster, while DIY projects with sanding/painting may take longer. Pro tip: Work in good lighting and prep materials the night before to save time!
Can I paint my gnome house kit without sanding the stump first?
Yes, but lightly sanding (with 120-grit sandpaper) helps paint adhere better and lasts longer. For a rustic look, skip sanding and use a primer-sealer first. Acrylic paints work best—they’re waterproof and easy to touch up!
What if my stump is too small for the kit’s base?
No problem! Use a wooden riser (like a 2x4 block) to elevate the house or opt for a miniature kit designed for smaller stumps. Alternatively, glue a second stump beneath it for stability—just let it dry fully before decorating.
How do I protect my gnome house from rain or pests?
Seal the stump with outdoor varnish or polyurethane before painting to repel moisture. For pests, avoid placing houses near ant trails or woodpiles. Elevate the base slightly (with pebbles or a small platform) to deter crawling critters.
Can I customize my gnome house with non-kit materials?
Swap out kit pieces for found objects like moss, pinecones, or tiny garden flags. Just ensure replacements are weather-resistant. Hot-glue works for lightweight additions, but use outdoor-rated glue for durability.
Wrapping up and next steps
Transforming a simple tree stump into a charming gnome house isn’t just a craft—it’s a chance to unleash your creativity and bring a touch of magic to your garden! 🌿✨ With the right tree stump gnome house kits, you’ll have everything you need to build a whimsical centerpiece that sparks joy and conversation.
Whether you’re a DIY newbie or a seasoned builder, the process is rewarding and fun.
Now that you’re armed with tips, answers, and inspiration, it’s time to roll up your sleeves and get crafting! Grab your kit, gather your tools, and let your imagination run wild. Your fairy garden’s newest resident is waiting for its cozy new home—what will you create? 🛠️💫