
Pruning
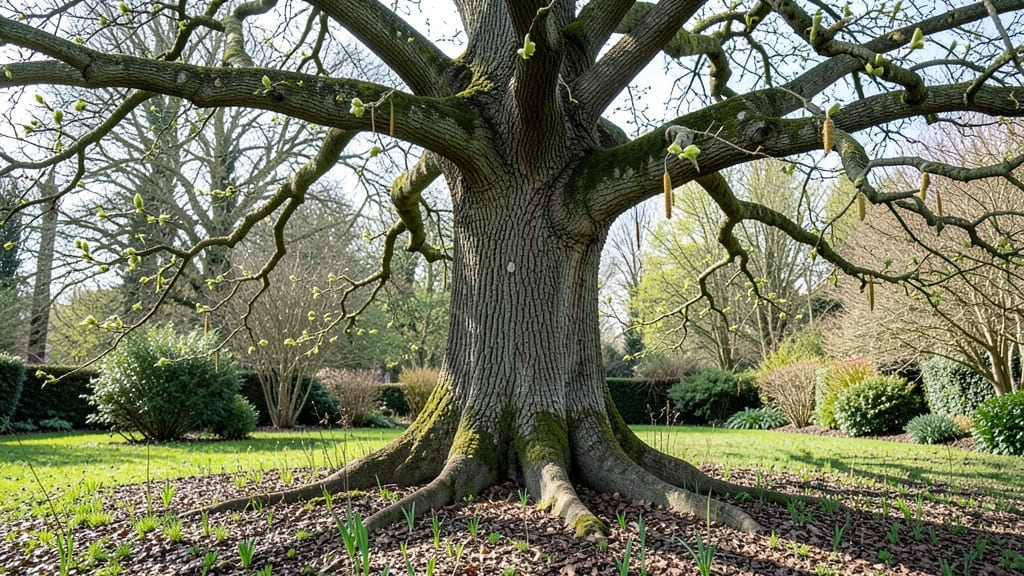
Pruning dormant branches in early spring is the secret to trees that explode with growth by summer. ✂️ I’ve watched my own maple and apple trees go from bare winter skeletons to lush canopies just by making a few strategic cuts before the buds swell—it’s like hitting the reset button on their energy.
The best time is when the tree is still dormant but sap starts flowing, usually 2-4 weeks before leaves appear. You’ll know it’s right when you see fat, plump buds along the branches—those are nature’s signal to start shaping.
Just avoid pruning after new leaves emerge, or you’ll stress the tree when it’s already working hard to feed fresh growth. What you end up with is a stronger structure, fewer broken limbs, and 20-30% more fruit or foliage by midseason.
The cuts heal cleaner, pests have fewer hiding spots, and sunlight reaches all the way to the inner branches. It’s not just about aesthetics—it’s about giving your tree the best possible start. Works for fruit trees, shade trees, and even young ornamentals.
Here’s exactly how to do it without overcomplicating things—no special tools or degrees in arboriculture required.
📚 In This Guide
- What you need
- Instructions
- Tips and common mistakes
- Wrapping up and next steps
What you need
- ● Pruning shears: Bypass shears (for cuts under ½ inch thick) – 1 pair (look for sharp, stainless-steel blades).
- ● Loppers: For branches ½ to 2 inches thick – 1 pair (choose ratcheting models for ease).
- ● Pruning saw: For branches 2+ inches thick – 1 saw (curved blade for clean cuts).
- ● Extension pole: Adjustable 6–10 ft pole with saw attachment – 1 unit (for high branches).
- ● Disinfectant: 70% isopropyl alcohol or bleach solution (1 part bleach to 9 parts water) – small bottle (to sterilize tools between cuts).
- ● Gloves: Heavy-duty, cut-resistant gloves – 1 pair (protects hands from thorns/splinters).
- ● Safety gear: Safety glasses (for debris protection).
- ● Work boots or closed-toe shoes.
- ● Long sleeves/pants (to avoid scratches).
- ● Cleanup supplies: Heavy-duty trash bags (2–3 bags).
- ● Rake or leaf blower (for debris).
- ● Tree wound dressing: (Controversial but useful for large cuts—small tube).
- ● Ladder: Sturdy, extendable ladder (if reaching >10 ft)—1 unit (ensure it’s rated for your weight).
- ● Marking twine/flags: For tagging branches to remove (small roll).
- ● Pruning sealant: For sealing cuts on oozing trees (e.g., maples)—small bottle.
- ● First-aid kit: Bandages, antiseptic wipes (for minor scrapes).
Instructions for pruning dormant branches in early spring
Here’s how to wake up your tree’s growth cycle with clean, strategic cuts.
✂️ Step 1: Identify Dead, Diseased, or Damaged Branches
Start by examining each branch closely. Dead wood appears dry, brittle, and often grayish-brown, while diseased branches may show discoloration, oozing sap, or fungal growth. I run my fingers along the bark—if it crumbles easily or feels hollow inside, it’s dead. Damaged branches might have jagged breaks or splits from storms.
Mark these branches with flagging tape or a spray paint dot so you don’t miss them during pruning. Real talk: Overlooking a dead branch now means wasted energy for your tree later. It’s better to remove it now than wait for it to spread disease.
✂️ Step 2: Remove Branches at the Correct Angle and Location
Use sharp, clean pruning shears or a saw for branches thicker than ½ inch. Cut just outside the branch collar—the swollen area where the branch meets the trunk. This ensures the tree seals the wound naturally. I make my cut at a 45-degree angle sloping away from the trunk to prevent water pooling.
For larger branches, make a three-cut method: First, cut about 2 feet out from the trunk on the underside of the branch. Then, cut down about 1 inch above the branch collar. Finally, remove the remaining stub. This prevents tearing the bark.
☀️ Step 3: Thin the Canopy for Better Airflow and Light
Look for branches that cross or rub against each other—these create wounds and invite pests. Remove one of the two branches at the point where they intersect, cutting back to a healthy lateral branch or bud. I aim to keep the tree’s natural shape while improving airflow and sunlight penetration.
Thin out no more than 25% of the tree’s foliage in one season. Over-pruning stresses the tree and can delay spring growth. Watch for water sprouts—those fast-growing, vertical shoots—and remove them entirely, as they drain energy from the tree.
✂️ Step 4: Shape the Tree for Balance and Structure
Step back and assess the tree’s overall shape. Focus on maintaining its natural form while removing branches that grow inward or downward. I start at the bottom and work my way up, ensuring each cut improves the tree’s structure without creating awkward gaps.
For young trees, you can be more aggressive with shaping. For mature trees, take your time—small, gradual adjustments prevent shock. Here’s the thing: A well-shaped tree now will reward you with stronger growth and fewer issues in the years ahead.
🌱 Step 5: Clean Up and Protect the Tree
After pruning, remove all debris from the area to prevent fungal growth. Sterilize your tools with rubbing alcohol or a 10% bleach solution to avoid spreading disease. I also apply wound dressing (like tree sealant) only to cuts larger than 1 inch in diameter—smaller wounds heal faster on their own.
Water the tree deeply after pruning to help it recover. Avoid heavy fertilization right away—your tree’s energy should go toward healing, not new growth. Keep an eye out for signs of stress, like wilting leaves or excessive leaf drop, and adjust care accordingly.
Tips & tricks for pruning dormant branches in early spring
Here's what nobody tells you about pruning that'll make all the difference in your tree's recovery.
Tool Sharpness Matters: Dull pruning shears crush rather than cut cleanly, causing unnecessary damage to the bark. I test my tools by making a clean cut through a piece of paper—if it tears, it's time to sharpen. For larger branches, a handsaw with a fine-tooth blade prevents splintering. Remember, every clean cut helps the tree heal faster.
Season Timing is Critical: Early spring, just before buds swell but before new growth begins, is the perfect window for pruning. This timing allows the tree to heal before putting energy into new leaves. If you prune too early, you risk exposing the tree to late winter frost damage. If you wait too long, you'll be removing next year's growth potential.
Branch Collar Preservation: Never cut flush with the trunk—always leave the branch collar intact. This swollen area contains healing cells that help seal the wound. I've seen too many pruning jobs where people cut right up to the trunk, leaving ugly scars that never fully close. The branch collar is your tree's natural bandage, so protect it at all costs.
Sterilize Between Cuts: Disease can spread quickly from one cut to another. Wipe down your tools with rubbing alcohol between each branch, especially if you're working with diseased wood. I keep a small bottle of alcohol in my tool belt for quick cleanups. This simple step can prevent fungal infections that could kill your tree.
Pro Tips for Tree In Early Spring
- Here's what nobody tells you about pruning that'll make all the difference in your tree's recovery.
- Tool Sharpness Matters: Dull pruning shears crush rather than cut cleanly, causing unnecessary damage to the bark. I ...
- Season Timing is Critical: Early spring, just before buds swell but before new growth begins, is the perfect window f...
Frequently asked questions
about pruning trees in early spring—because even the best gardeners need a little guidance! Here are answers to common queries to help you get started with confidence.What’s the best time to prune a tree in early spring?
Prune before buds swell (late winter to early spring) for best results. This timing encourages vigorous new growth while avoiding late-season pests or diseases. Avoid pruning after leaves emerge—it stresses the tree and invites infestations. Check your local frost dates for precision!
Can I prune a tree if it’s still dormant but has tiny buds forming?
Yes, but act fast! Tiny buds signal the tree is waking up. Prune only if necessary (e.g., removing dead branches) to avoid stimulating early growth that could be damaged by late frosts. If buds are swollen, wait 2–3 weeks for safer pruning.
What if my tree has no leaves or buds—is it dead?
Not necessarily! Some trees (like oaks or maples) stay bare longer. Scratch a small branch with your fingernail—if it’s green underneath, the tree’s alive. Prune only to remove clearly dead or diseased wood. If unsure, consult an arborist for a health check.
Will pruning in early spring help my tree survive winter damage?
Pruning after winter (late February–March) can remove frost-damaged branches, but early spring pruning focuses on shaping and health. Lightly trim broken or split branches in late winter, then do full pruning when buds swell. Avoid heavy cuts—focus on structure and airflow.
Are there trees I shouldn’t prune in early spring?
Yes! Avoid pruning bleeding trees (like maples, birches, or dogwoods) in early spring—they lose sap, weakening the tree. For these, prune late winter (dormant but before buds swell) or summer. Always research your tree’s species for best timing!
What if I accidentally prune too much?
Don’t panic! Over-pruning can stress the tree, but it’s not fatal. Focus on quality over quantity: remove no more than 25% of the canopy in one session. If you’ve gone overboard, prioritize watering, mulching, and avoiding fertilizer until new growth appears.
Wrapping up and next steps
Early spring is the perfect time to prune your trees—giving them a fresh start for vibrant growth and long-term health. 🌱 By following the right techniques, you’ll encourage stronger branches, better fruit production, and a more beautiful landscape.
Now that you’re equipped with the tools, timing, and tips, there’s no better moment to roll up your sleeves and get pruning!
Ready to take action? Start small—pick one tree or shrub this weekend and observe the difference by next spring. Your future self (and your trees!) will thank you.