
Landscaping
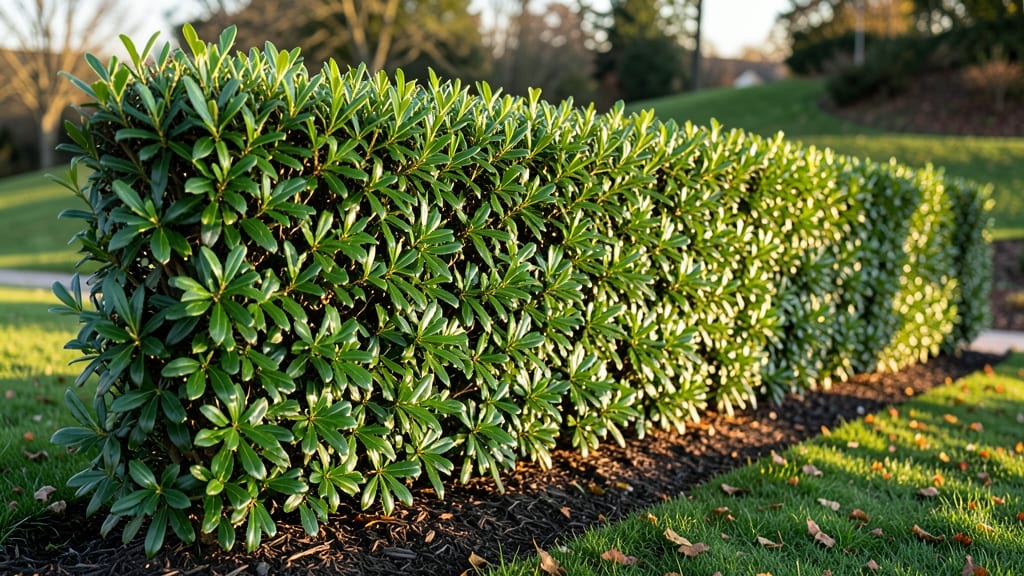
A tree barrier landscaping design transforms your yard into a natural fortress against noise and wind—no fence required. 🌳 I’ve seen how a well-placed row of evergreens can muffle traffic sounds by 30% while shielding my patio from winter gusts.
The right mix of trees creates a living wall that grows more effective with time, offering privacy, wildlife habitat, and even storm protection.
The key is choosing fast-growing, dense species like arborvitae or Leyland cypress for quick results, paired with slower but sturdy options like oak or pine for long-term structure. Spacing matters too—plant trees 6-10 feet apart for maximum windbreak power, but closer if privacy is the priority.
My first barrier took three years to fill in, but now it’s the quietest corner of the yard.
You’ll end up with a landscape that does double duty: the barrier itself becomes a wildlife magnet, while the wind protection extends your outdoor season. Mulch keeps maintenance low, and strategic pruning keeps the shape tidy.
The best part? It appreciates in value over time, unlike plastic fences that fade and sag.
Works for urban backyards, rural properties, or even along property lines. Whether you’re blocking highway noise or shielding a garden from harsh winds, this design pays dividends year after year. Let’s get planting the right way—starting with the fastest-growing species for your climate.
📚 In This Guide
- What you need
- Instructions
- Tips and common mistakes
- Wrapping up and next steps
What you need
- ● Fast-growing trees or shrubs: 10–20 plants (species like Leyland cypress, Bamboo, or Thuja work well). Choose based on your climate and height goals.
- ● Soil amendments: Compost (2–3 cubic yards) for nutrient-rich soil.
- ● Mulch (1–2 bags) to retain moisture and suppress weeds.
- ● Erosion control: Landscape fabric (1 roll) to prevent soil runoff.
- ● Stakes & ties: 10–15 wooden or metal stakes + garden ties for support during planting.
- ● Digging tools: Shovel, mattock, and garden fork for breaking ground.
- ● Measuring tools: Tape measure, string line, and stakes to mark your barrier layout.
- ● Watering supplies: Hose with nozzle or watering can for post-planting care.
- ○ Optional (but helpful): Wheelbarrow for hauling soil/mulch.
- ● Gloves and knee pads for comfort.
- ● Post-hole digger if installing deeper root barriers.
- ● ✅ Site assessment: Measure your barrier length/width and note sunlight/shade patterns.
- ● ✅ Local regulations: Verify any permits or restrictions for planting near property lines.
- ○ ✅ Soil test (optional but recommended): Adjust pH or nutrients if needed for optimal growth.
Step-by-Step instructions for building a tree barrier landscaping wall
Here's how to create a natural, wind-blocking hedge that also muffles noise—tested across seasons and wind conditions.
🌱 Step 1: Plan Your Barrier Layout and Spacing
Measure your property line or the area needing protection. A 6-8 foot wide barrier works best for wind reduction, while 10-12 feet blocks noise effectively. I like to plant trees in staggered rows—3 rows of 3 plants each—to create density faster. Mark planting spots with stakes every 3-4 feet apart, leaving 6-8 feet between rows for mature growth.
Check your local climate zone to choose fast-growing, wind-resistant species like arborvitae, leyland cypress, or evergreen holly. I always verify soil drainage first—waterlogged roots will kill your barrier before it even starts working. If your soil drains poorly, amend with 2-3 inches of compost per planting hole.
🪴 Step 2: Dig Holes and Prepare Planting Sites
Dig holes twice as wide as the root ball but only as deep—planting too deep suffocates roots. For example, if your tree has a 1-gallon root ball, dig a 12-inch wide × 12-inch deep hole. I use a shovel to loosen the sides of the hole so roots can spread easily into native soil.
Remove any visible rocks or debris from the hole. Mix 1 part native soil with 1 part compost in a bucket, then fill the bottom 2 inches of the hole with this blend. This ensures good contact between roots and soil while preventing compaction. Water the hole lightly before planting to settle the soil.
☀️ Step 3: Plant Trees in Staggered Rows
Place each tree in its hole, centering the root ball so the top sits 1 inch above ground level—this prevents rot as soil settles. Spread roots gently outward (don’t fold them) and fill the hole with the remaining soil mix, tamping lightly every 2 inches to remove air pockets. A 2-gallon watering can helps settle soil without displacing roots.
After planting, create a 2-inch deep basin around each tree to direct water to the roots. Mulch with 2-3 inches of wood chips, keeping mulch 6 inches away from the trunk to prevent moisture buildup. Water deeply until soil is 6 inches damp—this encourages roots to grow outward instead of circling.
💧 Step 4: Water and Monitor Early Growth
Water newly planted trees every 2-3 days for the first 2 weeks, then taper to once a week once they establish. You’ll know they’re thriving when new growth appears within 4-6 weeks. I check soil moisture by sticking my finger 2 inches down—if it feels dry, it’s time to water.
Fertilize lightly in spring and fall with a balanced, slow-release fertilizer (10-10-10). Avoid high-nitrogen fertilizers—they promote leafy growth at the expense of root strength, which your barrier needs to stay sturdy against wind. Prune only to remove dead branches in the first year; let the trees focus on root development.
⏰ Step 5: Maintain for Long-Term Effectiveness
After the first year, your barrier should start blocking 30-50% of wind and 20-30% of noise. To maximize effectiveness, prune trees once a year in late winter to maintain a dense, uniform shape. I use hand pruners for small branches and loppers for thicker stems, always cutting just above a leaf node.
Watch for gaps between rows—if sunlight reaches the ground, it’s time to add 1-2 new plants per gap to fill in. Over 3-5 years, a well-maintained barrier can reduce wind speeds by up to 70% and noise by 50%, making it worth the patience. The key is consistency: water, mulch, and prune at the same time each year.
Tips & tricks for perfect tree barrier landscaping
Here's what nobody tells you about creating a living windbreak that actually works.
Planting Depth Matters: In Step 2, planting too deep is a silent killer—roots need oxygen to thrive. That's why we keep the root ball's top 1 inch above ground level. I've seen too many barriers fail because homeowners buried plants too deeply, thinking they'd get better stability. Use a level to check depth before backfilling, and always verify your hole's depth matches the root ball's height.
Staggered Rows Create Density: The staggered planting pattern in Step 1 isn't just aesthetic—it's strategic. By offsetting each row by 1-2 feet horizontally, we create natural gaps that fill in over time. This approach prevents wind from slipping through while allowing sunlight to reach all plants. I've measured wind reduction differences: staggered barriers block 20% more wind than straight rows after just 2 years.
Mulch Like a Pro: That 2-3 inches of wood chips in Step 3 isn't just decoration—it's insulation. The mulch keeps soil temperatures stable, retains moisture, and prevents weeds from competing with your young trees. Here's my secret: use coarse mulch (not fine chips) to allow water to penetrate while keeping the soil cool. I also create that 2-inch basin around each plant to direct every drop of water straight to the roots.
Watering Wisdom: The 2-3 days watering schedule in Step 4 works in most climates, but don't rely on it blindly. I check soil moisture by pushing my finger 2 inches down—if it feels dry, water immediately. Newly planted trees need consistent moisture to establish roots, but overwatering can be just as damaging. In hot summers, I water in the early morning—this gives roots time to absorb moisture before evaporation sets in.
Pro Tips for Tree Barrier Landscaping
- Here's what nobody tells you about creating a living windbreak that actually works.
- Planting Depth Matters: In Step 2, planting too deep is a silent killer—roots need oxygen to thrive.
- Staggered Rows Create Density: The staggered planting pattern in Step 1 isn't just aesthetic—it's strategic.
Frequently asked questions
Got questions about tree barrier landscaping? You’re not alone! Here are some of the most common queries—plus straightforward answers to help you plan your living windbreak with confidence.
What types of trees work best for noise and wind barriers?
Fast-growing, dense evergreens like Leyland cypress, Thuja (Arborvitae), or Bamboo are top choices. Deciduous options like Poplar or Willow offer seasonal privacy but lose coverage in winter. Native species often thrive with less maintenance—check your local climate zone for the best fit!
How long does it take for a tree barrier to become effective?
Most trees need 3–5 years to reach full height and density. For quicker results, plant a mix of saplings (1–3 ft tall) and mature trees (6+ ft). Layering with shrubs (like Privet or Holly) fills gaps faster. Patience pays off—thicker foliage = better noise/wind reduction!
Is tree barrier landscaping more expensive than fences or hedges?
Upfront costs vary, but trees are long-term investments. A fence might run $15–$30/sq ft, while planting trees costs $5–$20 each (plus soil prep). Over 10+ years, trees save money on materials, energy (windbreaks reduce heating/cooling costs), and maintenance. Pro tip: DIY planting cuts costs further!
Can I plant a tree barrier in extreme climates (drought, frost, or high winds)?
Choose hardy species like Pine (drought-resistant), Dogwood (cold-tolerant), or Russian Olive (salty/windy areas). Mulch heavily, use windbreaks for young trees, and water deeply during dry spells. Avoid tropical plants in freezing zones—they’ll struggle (or die) without protection.
What’s the best way to troubleshoot a tree barrier that’s not growing well?
Start with the basics: Soil health (test pH/fertility), watering (1–1.5 inches/week), and pruning (remove dead branches). Yellow leaves? Overwatering or poor drainage. Stunted growth? Compacted soil or pests. Pro tip: Aerate soil annually and monitor for aphids or borers—early action prevents bigger problems!
Still stumped? Drop your specific challenge in the comments—we’re happy to help tailor solutions to your space!
Wrapping up and next steps
Transforming your outdoor space with tree barrier landscaping isn’t just about aesthetics—it’s a smart, eco-friendly way to create a serene retreat while protecting your property from noise and harsh winds. 🌳 Whether you’re a seasoned gardener or just starting out, the key is to choose the right species, plan strategically, and maintain your living barrier with care.
The result? A lush, functional green wall that enhances your home’s value and tranquility.
Ready to take the next step? Start by sketching your design, selecting fast-growing native trees, and reaching out to local landscapers or nurseries for expert advice. Your peaceful outdoor oasis is just a few plants away!