
Pruning
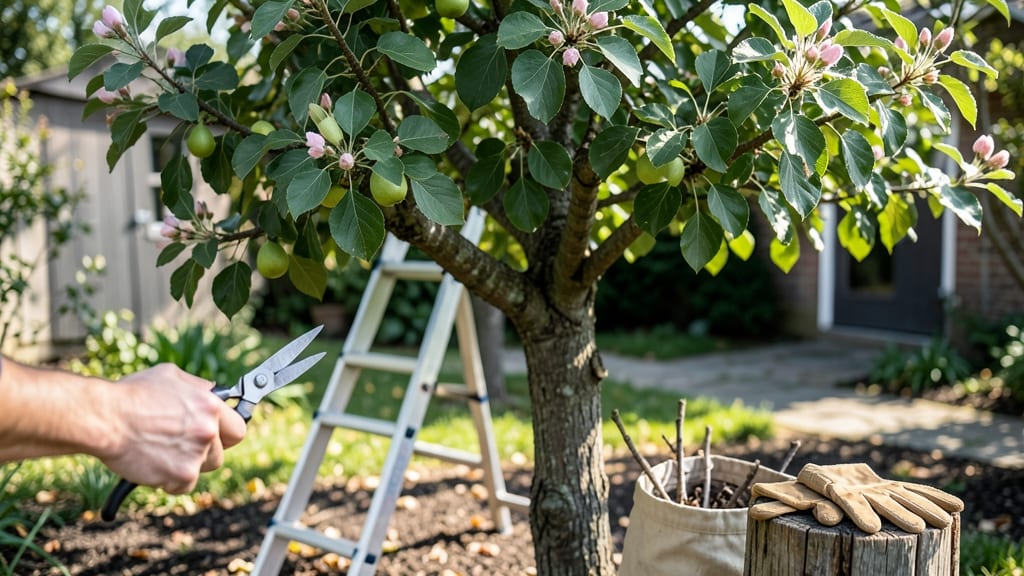
Pear tree maintenance keeps your tree thriving for decades. ✂️ I’ve watched neglected trees struggle with weak branches and poor fruit, while properly maintained ones produce bushels of sweet pears year after year. The key isn’t just cutting—it’s understanding when, why, and how to shape your tree for both health and harvest.
Start with the basics: prune in late winter or early spring before buds swell, remove dead or crossing branches first, and thin out crowded growth to improve airflow. A 10% annual reduction in branches keeps the tree balanced while encouraging strong new growth.
Water deeply once a week during dry spells, and mulch around the base to retain moisture and regulate soil temperature.
You’ll notice the difference by summer—fewer pests, less disease pressure, and fruit that ripens evenly. The tree’s structure becomes sturdy, and you’ll avoid the heartbreak of snapped limbs during storms. With consistent care, your pear tree will reward you with abundant harvests for generations.
Adapt this approach to your climate: in warmer zones, prune slightly later; in colder areas, protect young trees with burlap wraps. The same principles apply whether you’re dealing with a dwarf tree in a backyard or a standard variety in an orchard. Let’s get those branches in shape!
📚 In This Guide
- What you need
- Instructions
- Tips and common mistakes
- Wrapping up and next steps
What you need
- ● Pruning shears: Bypass shears (8–10" blade) for clean cuts on small branches.
- ● Loppers: 18–24" for thicker branches (up to 2" diameter).
- ● Pruning saw: Curved-tooth saw for branches over 2" thick.
- ● Gloves: Heavy-duty work gloves (leather or reinforced) to protect from thorns and splinters.
- ● Ladder: Extendable ladder (12–16 ft) for tall trees—safety first!
- ● Disinfectant: 70% isopropyl alcohol or bleach solution (1 part bleach to 9 parts water) to sterilize tools between cuts.
- ○ Pruning sealant: (Optional but helpful) Wound dressing for large cuts to prevent disease.
- ● Tarp or drop cloth: 10x12 ft to catch debris and protect landscaping.
- ● Trash bags: Heavy-duty bags (2–3) for pruned branches.
- ○ Marking spray: (Optional) Fluorescent paint to tag branches for removal.
- ● Rake: Garden rake to clear fallen leaves/debris post-pruning.
- ○ Tree ties or zip ties: (Optional) For securing scaffold branches if needed.
- ● Check the weather forecast—prune on a dry, calm day (avoid wind or rain).
- ● Gather a first-aid kit (just in case of minor cuts or scrapes).
- ● Wear closed-toe shoes and long sleeves for protection.
- ● Have a helper if your tree is large or overhanging structures.
How to maintain a healthy pear tree through strategic pruning
Here's my go-to approach to keep your pear tree productive and pest-resistant year after year.
🌿 Step 1: Assess the Tree Structure in Early Spring
Start your maintenance in late winter or early spring, just as buds swell but before new growth begins. This timing ensures you prune after winter dormancy but before sap flows heavily. I look for three key areas: the central leader, scaffold branches, and any crossing limbs.
Use clean, sharp pruning shears to make cuts at a 45-degree angle, about ¼ inch above a bud that faces outward. This prevents water from pooling in the wound and encourages new growth in the right direction. Remove any dead, diseased, or broken branches first—they're the easiest to spot and the most critical to address.
✂️ Step 2: Thin the Canopy for Better Airflow and Light
Pears need good airflow to prevent fungal diseases like fire blight. I focus on removing branches that cross or rub against each other, as well as those growing straight upward from the main scaffold. These "water sprouts" steal energy from fruit production. Aim to thin the canopy so light can penetrate to the inner branches.
For larger branches over ½ inch thick, use a pruning saw for clean cuts. Make the cut just outside the branch collar—the swollen area where the branch meets the trunk. Never leave stubs, as they invite decay. Step back after each cut to visualize the tree's shape—you want an open vase-like structure for pears.
☀️ Step 3: Summer Pruning to Control Growth and Fruit Load
After the initial spring pruning, monitor your tree throughout summer. In late June or early July, remove any suckers that appear at the base of the tree—these drain energy from fruit production. Also, thin out clusters of fruit to 6-8 inches apart to ensure larger, higher-quality pears.
Look for branches with excessive leaf growth but few fruit spurs. These branches are overproducing foliage at the expense of fruit. Cut them back by ⅓ to ½ to redirect energy toward fruiting wood. Summer pruning keeps the tree manageable and improves next year's harvest.
🪴 Step 4: Winter Cleanup and Disease Prevention
As winter approaches, remove all fallen leaves and fruit mummies from under the tree. These harbor diseases like black spot and fire blight. Rake up debris and dispose of it in the trash—not the compost pile. I also apply a 2-inch layer of organic mulch around the base, keeping it 6 inches away from the trunk.
This mulch layer insulates roots from freezing temperatures and retains moisture. Just avoid piling it against the trunk, as this can cause rot. A light application of copper fungicide in late winter also helps prevent fungal spores from overwintering on the bark.
Tips & tricks for perfect pear tree maintenance
Keeping your pear tree thriving takes a little planning—and these pro tips will help you avoid common pitfalls while maximizing fruit production.
Timing is Everything: That late winter/early spring window is critical for Step 1 pruning. I've seen trees stressed when pruned too early or too late—buds should be swelling but not yet open. If you miss this timing, wait until after the first leaves appear, though you'll sacrifice some of the tree's energy reserves. The goal is to prune when the tree is just waking up but before sap flows heavily, which can lead to excessive bleeding.
Tool Up Right: Never use dull shears or saws—they crush branches instead of making clean cuts. I keep a small file in my pruning kit to sharpen blades between uses. For branches thicker than your wrist, use a pruning saw with a fine-toothed blade to prevent tearing. And always disinfect your tools between cuts (especially when moving from diseased to healthy branches) using a 10% bleach solution or rubbing alcohol. This prevents spreading diseases like silver leaf fungus.
Visualize the Vase: When thinning the canopy in Step 2, step back frequently to check your progress. I imagine an open vase shape—wider at the top than the bottom, with branches spreading outward. This creates that perfect light penetration we want. For larger branches, make your cut just outside the branch collar (that swollen area where the branch meets the trunk) to promote faster healing. If you're unsure where to cut, trace the branch outline with your finger first—this helps visualize the natural branch angle.
Summer Pruning Secrets: In Step 3, those late June/early July suckers are sneaky—they can appear overnight! Make it a habit to check your tree every 2-3 weeks during summer. For fruit thinning, I use my fingers to gently twist small fruits off the cluster, leaving the largest ones spaced 6-8 inches apart. This might seem counterintuitive, but it actually increases the size and quality of the remaining pears by reducing competition for nutrients.
Pro Tips for Pear Tree Maintenance
- Keeping your pear tree thriving takes a little planning—and these pro tips will help you avoid common pitfalls while maximizing fruit production.
- Timing is Everything: That late winter/early spring window is critical for Step 1 pruning.
- Tool Up Right: Never use dull shears or saws—they crush branches instead of making clean cuts.
Frequently asked questions
Got questions about keeping your pear tree thriving?
Here are answers to the most common concerns—so you can prune with confidence and enjoy bountiful harvests for years to come!
When is the best time to prune a pear tree?
For dwarf and semi-dwarf varieties, prune in late winter or early spring (before buds swell) to avoid disease. Standard pear trees benefit from a summer thinning (June–July) to improve air circulation and fruit quality. Avoid heavy pruning in fall—it invites pests and diseases.
How do I know if I’m pruning too much?
If you see more than 25% of the tree’s canopy removed in one session, you’re overdoing it. Signs of over-pruning include excessive water sprouts (shoots growing from pruning cuts), leaf yellowing, or reduced fruit production the next year. Rule of thumb: Never remove more than 1/3 of the tree’s branches annually.
Why are my pear tree leaves curling or spotted after pruning?
Curling or spotted leaves often signal pests (aphids, mites) or fungal issues (fire blight, powdery mildew). Pruning wounds can invite infections—always use sterilized tools and seal larger cuts with pruning sealant. Solution: Spray with neem oil (for pests) or copper fungicide (for disease) and monitor for repeat issues.
Can I prune a young pear tree the same way as a mature one?
No! Young trees (under 3 years) need structural shaping to establish a strong scaffold. Focus on removing competing branches, thinning crowded growth, and opening the center for airflow. Mature trees (5+ years) prioritize fruit-bearing branches—cut back dead wood and water sprouts while preserving the tree’s shape.
Will pruning my pear tree increase fruit size?
Yes—strategic pruning improves fruit quality! By thinning branches, you reduce competition for nutrients, letting remaining fruit grow larger. Aim to space fruit clusters 6–8 inches apart during summer thinning. Pro tip: Remove suckers (shoots at the base) to redirect energy to fruit production.
Do I need to prune in winter if I live in a cold climate?
In Zone 5 or colder, prune after the worst frost (late winter) to avoid dormant season stress. Heavy snow or ice can damage weak branches—check for broken limbs in early spring and prune them immediately. Always sterilize tools to prevent bacterial canker, common in cold climates.
Wrapping up and next steps
Keeping your pear tree thriving is all about timing, technique, and consistency—whether you’re pruning for fruit production, shaping its growth, or preventing disease. 🌳 With the right tools, a clear plan, and seasonal attention, you’ll ensure your tree stays healthy, productive, and beautiful for years to come. Now’s the perfect time to grab those shears and get started!
📅 Your Next Step:
- Mark your calendar for late winter or early spring—ideal for major pruning sessions.
- Review your tree’s structure and refresh your pruning guide before diving in.
- Celebrate small wins—every cut brings your pear tree one step closer to bountiful harvests and lush foliage!