
Pruning
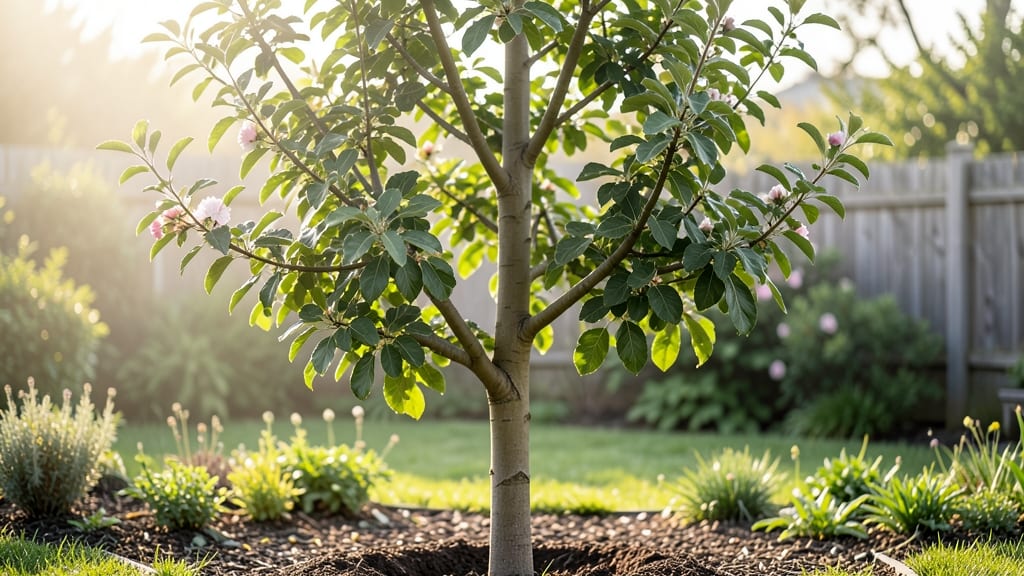
Your apple tree's future strength starts with the central leader pruning method. ✂️ I've watched this technique transform weak, sprawling trees into sturdy, productive orchards—even in my first attempt. The secret lies in guiding that single upright trunk while removing competing branches early, before they fight for energy.
This approach works year-round with seasonal adjustments: aggressive shaping in late winter, light maintenance after harvest, and constant vigilance against water sprouts that steal nutrients. You'll need sharp pruners, a saw for thicker branches, and a clear day to work—no guessing required.
The goal is simple: one strong leader that supports heavy fruit loads without snapping.
What you end up with is a tree that produces fruit closer to the trunk, making harvests easier and reducing disease risk from wet foliage. The branches form a natural vase shape that catches sunlight perfectly, and you'll notice stronger growth within just one growing season.
My trees now bear fruit reliably every year, with fewer broken limbs and healthier wood.
Perfect for backyard orchards, container-grown trees, or even urban yards with limited space. The same principles apply whether you're working with a newly planted tree or rescuing an overgrown one. Let's get those branches in line!
📚 In This Guide
- What you need
- Instructions
- Tips and common mistakes
- Wrapping up and next steps
What you need
- ● Pruning shears – Sharp, bypass-style (for cuts up to ¾ inch thick)
- ● Loppers – Bypass or anvil type (for branches 1–2 inches thick)
- ● Pruning saw – Curved-tooth (for branches 2+ inches thick)
- ● Rubbing alcohol (70% or higher) – 1 small bottle (for sterilizing tools)
- ○ Pruning sealant (optional but recommended) – Wound dressing (for large cuts)
- ● Gloves – Heavy-duty, cut-resistant (to protect hands)
- ● Ladder or step stool – Sturdy, non-slip (for high branches)
- ● Disposable bags or bucket – For collecting pruned branches
- ● Hand pruners with a ratchet mechanism (for easier leverage)
- ● Pole saw or extendable pruners (for very tall trees)
- ● Tree wound paint (if you prefer sealing cuts)
- ● Notebook & pencil – To sketch your pruning plan
- ● Safety glasses (if debris may fly)
Step-by-Step guide to pruning apple trees using the central leader method
This approach builds a sturdy framework for your tree—here’s how to do it right.
🌱 Step 1: Identify the Central Leader and Main Branches
Start by locating your tree’s central leader—the single, strong, upright stem growing straight up from the trunk. This is your tree’s backbone. Look for branches that form a 45-60° angle from the trunk; these are your scaffold branches, which will form the tree’s main structure. Remove any branches growing straight up or down—they’ll compete with the leader and create weak crotches.
Use your hands to gently bend each branch. If it snaps easily, it’s too weak to keep. Strong branches bend slightly but don’t break. Mark these with a piece of twine or tape so you don’t accidentally prune them later. The goal is to keep 3-5 well-spaced scaffold branches evenly distributed around the trunk.
✂️ Step 2: Prune Back the Central Leader and Remove Competing Branches
Cut the central leader back to a bud that faces outward (not inward or downward). This encourages the leader to grow straighter and stronger. Use clean, sharp pruning shears to make a 45° cut just above the bud. Avoid leaving stubs—this invites disease and weak growth. If the leader is too weak or damaged, select the strongest upward-growing branch to become the new leader.
Next, remove any branches that are rubbing against each other or growing directly toward the center of the tree. These will create wounds and block light. Cut these branches back to the collar (the swollen area where the branch meets the trunk). Avoid leaving any stubs—always cut just outside the branch collar to promote faster healing.
☀️ Step 3: Thin Out Interior Branches for Airflow and Light
Focus on the interior of the tree where branches crowd together. Remove one-third of the smallest, weakest branches to improve airflow and sunlight penetration. This reduces disease risk and helps fruit develop evenly. Cut these branches back to a bud or lateral branch—never leave a stub. You’ll see a noticeable difference in how light filters through the canopy after this step.
Pay special attention to water sprouts—fast-growing, vertical shoots that steal energy from fruit production. Prune these back to a lateral branch or bud. If they’re thick, make the cut just above a swollen bud facing the direction you want the branch to grow. This encourages stronger, more productive growth.
🌿 Step 4: Shape the Tree for Balance and Future Growth
Step back and assess the tree’s shape. The central leader should dominate the center, with scaffold branches evenly spaced around it. If one side looks sparse, select a strong lateral branch to encourage as a new scaffold. Prune it back to a bud to stimulate growth in the right direction. The goal is a balanced, open-centered tree that lets sunlight reach all branches.
For young trees, limit pruning to no more than 25% of the foliage in a single session. Over-pruning stresses the tree and reduces fruit production. If you’re working with a mature tree, spread pruning over 2-3 sessions to avoid shocking the plant. Always prune on a dry, sunny day to reduce the risk of disease.
⏰ Step 5: Clean Up and Monitor for Recovery
After pruning, sterilize your tools with rubbing alcohol to prevent spreading disease. Collect and dispose of pruned branches away from the tree to avoid pests. Water the base of the tree deeply to help it recover. You’ll notice new growth within 2-4 weeks—this is a sign the tree is responding well to the pruning.
Keep an eye on the tree over the next few months. If you see dieback (dead or dying branches), prune those back to healthy wood. Avoid pruning during fall or winter unless necessary—these are the tree’s dormant periods, and heavy pruning can stress it. Instead, focus on light maintenance pruning in late winter or early spring, just before new growth begins.
Tips & tricks for perfect apple tree central leader pruning
Real talk: Pruning an apple tree isn't just about cutting branches—it's about shaping its future. These are the insights I wish I'd known when I first tried this method.
Branch Strength Test: In Step 1, when you're testing branch strength by bending them, pay attention to how they feel—not just whether they snap. A strong scaffold branch should bend slightly but spring back immediately. If it bends too easily, it won't support the weight of fruit later. This simple test saves you from keeping weak branches that'll break under fruit load.
Bud Direction Matters: During Step 2, when pruning the central leader, I can't stress enough how important bud direction is. Always cut just above a bud that faces outward—never downward or inward. I learned this the hard way when my first pruning led to inward-growing branches that crowded the center. Outward-facing buds encourage the leader to grow straight and strong, creating that perfect open vase shape.
Pruning Season Insight: The instructions mention pruning in late winter, but here's what nobody tells you—spring is actually better for young trees. The tree's natural growth hormones kick in during spring, helping it recover faster. For mature trees, late winter is perfect, but if you're working with a young tree, wait until you see those first green buds appearing in early spring.
Tool Maintenance: After finishing in Step 5, take 2 minutes to properly clean your pruning tools. I use a wire brush to scrub off sap and then soak the blades in a 10% bleach solution for 5 minutes. This prevents disease spread between cuts. I've seen too many trees suffer from fungal infections because tools weren't properly sterilized between branches.
Pro Tips for Apple Tree Central Leader
- Real talk: Pruning an apple tree isn't just about cutting branches—it's about shaping its future.
- Branch Strength Test: In Step 1, when you're testing branch strength by bending them, pay attention to how they feel—not just whether they snap.
- Bud Direction Matters: During Step 2, when pruning the central leader, I can't stress enough how important bud direction is.
Frequently asked questions
Got questions about pruning your apple tree with the central leader method? You’re not alone! Here are answers to the most common concerns—whether you're a newbie or a seasoned gardener looking to refine your technique.
What’s the best time of year to prune an apple tree using the central leader method?
The ideal window is late winter or early spring (just before buds swell) when the tree is dormant but about to wake up. This timing minimizes stress and disease risk. Avoid heavy pruning in fall—it can leave wounds vulnerable to pests. Pro tip: Light maintenance pruning (removing deadwood or crossing branches) can happen anytime, but major shaping? Save it for that dormant season!
How long does it take to see results from central leader pruning?
Patience is key! You’ll notice immediate changes like better airflow and fewer crowded branches after your first session. However, full structural benefits (like a sturdy scaffold and abundant fruit) typically take 2–3 years of consistent pruning. Think of it as a long-term investment in your tree’s health—like compound interest for your orchard!
What if my apple tree already has a bunch of co-dominant leaders? Can I still use the central leader method?
Yes, but it’ll require extra attention. Start by identifying the strongest, most vertical leader and prune the others back to a lateral branch (or remove them entirely if they’re weak). Over time, the central leader will dominate, but you may need to tie down the new leader with stakes for support during its growth spurt. Warning: If multiple leaders are equally strong, the tree may revert to a multi-leader structure—patience and persistence are critical!
Will pruning for a central leader reduce my apple harvest?
Not if done correctly! The goal is to improve fruit production by reducing competition for sunlight and nutrients. A well-pruned central leader tree often yields larger, higher-quality apples because branches are less crowded. That said, over-pruning (removing >25% of the canopy in one go) can temporarily reduce yield. Stick to the 10–25% rule for annual pruning.
What’s an alternative if the central leader method isn’t working for my tree?
If your tree struggles with the central leader (e.g., weak wood, storm damage, or poor genetics), consider switching to the open-center or modified central leader methods. The open-center approach works well for dwarf varieties or areas with heavy snow/ice. For existing multi-leader trees, the 3-leader system (3 main scaffold branches) is a flexible compromise. Key takeaway: Adapt to your tree’s natural growth habits—no one-size-fits-all solution!
Wrapping up and next steps
Mastering the apple tree central leader pruning technique is your ticket to a thriving, productive orchard—year after year! By following the right steps and timing, you’ll ensure strong growth, better fruit yield, and a stunning, natural shape. 🌳✨
Now that you’re armed with the knowledge, roll up your sleeves and get pruning! Start with a clear plan, gather your tools, and take it step by step. Before you know it, your apple tree will be the envy of the neighborhood—and you’ll be the proud gardener behind it all.
For extra confidence, watch a few tutorial videos or join a local gardening group to swap tips. Happy pruning!