
Landscaping
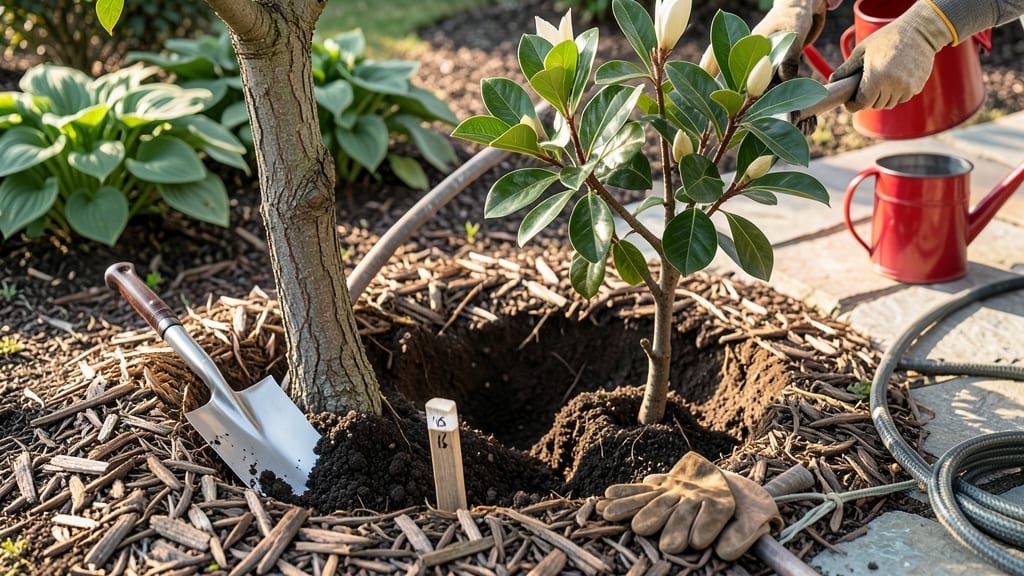
Landscape tree and shrub planting isn't just about filling empty spaces—it's about crafting a living tapestry that changes with each season. ✨ I remember my first attempt at layering plants: I planted everything at once, and by winter, the garden felt flat and lifeless. Now, I use a simple system that creates depth, movement, and year-round interest, even in small yards.
The key is starting with the right plants for your space—tall evergreens for structure, mid-height shrubs for texture, and low-growing perennials for color. My go-to combo for a sunny border includes a 6-foot arborvitae as the backbone, 3-foot hydrangeas for blooms, and 1-foot creeping thyme for ground cover.
This trio gives height, color, and texture without overwhelming the space.
By the end of the season, you'll have a garden that feels intentional, not random. The evergreens provide winter structure, spring blooms add color, and summer foliage keeps it lush. Even in a 20-foot strip along a fence, this approach transforms a boring space into a dynamic outdoor room.
Works for any yard size, from urban patios to country acres. The trick is thinking in layers—not just rows. Let's get planting!"
📚 In This Guide
- What you need
- Instructions
- Tips and common mistakes
- Wrapping up and next steps
What you need
- ● Shovel (round-point or flat-blade) – For digging holes (1-2, depending on project size).
- ● Trench shovel – For amending soil in larger areas.
- ● Garden fork – To loosen compacted soil (1-2).
- ● Pruners (bypass or felco) – For trimming roots and shaping plants (1 pair).
- ● Measuring tape – To mark planting distances (1).
- ● Wheelbarrow – For hauling soil, mulch, or tools (1).
- ● Garden gloves – Protect your hands (1-2 pairs).
- ● Watering hose with nozzle – For post-planting hydration.
- ○ Level or string line – Ensures even planting (optional but helpful).
- ● Trees and shrubs – Choose 3-5 varieties for layered height (e.g., evergreens, deciduous, flowering).
- ● High-quality soil or compost – 1-2 cubic yards (amend native soil if needed).
- ● Organic mulch (pine straw, wood chips, or shredded bark) – 2-3 bags (3-4 cubic feet each).
- ● Slow-release fertilizer – 1-2 bags (follow package rates).
- ○ Plant stakes (optional) – For support (5-10 stakes, 4-6 ft long).
- ○ Eco-friendly plant ties (optional) – To secure young plants.
- ● Site analysis – Check sunlight, drainage, and soil pH (test kits available).
- ● Permits (if required) – Check local regulations for large plantings.
- ● Weather check – Plant on a cool, cloudy day (avoid extreme heat or frost).
- ● Layout plan – Sketch spacing (follow mature size guidelines).
Step-by-step instructions for layered tree and shrub planting
Here's how to create a balanced, year-round landscape that thrives with minimal maintenance.
🌱 Step 1: Plan Your Layered Structure
Start by sketching your design, focusing on three key layers: tall trees for vertical structure, medium shrubs for mid-level interest, and low ground covers for texture. I always place the tallest elements first—these anchor the design and prevent overcrowding. For a 4-plant setup, consider one 10-15 foot tree (like a Japanese maple), two 6-8 foot shrubs (such as hydrangeas), and one 3-4 foot accent plant (like boxwood).
Measure spacing based on mature size: trees need 15-20 feet between trunks, shrubs should sit 4-6 feet apart, and ground covers should fill gaps without competing for light. Use a measuring tape to mark planting spots—this prevents last-minute adjustments that disrupt the flow. Real talk: Skipping this step leads to cramped roots and future pruning headaches.
🪴 Step 2: Prepare the Planting Holes
Dig holes twice as wide as the root ball but no deeper—this encourages roots to spread horizontally rather than settling too low. For a 10-gallon shrub, aim for a 16-inch diameter hole. Loosen the sides with a garden fork to reduce compaction, which improves water absorption. I always step back and check the depth—if the hole looks too shallow, add a few inches of native soil mixed with compost to the bottom.
Water the hole thoroughly 24 hours before planting to settle the soil. This prevents roots from drying out during transplanting. For clay-heavy soil, amend the bottom 6 inches with sand or peat moss to improve drainage. The goal is a hole that holds moisture but doesn’t stay soggy—this ensures roots establish quickly.
☀️ Step 3: Plant with Proper Spacing and Support
Remove the plant from its container and soak the root ball for 10-15 minutes to hydrate dry roots. Place it in the hole so the top of the root ball sits 1-2 inches above ground level—this prevents water from pooling at the base. For taller trees, install a stake at a 45-degree angle and loosely tie the trunk with tree tie straps (never wire, which can girdle the stem).
Backfill with the native soil-compost mix, tamping gently as you go to eliminate air pockets. Water deeply until the soil settles 2 inches—this ensures roots make contact with moisture. For shrubs, add a 2-inch layer of mulch (keep it 6 inches away from the trunk to prevent rot). Here’s the thing—mulch too close to the stem traps moisture and invites disease.
💧 Step 4: Water and Monitor Establishment
After planting, water every other day for 2 weeks, then weekly for the first growing season. Use a soaker hose to deliver 1-2 inches of water per session—this mimics natural rainfall and encourages deep root growth. Check soil moisture by pushing a finger 2 inches deep; if it’s dry, water again. Overwatering now will drown roots before they adapt.
Fertilize only after 6-8 weeks with a balanced, slow-release formula (10-10-10). Young plants need time to recover from transplant shock before feeding. Watch for yellowing leaves—this usually means overwatering, while brown edges signal underwatering. Adjust your schedule based on these cues. You’ll see new growth in 4-6 weeks if everything’s on track.
✂️ Step 5: Prune for Shape and Health
Prune newly planted shrubs by one-third to encourage bushier growth, focusing on dead or crossing branches. For trees, remove only damaged limbs—avoid heavy pruning in the first year. Use clean, sharp pruners and make cuts at a 45-degree angle just above a bud or branch collar. Seal larger cuts (over ½ inch) with pruning sealant to prevent disease entry.
Shape evergreens lightly to maintain their natural form, while deciduous shrubs can be pruned after flowering in late spring. The key is patience—avoid over-pruning, which stresses plants during establishment. After pruning, apply a layer of mulch to retain moisture and suppress weeds. Your landscape will fill in beautifully in 2-3 years with proper care.
Tips & tricks for perfect layered landscape planting
Here's what I learned after designing and planting dozens of layered landscapes—mistakes that cost me time and money, and the tricks that make all the difference.
Design First, Plant Second: Before digging a single hole, take a step back and visualize your mature plants. Use a garden hose to trace the outline of each plant's mature size—this prevents the classic rookie mistake of planting too close. I once had to remove a hydrangea after it outgrew its space, and trust me, that's a headache you don't want. For trees, remember they'll cast shade—place sun-loving shrubs on the south side of trees in the Northern Hemisphere (reverse for Southern Hemisphere). This simple adjustment saves future transplanting.
The Hole Truth About Planting Depth: The 10-15 minute root soaking in Step 3 is non-negotiable—it's the difference between plants that thrive and ones that struggle. But here's what nobody tells you: After placing your plant, check the depth by comparing the root flare (where roots meet trunk) to the surrounding soil line. The top of the root ball should sit just 1-2 inches above ground level, but the flare should be at soil level. I learned this the hard way when my first Japanese maple developed root rot from being planted too deep. Use a level tool to verify—it's worth the few extra minutes.
Staking Secrets: When staking taller trees in Step 3, angle the stake 45 degrees away from the prevailing wind (usually west in most climates) and tie it loosely with tree tie straps. The key is to give support without restricting growth—check ties every 3-4 weeks and loosen them as the tree strengthens. I've seen wire ties cut into bark, creating wounds that invite disease. For shrubs, skip staking entirely unless they're in high-wind areas; they'll establish better without it. The goal is temporary support, not permanent restraint.
Watering Wisdom: That initial 2-week watering schedule in Step 4 is critical, but here's the trick: water deeply but less frequently. Instead of light sprinkles, aim for 1-2 inches of water per session—this encourages roots to grow downward where moisture is abundant. I use a rain gauge to measure, and you'd be surprised how often people underestimate how much water they're actually delivering. For clay soil, water in the morning so excess drains away; for sandy soil, water in the evening to reduce evaporation. Adjust your schedule based on weather—if it rains, skip a watering day.
Pro Tips for Landscape Tree And Shrub Planting
- Here's what I learned after designing and planting dozens of layered landscapes—mistakes that cost me time and money,...
- Design First, Plant Second: Before digging a single hole, take a step back and visualize your mature plants. Use a ga...
- The Hole Truth About Planting Depth: The 10-15 minute root soaking in Step 3 is non-negotiable—it's the difference be...
Frequently asked questions
Got questions about transforming your yard with landscape tree and shrub planting? You’re not alone! Here are answers to the most common queries to help you plant with confidence.
When is the best time to plant trees and shrubs?
The ideal window is early spring (after the last frost) or fall (4-6 weeks before the first frost). These times allow roots to establish before extreme weather. For container-grown plants, you can plant year-round—just water deeply and mulch well. Pro tip: Avoid planting during heatwaves or freezing temps!
How much does professional planting cost compared to DIY?
Costs vary widely: DIY can run $50–$200 per plant (plus tools), while professional planting averages $500–$2,000+ for labor, equipment, and expertise. DIY saves money but requires research; pros ensure proper spacing, soil prep, and long-term health. Pro tip: Split costs with neighbors for bulk plant purchases!
What’s the best spacing for trees and shrubs in layered designs?
Spacing depends on mature size:
- Trees: 15–30 feet apart (small to large varieties).
- Shrubs: 3–10 feet apart (dwarf to tall).
- Layering tip: Place tallest plants (trees) at the back, mid-height shrubs in the middle, and low shrubs/ground covers in front for depth.
Why are my newly planted shrubs wilting or turning yellow?
Common causes include:
- Over/under-watering: Check soil moisture (1–2 inches deep).
- Poor drainage: Amend heavy clay soil with compost.
- Transplant shock: Mulch 2–3 inches deep and avoid fertilizing for 4–6 weeks.
- Pests/disease: Inspect leaves for damage or spots.
Are there low-maintenance alternatives to traditional shrubs?
Yes! Consider:
- Ornamental grasses (e.g., fountain grass, sedge): Drought-tolerant and textural.
- Evergreen perennials (e.g., boxwood, hemlock): Provide year-round structure.
- Native plants: Require less water/fertilizer (e.g., butterfly bush, serviceberry).
- Hedges: Try Ilex (holly) or Ligustrum for dense, green screens.
Wrapping up and next steps
Transforming your outdoor space with landscape tree and shrub planting isn’t just about aesthetics—it’s about creating a thriving, dynamic environment that evolves with the seasons! 🌿 By embracing layered design, you’ve unlocked the secrets to year-round structure, color, and harmony.
Whether you’re a seasoned gardener or a beginner, every well-placed plant contributes to a landscape that feels alive and intentional.
Now that you’re armed with the right materials, techniques, and insights, the next step is simple: start small and build confidence. Plant one layer at a time—perhaps a bold shrub as your foundation or a cluster of perennials for texture.
Before you know it, your vision will take root, and you’ll be the proud designer of a landscape that delights the senses all year long! 🌟