
Pruning
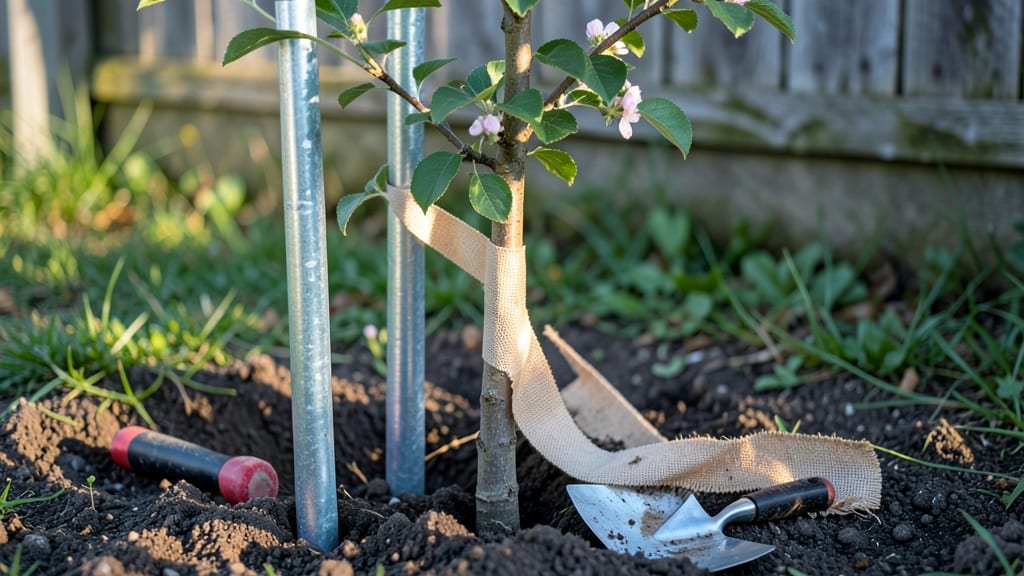
Staking a tree with just two stakes delivers perfect stability without overcomplicating the process. 🌳 I learned the hard way that improper staking can girdle young trunks or leave them wobbling—until I mastered this balanced approach that prevents both extremes.
The key lies in tension, angle, and knowing exactly when to remove support.
You’ll need two sturdy wooden or metal stakes (about 6 feet tall), soft tree ties or wide nylon straps, a mallet, and a level.
Most garden centers carry these basics, but the real trick is positioning the stakes at a 45-degree angle—not straight up—about 18 inches from the trunk on opposite sides. This creates a natural triangle of support that resists wind without constricting growth.
The result is a tree that stands firmly upright from day one, with roots encouraged to anchor naturally. You’ll notice the trunk thickens more evenly because the ties aren’t cutting into the bark, and the tree develops its own strength faster.
Most young trees need staking for 1-2 growing seasons—long enough to establish roots but not so long they become dependent.
This method works for newly planted fruit trees, shade trees, and even large shrubs. The same principles apply whether you’re dealing with a 6-foot sapling or a 12-foot specimen—just adjust stake length and tie spacing accordingly. Here’s how to do it right the first time.
📚 In This Guide
- What you need
- Instructions
- Tips and common mistakes
- Wrapping up and next steps
What you need
- ● 2 Stakes: Choose wooden, metal, or plastic stakes (1.5–2 inches in diameter and 3–4 feet long). Opt for galvanized or pressure-treated wood for longevity.
- ● Tree Tie or Soft Strap: A 3–4-foot-long, stretchable fabric tie (like Tree Ties or Velcro straps) to secure the tree without damaging the trunk.
- ● Mallet or Hammer: A rubber mallet (to avoid splitting stakes) or a small hammer for driving stakes into the ground.
- ● Measuring Tape: To ensure stakes are placed at the correct distance from the tree trunk.
- ○ Shovel or Auger: For digging holes (optional but helpful for firmer placement).
- ● Garden Gloves: Protect your hands from splinters or rough bark.
- ● Level or String Line: Ensures stakes are perfectly vertical for even support.
- ● Mulch or Soil: To cover stake holes and prevent erosion or pest access.
- ● Pruning Shears: If you need to trim any interfering branches before staking.
Step-by-Step instructions for staking trees with 2 stakes
Here's the method I've used for years—strong support without stunting growth.
🪴 Step 1: Choose the Right Stakes and Location
Use two 4-6 foot wooden or metal stakes—one on each side of the tree trunk, about 12-18 inches away. I prefer flexible fiberglass stakes because they won't rust and can bend slightly with wind. Drive them into the ground at a 45-degree angle so the tops point toward the tree's root flare.
Position the stakes 6-12 inches away from the trunk—too close and they'll damage roots when you tighten the ties later. The angle is key: it creates a natural triangle of support that prevents leaning. If your tree is in windy conditions, bury the stakes 12-18 inches deep for maximum stability.
🌱 Step 2: Attach the Stakes to the Tree
Wrap the tree trunk with soft tree ties or wide fabric strips—never wire or anything that can cut into the bark. I like 1-inch wide fabric ties because they're gentle and stretch slightly as the tree grows. Secure one tie around the trunk at head height (about 3 feet up), then loop it around the top of each stake.
Cross the ties at the top of the stakes and secure them with a slip knot—this lets the tree move slightly with wind while staying upright. The ties should be snug but not tight; you can test by trying to move the tree trunk a little. If it budges easily, tighten just enough to stop movement without restricting growth.
✂️ Step 3: Create a Support Triangle
Add a third tie 12-18 inches below the first one to create a stable triangle. This prevents the tree from rocking or leaning to one side. The lower tie should connect the stakes at their base, forming an "A" shape with the top tie. Think of it like a tripod—three points of contact distribute pressure evenly.
Check the tension weekly for the first month. As the tree grows, the ties will loosen naturally. I adjust mine every 2-3 weeks during the first year, then remove them completely by the second growing season. The goal is to give the tree just enough support to stand firm while letting its roots develop strength.
💧 Step 4: Monitor and Adjust as the Tree Grows
Watch for signs the stakes are too tight—yellowing leaves or stunted growth means the ties are restricting the trunk's natural movement. If you see this, loosen the ties immediately. The tree should sway slightly in the wind; if it's completely rigid, it's not getting the movement it needs to develop strong roots.
Remove the stakes when the tree can stand on its own—usually after 1-2 years, depending on species. I test stability by gently pushing the trunk; if it doesn't wobble, it's ready. For young fruit trees or ornamental varieties, you might need to leave them in for a third season, but always remove them before winter to prevent frost damage.
Tips & tricks for perfect tree staking
These practical insights will help you avoid common mistakes and ensure your young trees grow strong and straight.
Stake Placement Precision: In Step 1, when positioning your 4-6 foot stakes, imagine forming a triangle with the tree trunk. The 45-degree angle isn't just about looks—it creates optimal leverage against wind. For young trees in exposed areas, I recommend burying the stakes an extra 2-3 inches deeper than the standard 12-18 inches. This extra depth prevents stakes from pulling out when strong winds hit, especially during the first critical growing season.
Tie Tension Technique: The slip knot in Step 2 is your secret weapon. When you test the trunk's movement, aim for just enough resistance to prevent leaning—think of it like how a hammock sways but doesn't break. I've learned the hard way that too-tight ties can actually cause bark damage as the tree grows. If you notice any indentations from the ties after a few weeks, loosen them immediately. The tree should move about 1-2 inches in any direction when gently pushed.
Triangle Geometry: That third tie in Step 3 isn't just decorative—it's what turns your two-stake system into a true support structure. The "A" shape with the lower tie creates a stable base, much like how a three-legged stool never wobbles. When checking tension weekly, run your hand along the ties to feel for any rough spots. If the fabric ties start to fray after a few months, replace them before they lose their holding power. This simple check can prevent your entire support system from failing.
Growth Monitoring: The 2-3 week adjustment schedule in Step 4 is crucial because trees grow faster than you might expect. I've seen young trees double in height within a single growing season! When you remove stakes after 1-2 years, do it gradually—loosen the ties completely first, then remove the stakes over several days. This gradual approach prevents shock to the tree's developing root system. For fruit trees, I often leave stakes in for a third season if the tree shows any signs of leaning during summer storms.
Pro Tips for Stake A Tree With 2 Stakes
- These practical insights will help you avoid common mistakes and ensure your young trees grow strong and straight.
- Stake Placement Precision: In Step 1, when positioning your 4-6 foot stakes, imagine forming a triangle with the tree...
- Tie Tension Technique: The slip knot in Step 2 is your secret weapon. When you test the trunk's movement, aim for jus...
Frequently asked questions
Got questions about staking trees with just two stakes? You’re not alone—this method is simple but can feel tricky at first. Below, we’ve rounded up the most common queries to help you stake like a pro.
How deep should the stakes go for a young tree?
Stakes should be buried one-third of their length into the soil, about 12–18 inches deep for most young trees. This ensures stability without restricting root growth. Use a mallet to tap them gently—no need to force it! For larger trees, opt for deeper stakes (up to 24 inches) or wider support.
When is the best time to stake a newly planted tree?
Stake your tree immediately after planting to prevent wind damage while roots establish. However, avoid staking in extreme weather (like storms or heavy rain). If planting in fall, remove stakes in early spring to encourage natural trunk strength. Pro tip: Check stakes monthly—loosen ties if the tree outgrows them!
Can I reuse stakes from last year?
Yes, but inspect them first! Clean off dirt, check for cracks or rust, and ensure they’re still sturdy. If stakes are bent or splintered, replace them. For long-term use, treat wooden stakes with a non-toxic preservative to extend their life. Metal stakes (like rebar) last forever but may need rust checks.
What if my tree leans even after staking?
Leaning can happen if stakes are too loose, ties are too tight (restricting growth), or the tree’s root ball isn’t centered. Adjust immediately:
- Loosen ties to allow slight movement (trees need to sway naturally).
- Rebury stakes deeper or add a third temporary stake diagonally for support.
- Check for soil settling—add mulch to stabilize the base.
Are there alternatives to traditional stakes?
Try these low-cost, eco-friendly options:
Alternative
Best For
How to Use
Bamboo poles
Lightweight trees
Split and tie like stakes; biodegradable!
Tree branches (from pruning)
Emergency support
Soak in water first, then stake like wood.
Plastic tree ties + rocks
Windbreaks for small trees
Anchor ties to buried rocks for flexibility.
Wrapping up and next steps
Staking a tree with just two stakes is simpler than you think—and it’s a game-changer for young saplings! By following this foolproof method, you’ll ensure steady growth, prevent wind damage, and give your tree the best start in life. 🌱✨
Now that you’re armed with the know-how, grab those stakes and get planting! Once your tree is secure, don’t stop there—monitor its progress and adjust as needed. Happy gardening!