
Planting
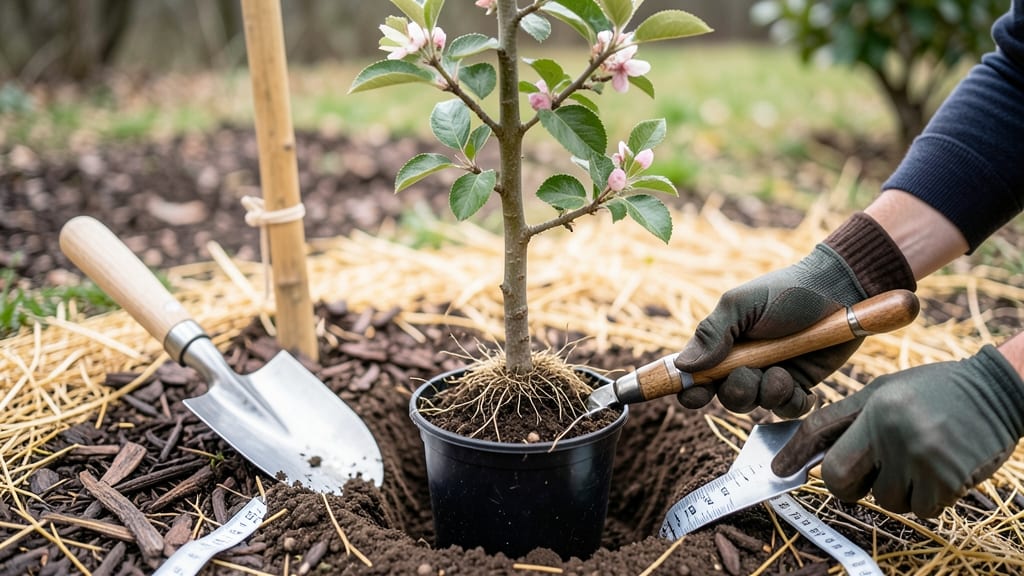
Planting an apple tree is one of those rare gardening moments where patience pays off in spades—literally. 🌳 Three years from now, that bare-root seedling could be heavy with fruit, but only if you nail the first steps: choosing the right spot, prepping the soil, and planting with confidence.
I’ve watched my own trees go from awkward saplings to productive powerhouses, and the difference between success and struggle starts right here.
The secret isn’t fancy tools or expensive soil—it’s sunlight, drainage, and a little elbow grease. You’ll need a sunny patch (at least 6 hours of light daily), loose soil that drains well, and a hole twice as wide as the roots.
Bare-root trees need special care: soak those roots before planting, spread them out like a starfish, and bury the graft union just above soil level. Water deeply right after, then mulch to keep moisture locked in.
What you’ll get is a tree that grows stronger every season, with fewer pests and better fruit set. The first year is all about roots—no fruit, but thick stems and lush leaves.
By year three, you’ll be picking apples, and the neighbors will be asking how you did it. (Spoiler: it’s not magic, just method.)
This works for backyard orchards, container growing (with dwarf varieties), or even urban lots. Whether you’re planting in spring or fall, the steps stay the same—just adjust your timeline. Let’s get that tree in the ground so you can start counting down to harvest time.
📚 In This Guide
- What you need
- Instructions
- Tips and common mistakes
- Wrapping up and next steps
What you need
- ● Apple tree sapling (choose a dwarf, semi-dwarf, or standard variety based on space—dwarf trees are ideal for small yards!)
- ● Shovel (a garden spade or digging shovel with a 12–18" blade for precision)
- ● Garden fork or tiller (to loosen compacted soil, especially if planting in clay or heavy ground)
- ● Pruning shears (sterilized, with sharp blades for trimming roots or branches)
- ● Organic compost or well-aged manure (5–10 gallons, mix with native soil for nutrients)
- ● Mulch (3–4 inches of wood chips, straw, or pine bark to retain moisture and suppress weeds)
- ○ Tree stake (optional but recommended) (1–2 bamboo stakes or metal stakes, 4–6 feet tall)
- ● Tie-down straps or soft cloth strips (to secure the tree to the stake without damaging the trunk)
- ● Watering can or hose with a gentle spray nozzle (for deep, slow watering)
- ● Garden hose or soaker hose (for post-planting hydration)
- ● Root stimulator or mycorrhizal fungi (boosts root growth—mix into planting hole)
- ● Slow-release fertilizer (balanced 10-10-10 or organic options like fish emulsion)
- ● Tree guard or wire cage (protects young trees from deer or rabbits)
- ● Soil test kit (to check pH and nutrient levels—ideal range: 6.0–7.0)
- ● Garden gloves (to keep hands clean and protect from thorns)
Step-by-step guide to planting an apple tree
Here's the straightforward method I've used to establish healthy, productive apple trees—no guesswork involved.
🪴 Step 1: Choose the Right Tree and Location
Select a dwarf or semi-dwarf variety for smaller spaces—these mature at 6-12 feet tall and bear fruit faster than standard trees. Look for bare-root trees in early spring when they're dormant, or container-grown trees anytime. Avoid standard-sized trees unless you have ample yard space.
Find a spot with full sun (6-8 hours daily) and well-draining soil. Apple trees need room to spread: 15-20 feet apart for standard trees, 10-12 feet for semi-dwarfs. Test your soil's pH—apples thrive in slightly acidic soil (6.0-6.5). If yours is too alkaline, amend with sulfur or peat moss before planting.
🌱 Step 2: Prepare the Planting Hole and Amend Soil
Dig a hole twice as wide as the tree's root ball but no deeper—planting too deep can suffocate roots. Loosen the soil at the bottom with a shovel to encourage root growth. If your soil is heavy clay, mix in 3-4 inches of compost at the hole's base to improve drainage.
For bare-root trees, soak the roots in lukewarm water for 1-2 hours before planting. This jumpstarts hydration and prevents transplant shock. If using a container-grown tree, gently remove it from the pot and loosen any circling roots with your fingers. Don't tease roots excessively—just enough to encourage outward growth.
☀️ Step 3: Plant at the Correct Depth and Stake for Support
Place the tree in the hole so the graft union (the bump where the scion was attached) sits 2-4 inches above soil level. This prevents roots from growing over the graft, which can produce unwanted suckers. Fill the hole halfway with soil, then water deeply to settle it and remove air pockets.
Drive a 4-6 foot stake into the ground 3-4 inches from the tree, angled slightly away from prevailing winds. Tie the tree to the stake with soft tree ties (not wire or twine), leaving room for the trunk to grow. Backfill the hole completely, mounding soil slightly at the base to encourage roots to spread outward. Water again until the soil is evenly moist 6-8 inches deep.
💧 Step 4: Mulch and Water for Establishment
Spread 3-4 inches of mulch (wood chips or straw) in a 3-foot diameter circle around the tree, keeping it 6 inches away from the trunk to prevent rot. Mulch retains moisture and regulates soil temperature. Water the tree deeply once a week for the first month, then taper to every 2 weeks once established—unless your area experiences extreme heat or drought.
Watch for wilting leaves or soil pulling away from the pot as signs it's time to water. Avoid overhead watering, which can spread disease. Instead, use a soaker hose or drip irrigation at the base. Fertilize lightly with balanced 10-10-10 in early spring only—too much fertilizer stresses young trees.
⏰ Step 5: Prune and Care for the First Three Years
Prune in late winter or early spring before buds swell, removing dead, crossing, or inward-growing branches. Aim to create an open-center shape with a strong central leader. For dwarf trees, limit pruning to light shaping—they're naturally compact. Disinfect pruning tools with rubbing alcohol between cuts to prevent disease spread.
Thin fruit in late spring (when apples are golf-ball sized) to 6-8 inches apart on each branch. This ensures larger, higher-quality fruit and reduces strain on the tree. Apply dormant oil spray in late fall to control pests like mites and scale. By year three, your tree should be fully established and ready to produce its first harvest—if you've followed these steps carefully.
Tips & tricks for planting a thriving apple tree
These simple strategies will help you avoid common mistakes and give your apple tree the best possible start.
Location Intelligence: The 6-8 hours of full sun requirement is non-negotiable—apples won't thrive in partial shade. I've seen trees in my own yard struggle when planted near taller shade trees. Check your yard's sunlight patterns for at least 6 hours of direct sun during the growing season, and avoid spots where larger trees or buildings cast shadows after noon.
Root Preparation: That 1-2 hour soaking for bare-root trees isn't just about hydration—it's about waking up the roots. I learned the hard way when I skipped this step and my first tree took weeks to establish. Use lukewarm water (not cold) and check the roots periodically—they should feel plump and flexible, not limp. For container-grown trees, gently loosen circling roots with your fingers, but don't overdo it—you're encouraging outward growth, not creating a root ball mess.
Planting Depth Secret: The 2-4 inches above soil level for the graft union is crucial for preventing suckers. I've seen homeowners bury this completely, which leads to vigorous but unwanted growth below the graft. Use a small stake or marker to note the graft union's position before backfilling. If you're unsure, err on the side of slightly higher placement—you can always add soil later if needed.
Watering Wisdom: The first month's weekly deep watering is about establishing roots, not just keeping leaves green. I recommend using a moisture meter to verify that water reaches 6-8 inches deep. If you're in a drought-prone area, consider installing a simple drip irrigation system—it delivers water right to the roots without waste. And remember, mulch isn't just decoration: that 3-4 inch layer helps retain moisture while protecting the trunk from rot.
Pro Tips for Plant An Apple Tree Step By Step
- These simple strategies will help you avoid common mistakes and give your apple tree the best possible start.
- Location Intelligence: The 6-8 hours of full sun requirement is non-negotiable—apples won't thrive in partial shade.
- Root Preparation: That 1-2 hour soaking for bare-root trees isn't just about hydration—it's about waking up the roots.
Frequently asked questions
Got questions about planting your apple tree? You’re not alone!
Here are answers to the most common concerns—from timing to troubleshooting—to help you grow confidently.
When is the best time of year to plant an apple tree?
Plant your apple tree in early spring (March–April) or late fall (October–November) when the soil is workable but not frozen. Avoid extreme heat or drought—root systems need time to establish before summer stress. If planting in containers, spring is ideal to give roots a full growing season.
Can I plant an apple tree from a grocery store apple?
Nope! Store-bought apples are treated to prevent sprouting and often carry diseases. Instead, buy a certified disease-free nursery tree (bare-root or potted) for the best chance at healthy growth. Look for varieties suited to your climate zone—local nurseries are a great resource!
How long does it take for an apple tree to bear fruit?
With proper care, most apple trees produce fruit in 3–5 years. Dwarf varieties may fruit sooner (as early as 2 years), while standard trees can take 5+ years. Patience pays off—young trees focus on root and canopy growth first! Pro tip: Thin fruit in the first few years to encourage larger, healthier apples.
What should I do if my new apple tree’s leaves are yellowing?
Yellow leaves often signal overwatering, underwatering, or nutrient deficiencies. Check soil moisture (it should be damp but not soggy) and adjust watering. Yellowing between veins may mean iron deficiency—apply chelated iron or compost. Pests like aphids can also cause issues; spray with soapy water if needed. Monitor closely!
Do apple trees need a pollinator to produce fruit?
Most apple trees are self-pollinating but benefit from a second variety nearby for better fruit set. If planting just one tree, choose a self-fertile variety (like ‘Gala’ or ‘Fuji’). For guaranteed pollination, plant two compatible trees within 50 feet. Check your local extension service for recommended pairings!
Bonus Tip:
Use a mulch ring (wood chips or straw) around your tree to retain moisture and suppress weeds—just keep it 3–4 inches away from the trunk to avoid rot.
Wrapping up and next steps
Planting an apple tree is a rewarding journey that blends patience with the joy of nurturing life.
By following these step-by-step instructions—from selecting the right variety to pruning and caring for your young tree—you’re setting the stage for a future harvest of crisp, delicious apples. 🌱🍏 Remember, every expert gardener started with their first sapling, so embrace the learning process and celebrate small victories along the way.
Now that you’re ready to dig in, why not take the next step? Research local apple varieties that thrive in your climate, or explore companion plants that can enhance your tree’s growth. Happy planting—your orchard awaits! 🌟