
Pruning
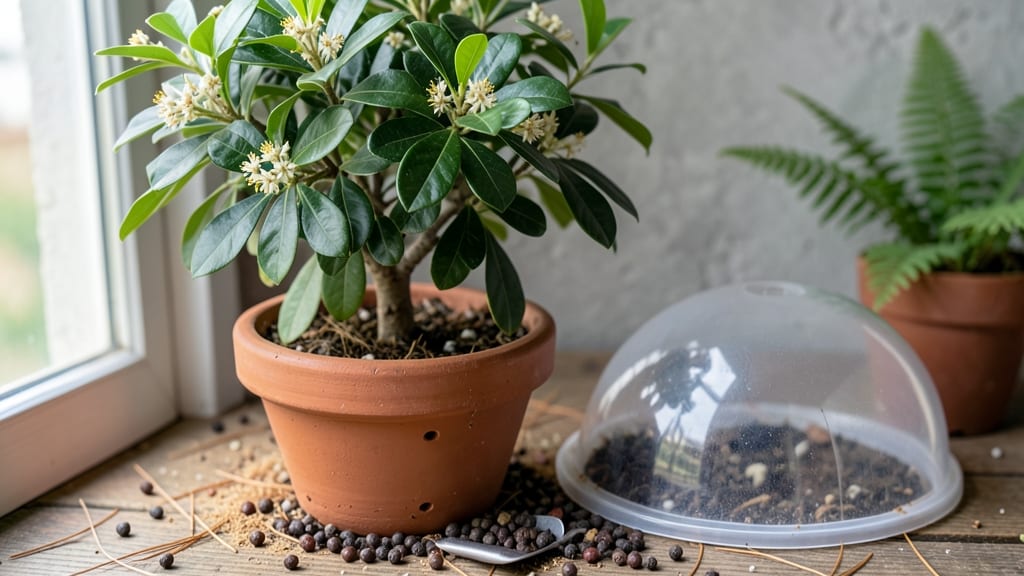
Growing an allspice tree from seeds unlocks a kitchen game-changer. 🌿 The warm, clove-like aroma of its leaves and berries—used for centuries in Caribbean and Latin American cooking—starts with a simple seed.
My first attempt took patience, but now I grow them reliably each spring, and the harvest transforms my pantry.
The secret lies in mimicking tropical conditions: warm soil, high humidity, and indirect light. You'll need a well-draining mix (equal parts peat, perlite, and sand), a humidity dome or plastic wrap, and a spot that stays between 70-80°F—no cold drafts.
Germination can take 2-4 weeks, so resist the urge to check daily. Patience here separates thriving seedlings from disappointment.
Once sprouted, the real magic begins. Tiny leaves appear with that signature allspice scent, and within a year, you'll have a compact tree (3-6 feet tall) producing fragrant foliage perfect for soups, marinades, or drying.
The berries take longer—3-5 years—but their complex flavor makes the wait worthwhile. I use mine in everything from jerk chicken to homemade root beer.
For faster results, try grafting onto existing citrus trees (advanced gardeners only). Even in containers, these trees thrive in sunny patios, and their evergreen foliage adds year-round interest. Here’s how to get started without losing your cool—or your seeds.
📚 In This Guide
- What you need
- Instructions
- Tips and common mistakes
- Wrapping up and next steps
What you need
- ● Mature allspice tree (Pimenta dioica): Ensure it’s at least 3–5 years old for optimal seed production. 🌿
- ● Ripe allspice berries: Harvest when fully dark purple/black and slightly soft to the touch (aim for late fall to winter). Quantity: ~1–2 lbs (450–900g) for a good yield.
- ● Sharp pruning shears or scissors: For cleanly harvesting berries without damaging the tree.
- ● Large bowl or bucket: To collect fallen berries or freshly picked ones.
- ● Colander or fine mesh strainer: For rinsing and draining berries.
- ● Clean kitchen towel or paper towels: For patting berries dry.
- ● Baking sheet or tray: Line with parchment paper for drying.
- ● Oven or dehydrator: Set to low heat (170–190°F / 77–88°C) for gentle drying.
- ● Small bowl or jar: For separating seeds from dried berry pulp.
- ○ Fine-mesh sieve or sifter: To sift out seeds from pulp (optional but helpful).
- ● Air-tight glass jars or containers: With tight-sealing lids (e.g., mason jars, spice tins). Size: 4–8 oz (120–240g) capacity per jar.
- ○ Optional: Food-grade silica gel packets: For extra moisture absorption during storage.
- ● Labeling tags and marker: To label jars with the harvest date.
- ● Mortar and pestle: If you plan to grind some seeds into powder later.
- ● Patience: Drying seeds properly takes 1–2 weeks—don’t rush it!
- ● Dry, well-ventilated space: For storing jars away from heat, light, or humidity.
- ○ Basic knife skills (optional): If you prefer hand-picking seeds from dried berries instead of sifting.
Step-by-Step guide to extracting and storing allspice seeds
Here’s how to harvest whole allspice berries, extract the seeds, and store them properly for bold, year-round flavor.
🌱 Step 1: Harvest Ripe Allspice Berries
Wait until the berries turn a deep purple-black and feel soft when gently squeezed—they’ll release their seeds easily. Harvest in late fall when the fruit is fully mature but before it splits open on the tree. Use clean, sharp pruning shears to snip clusters, leaving stems intact to preserve the seeds.
Spread the berries on a clean towel or paper towels in a single layer. Let them air-dry in a warm, dry place for 3-5 days, turning occasionally. The berries should wrinkle slightly and darken further—this signals they’re ready for seed extraction. Avoid direct sunlight, which can scorch the delicate skins.
✂️ Step 2: Extract Seeds from Dried Berries
Once the berries are completely dry, place them in a clean, dry bowl. Use a rolling pin or mortar and pestle to gently crush them—just enough to break open the skins without damaging the seeds inside. I like to work in small batches to avoid over-crushing. The seeds will pop free as the berries split apart.
Sift the mixture through a fine-mesh strainer to separate the seeds from the pulp. Discard the fibrous pulp, but save the seeds—they’re the heart of your spice. You’ll need about 4-5 berries per teaspoon of seeds, so plan accordingly if you’re aiming for a specific yield. Store the seeds in a dry container until ready for further processing.
🌿 Step 3: Dry and Store Whole Allspice Seeds
Spread the extracted seeds on a baking sheet lined with parchment paper. Place them in a low oven (170°F) for 1-2 hours, stirring occasionally, until they’re completely dry and brittle. This step ensures they’ll keep their flavor and prevent mold during storage. Alternatively, air-dry them for 2-3 days in a warm, dry place with good airflow.
Once fully dried, transfer the seeds to an airtight glass jar or vacuum-sealed bag. Store in a cool, dark pantry—they’ll retain their flavor for up to 2 years. For best results, label the jar with the harvest date. The seeds should feel hard and dry to the touch; if they’re still slightly soft, return them to the oven or air-dry for another day.
💧 Step 4: Optional Grounding for Immediate Use
If you prefer ground allspice, use a clean coffee grinder or spice mill to pulverize the dried seeds. Work in small batches to avoid overheating the grinder, which can dull the flavor. Store the ground spice in the same airtight container as the whole seeds—it’ll lose potency faster but still keep well for 6-12 months. For a fresher taste, grind only what you need just before using.
Here’s the thing—whole seeds release flavor more gradually than ground spice, so they’re ideal for slow-cooked dishes, marinades, or baking. If you’re making a large batch of mulled wine or spiced rum, whole seeds infuse better over time. For quick dishes, a pinch of ground allspice works perfectly.
⏰ Step 5: Test and Rotate Storage
After 6 months, open the jar and give the seeds a sniff. If they still smell rich and aromatic, they’re good to use. If the scent is faint or musty, it’s time to replace them. I like to split my harvest into two jars: one for immediate use and one for long-term storage. This way, I always have fresh seeds on hand while saving the rest for later.
For a flavor boost, toast the seeds in a dry skillet over low heat for 2-3 minutes before grinding or using whole. This deepens their warmth and complexity—perfect for holiday baking or spiced beverages. Just don’t walk away; they burn faster than you’d think!
Tips & tricks for perfect allspice tree seed processing
These little-known techniques will help you maximize flavor and efficiency when working with allspice berries.
Harvest Timing Secret: The 3-5 day drying period in Step 1 is non-negotiable for proper seed release. I've found that berries harvested in the morning have slightly more moisture to work with—this makes the crushing process in Step 2 easier. Place them in a single layer with stems facing up; this creates better airflow around the berries and prevents uneven drying. The wrinkling you're looking for should appear on day 3-4, not before.
Seed Extraction Technique: When crushing the dried berries in Step 2, work in batches no larger than a handful. The key is to break just the outer skin while leaving the seeds intact—think of it like cracking walnuts. If you hear seeds popping, you've gone too far. A fine-mesh strainer works best for separation, but if you don't have one, a clean kitchen towel works in a pinch. Just shake it gently over a bowl to catch the seeds while the pulp falls through.
Drying Strategy: The 170°F oven method in Step 3 is foolproof, but if you choose air-drying, place your seeds on a wire rack over a baking sheet to catch any moisture drips. Stir them every 8 hours to ensure even drying. I've had success with a small fan blowing gentle airflow across them—just don't point it directly at the seeds. The goal is complete dryness without any moisture remaining; seeds should feel brittle enough to snap between your fingers.
Storage Wisdom: For the 2-year shelf life mentioned in Step 3, use glass jars with rubber seals rather than plastic containers. The rubber prevents moisture seepage while allowing the jar to seal properly. If you're storing multiple harvests, keep them in separate containers—mixing years can dilute the flavor profile. The cool, dark pantry condition is critical; even indirect light can degrade the essential oils over time.
Pro Tips for Allspice Tree Seeds
- These little-known techniques will help you maximize flavor and efficiency when working with allspice berries.
- Harvest Timing Secret: The 3-5 day drying period in Step 1 is non-negotiable for proper seed release.
- Seed Extraction Technique: When crushing the dried berries in Step 2, work in batches no larger than a handful.
Frequently asked questions
Got questions about allspice tree seeds?
You’re not alone! Whether you're harvesting, storing, or using them, here are some of the most common queries—and their answers—to help you navigate the process like a pro.
How do I know when allspice berries are fully ripe for seed extraction?
Allspice berries turn from green to deep purple-black when fully ripe—usually in late fall or winter, depending on your climate. Gently squeeze a berry: if it’s soft and slightly squishy (like an overripe plum), it’s ready for harvesting. Pro tip: Wait until after the first frost for the best flavor and seed quality!
How long do allspice seeds stay fresh if stored properly?
When stored correctly—in an airtight container away from light, heat, and moisture—whole allspice seeds can retain their flavor for 2–3 years. For peak potency, use them within 12–18 months. Fun fact: Ground allspice loses flavor faster, so keep it whole when possible!
Can I substitute allspice seeds for ground allspice in recipes?
Crush whole seeds in a mortar and pestle or spice grinder for a fresher, more aromatic flavor. For a 1:1 swap, use 1 teaspoon ground allspice = 1/4 teaspoon whole seeds (crushed). Warning: Whole seeds can be overpowering—start small and adjust to taste!
What should I do if my allspice seeds develop mold or pests during storage?
If you spot mold (fuzzy spots) or pests (tiny bugs or webbing), discard the batch immediately—allspice seeds can’t be safely salvaged once contaminated. To prevent this, store seeds in a glass jar with a tight seal and add a bay leaf or silica packet to deter pests. Quick fix: Freeze seeds for 48 hours before storing to kill any hidden eggs!
Are allspice tree seeds safe to eat raw, or do they need to be cooked?
Yes! Whole allspice seeds are edible raw and pack a warm, slightly sweet-piney flavor. They’re often used in jerky, pickles, or teas, but cooking (like in stews or marinades) can mellow their intensity. Caution: Avoid overconsumption—large amounts may cause mild stomach upset.
Wrapping up and next steps
Harvesting and storing allspice tree seeds is a rewarding way to preserve nature’s bold, warm flavors for your favorite recipes—whether it’s mulled wine, jerk seasoning, or cozy baked goods.
With the right tools and techniques, you can turn fresh seeds into a pantry staple that lasts for years. Now’s the perfect time to experiment!
Ready to elevate your spice game? Start small—try extracting seeds from just a few ripe berries, then scale up as you master the process. Happy spicing! 🌿✨