
Propagation
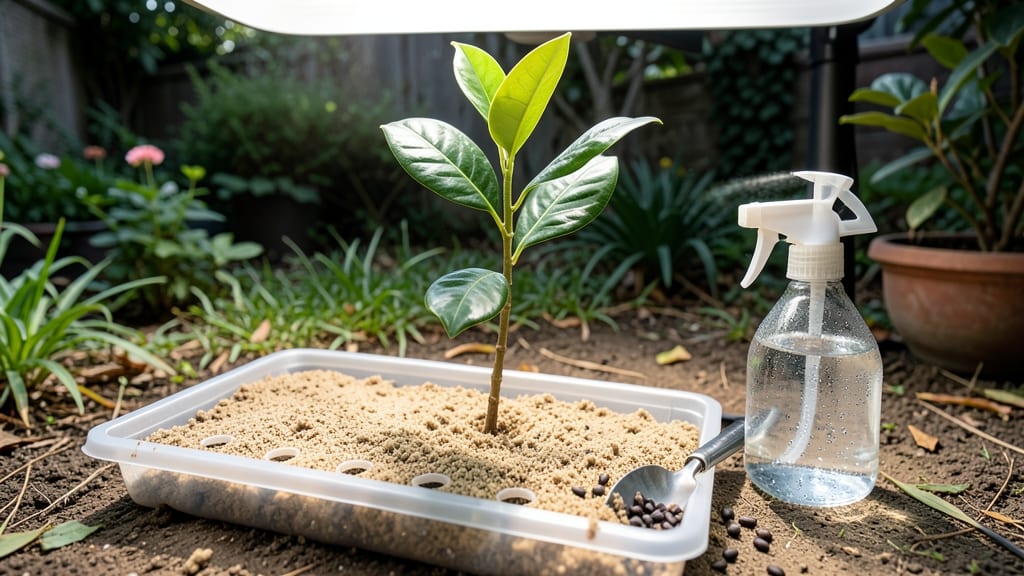
Growing a clove tree from seeds feels like unlocking a tropical treasure chest—except most of the time, those seeds take months (or never) to sprout. 🌱 I’ve wrestled with this myself, and after testing different germination tricks, I’ve found ways to coax those stubborn seeds into action faster than the usual 3-6 month wait.
The secret isn’t just patience—it’s mimicking the warm, humid conditions of their native spice islands. You’ll need a heat mat, a clear plastic bag to trap moisture, and a little science to break their dormancy.
Most gardeners avoid seeds entirely and use cuttings instead, but there’s something thrilling about watching a tiny clove seedling push through the soil for the first time.
By month 3, you’ll have a sturdy seedling with glossy leaves, ready to transition to individual pots. The payoff? A fragrant, slow-growing tree that might one day produce its own cloves—though don’t expect that for at least 8-10 years.
The real reward is seeing your tropical houseplant thrive where store-bought seedlings often fail.
This method works best in warm climates or greenhouses, but even indoor growers can succeed with the right setup. Here’s how to skip the guesswork and get those seeds sprouting faster than you’d expect.
📚 In This Guide
- What you need
- Instructions
- Tips and common mistakes
- Wrapping up and next steps
What you need
- ● Clove seeds: Fresh, high-quality seeds (10–20 seeds for best results). Look for organic or specialty seed suppliers for optimal germination rates.
- ● Well-draining potting mix: A blend of cactus/succulent mix (60%) + perlite or coarse sand (40%) to prevent root rot. Avoid heavy garden soil!
- ● Small seed trays or pots: 2–3 inch (5–7.5 cm) pots or a seed-starting tray with drainage holes (1–2 seeds per pot).
- ● Plastic wrap or humidity dome: To create a mini greenhouse effect and retain moisture.
- ● Spray bottle: For gentle watering (avoid soaking the soil).
- ● Grow lights or sunny windowsill: Clove seeds thrive in warmth (75–85°F / 24–29°C) and bright, indirect light.
- ○ Heating mat (optional but helpful): A seedling heat mat set to 80–85°F (27–29°C) can speed up germination.
- ● Small hand trowel: For gently planting seeds without crushing them.
- ● Fertilizer (balanced, water-soluble): Like 5-5-5 or 10-10-10 (diluted to half-strength) once seedlings sprout.
- ● Pruning shears: For trimming leggy seedlings later.
- ● pH meter or testing kit: Ideal soil pH for clove trees is 5.5–6.5 (slightly acidic).
- ● Label markers: To track planting dates and seed varieties.
Step-by-step instructions for growing clove trees from seeds
Here's how I get clove seeds sprouting reliably—no guesswork, just proven techniques.
🌱 Step 1: Prepare Seeds for Faster Germination
Clove seeds have a hard outer shell that slows sprouting. Soak them in warm water (85-90°F) for 24-48 hours to soften the coating. I use a small bowl and change the water every 8 hours to prevent mold. The seeds are ready when they sink to the bottom—this means the shell has softened enough for roots to break through.
After soaking, spread the seeds on a paper towel and place them in a sealed plastic bag. Store them in a warm, dark place (75-80°F) for 3-5 days. Check daily for moisture—if the towel dries out, mist it lightly. You'll see tiny white roots emerging from the seeds; this is your signal they're ready to plant.
💧 Step 2: Plant Seeds in Moist, Warm Soil
Use a light, well-draining potting mix (I blend equal parts peat moss, perlite, and coconut coir). Fill small pots or seed trays with the mix, leaving ½ inch of space at the top. Moisten the soil until it's damp but not soggy—you should be able to squeeze a handful without water dripping out.
Plant the pre-sprouted seeds ½ inch deep, spacing them 1 inch apart. Cover them lightly with soil and mist the surface gently. Place the pots in a warm, humid environment (75-85°F). I use a seedling heat mat set to 80°F and cover the pots with plastic wrap to trap warmth and moisture. Keep the soil consistently moist—never let it dry out completely.
☀️ Step 3: Provide Indirect Light and Monitor Growth
Once the seeds sprout (usually within 7-14 days), remove the plastic wrap immediately to prevent damping-off. Place the seedlings in bright, indirect light—direct sun will scorch their delicate leaves. A south-facing window with sheer curtains works well, or use a grow light 4-6 inches above the plants for 12-14 hours daily.
Watch for the first set of true leaves (not the initial seed leaves) to appear. This usually takes 4-6 weeks after planting. When the seedlings reach 3-4 inches tall and have 3-4 true leaves, they're ready for their first transplant into slightly larger pots (3-4 inches wide). Harden them off by gradually exposing them to outdoor conditions for 1-2 hours daily over 10 days before moving them permanently.
🌿 Step 4: Transplant and Care for Young Clove Trees
Choose a well-draining, slightly acidic soil (pH 5.5-6.5) for your clove trees. Plant them in pots 6-8 inches wide with drainage holes, or directly in the ground if you're in a tropical or subtropical climate. Space them 6-8 feet apart if planting outdoors. Water deeply after transplanting to help the roots settle.
Clove trees thrive in partial shade to full sun (6-8 hours daily), but avoid harsh afternoon sun in hot climates. Keep the soil consistently moist but not waterlogged—cloves hate soggy roots. Fertilize lightly every 2 months with a balanced, water-soluble fertilizer (10-10-10) during the growing season. You'll see faster growth and stronger stems when you maintain this routine.
Tips & tricks for fast clove tree germination
Here's what nobody tells you about getting those stubborn clove seeds to sprout reliably.
The Soak Test: Don't just eyeball when your clove seeds are ready after the 24-48 hour soak—wait until they sink to the bottom of the bowl. Floating seeds need more time; only the sunk ones have softened shells ready for root growth. I've wasted weeks waiting for seeds that weren't properly prepped!
Temperature Matters: That 75-80°F range during the 3-5 day dark period is critical. If your home runs cooler, place the sealed bag on top of your fridge (not inside) or use a seedling heat mat. I learned this the hard way after my first batch failed in a 68°F kitchen—patience won't help if it's too cold.
Light Transition Secret: When you remove the plastic wrap after sprouting (7-14 days), don't rush to bright light immediately. Start with gentle morning sun through sheer curtains for the first 24 hours to prevent leaf scorch. I've seen seedlings develop brown patches when moved straight to full sun too soon.
Harden Off Gradually: The 1-2 hour daily outdoor exposure during hardening should increase by 30 minutes every 3 days. Watch for wilting—the plant's way of saying "too much too soon." I once lost three seedlings by doubling exposure time too quickly. Better to take 10 days than lose your investment!
Pro Tips for Grow Clove Tree From Seeds
- Here's what nobody tells you about getting those stubborn clove seeds to sprout reliably.
- The Soak Test: Don't just eyeball when your clove seeds are ready after the 24-48 hour soak—wait until they sink to t...
- Temperature Matters: That 75-80°F range during the 3-5 day dark period is critical. If your home runs cooler, place t...
Frequently asked questions
Got questions about growing your own clove tree from seeds? You’re not alone! Here are answers to the most common concerns—so you can grow with confidence.
How long does it take for clove tree seeds to germinate?
Clove tree seeds (Syzygium aromaticum) can take anywhere from 2 to 6 months to germinate—patience is key! Warmth (70–85°F) and consistent moisture speed up the process. Soak seeds overnight before planting to soften the hard outer shell and improve sprouting odds. Pro tip: Use a heat mat if your climate is cool.
What’s the best temperature for germinating clove seeds?
Clove seeds thrive in warmth (70–85°F or 21–29°C). If your home is cooler, place the seed tray near a sunny window or use a seedling heat mat. Avoid cold drafts or fluctuating temps—consistency is critical. A mini greenhouse or plastic wrap tent can also boost humidity and warmth. Too cold? Try a sunny windowsill with a heat source.
Can I grow a clove tree indoors, or does it need outdoor conditions?
Yes! Clove trees can start indoors in pots (6+ inches deep) with well-draining soil and bright, indirect light. However, they love humidity and warmth, so mimic tropical conditions with a humidifier or pebble tray. Once established (after 1–2 years), transplant outdoors in USDA zones 10–12—they’re sensitive to frost. Indoor growers: Rotate pots weekly for even light exposure.
Why aren’t my clove seeds sprouting? Troubleshooting tips?
Common issues and fixes:
- Hard seed coat: Scratch the seed lightly with sandpaper or soak in warm water for 48 hours.
- Poor drainage: Use a mix of peat moss + perlite to prevent rot.
- Low humidity: Cover seeds with plastic wrap or a humidity dome.
- Cold temps: Move seeds to a warmer spot (e.g., near a heater vent).
If seeds stay dormant after 6 months, they may be non-viable—try fresh seeds! Check for mold or soft seeds—discard those immediately.
Are there faster alternatives to growing cloves from seed?
If you’re eager for cloves, consider these shortcuts:
- Buy a young tree: Nurseries sell 1–2 ft. clove saplings (faster harvest in 3–5 years).
- Layering: Propagate from a friend’s mature tree by bending a low branch into soil and securing it.
- Air layering: Wrap a branch in damp moss and plastic, then cut it once roots form.
Seeds are rewarding but slow—choose your method based on patience vs. speed!
Wrapping up and next steps
Growing a clove tree from seeds is a rewarding journey that blends patience with the joy of nurturing life! 🌱 With the right germination tricks, warm environment, and consistent care, you’ll soon be watching those tiny sprouts transform into a fragrant, thriving plant.
Whether you’re a beginner or a seasoned gardener, this process is totally doable—and the aromatic payoff is worth every effort.
Now that you’re armed with the know-how, take the next step! Start with fresh seeds, set up your germination station, and keep an eye on those little miracles growing. Before you know it, you’ll be harvesting your own cloves—one seed at a time! 🌟