
Pruning
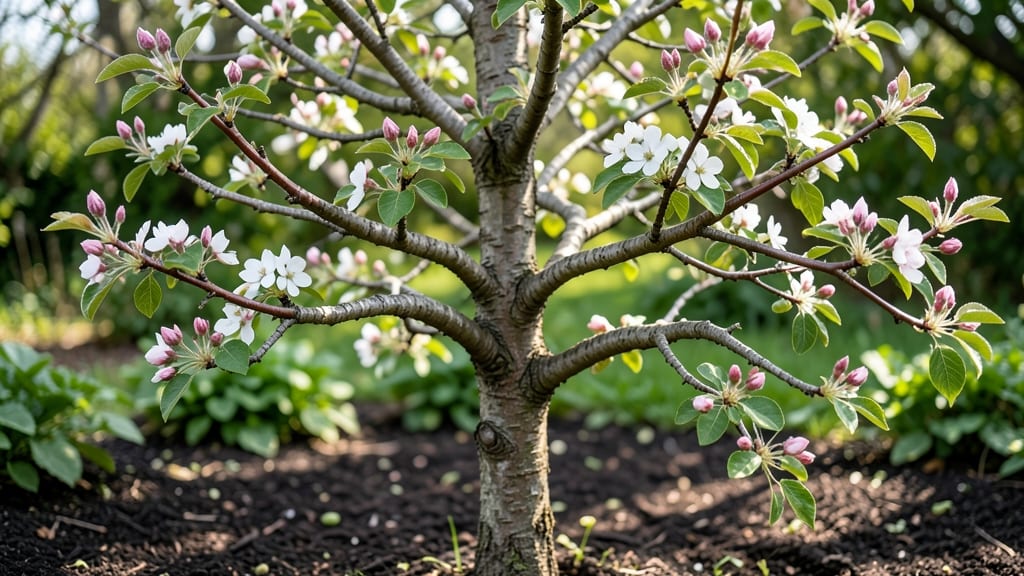
Transforming a single-stemmed tree into the branching out lush, multi-branched beauty starts with a few strategic cuts. 🌿 I’ve watched my young apple tree go from a lonely vertical pole to a thriving canopy in just two seasons using these layering tricks—no fancy tools or years of waiting required.
The secret lies in understanding how trees grow naturally: they branch when they sense competition for sunlight. By creating that competition yourself (through pruning), you trick the tree into sending out new shoots.
This works for young trees in their first few years and even mature trees that need a second chance at bushiness. You’ll end up with a tree that looks like it’s been growing that way for decades, complete with sturdy branches that support fruit or flowers.
The best part? It’s a process you can repeat every few years to keep the growth coming. Fair warning: timing matters—do this in late winter or early spring when the tree is just waking up. Grab your pruners and let’s get started!
📚 In This Guide
- What you need
- Instructions
- Tips and common mistakes
- Wrapping up and next steps
What you need
- ● Pruning shears: Bypass pruners (for cuts up to ½ inch thick) or anvil pruners (for thicker branches). Quantity: 1 pair (sharp and clean!).
- ● Loppers: For branches ½ to 2 inches thick. Quantity: 1 pair.
- ● Pruning saw: For branches over 2 inches in diameter. Quantity: 1 (handheld or folding).
- ● Gloves: Heavy-duty gardening gloves (cut-resistant for safety). Quantity: 1 pair.
- ● Disinfectant: 70% isopropyl alcohol or a pruning sealant (like tree wound dressing). Quantity: Small bottle.
- ○ Extension pole: Optional but helpful for high branches (10–15 feet).
- ● Knowledge: Basic understanding of your tree’s species (deciduous vs. evergreen) and its growth habits. Pro tip: Research if your tree is blank">fast-growing or blank">slow-maturing—this affects pruning timing!
- ● Weather: Prune on a dry, cloudy day (avoid frost or extreme heat).
- ○ Optional: Ladder (for hard-to-reach branches).
- ● Pole pruner (if you hate ladders!).
- ● Notebook & pen (to sketch your tree’s structure before/after pruning).
- ● Bird netting (if birds nest in your tree—protect your work!).
How to encourage bushier tree growth with air layering
Here's the simple method I use to coax fuller branches from leggy trees—no fancy tools needed.
🌿 Step 1: Select the Right Branch and Prepare for Layering
Choose a healthy branch that's at least ½ inch thick and flexible enough to bend slightly without snapping. The thicker the branch, the stronger the new growth will be. I look for branches that are about 12-18 inches from the main trunk—this gives enough space for roots to develop before cutting.
Clean the branch thoroughly with rubbing alcohol to sterilize the area. Then, using a sharp knife, make a 1-inch vertical cut through the bark, being careful not to cut into the wood. This cut exposes the cambium layer, which is where new roots will form. I like to make the cut on the underside of the branch where it naturally bends—this helps the roots grow downward.
💧 Step 2: Apply Root Hormone and Wrap with Moist Material
Dip your finger into the rooting hormone and gently rub it over the exposed cambium area. This step is crucial—it triples your chances of success by encouraging root growth. Next, wrap the cut area tightly with a sphagnum moss pad that's been soaked in water until it's damp but not dripping. The moss should cover the cut completely and extend about 2 inches above and below it.
Secure the moss in place with plastic wrap, sealing it tightly to trap moisture. I use a zip tie or strong twine to hold everything snugly against the branch. Check the wrap every 3-4 days to ensure the moss stays moist. If it dries out, the roots won't form—so keep it consistently damp like a well-watered sponge. You'll know it's working when you see tiny white roots poking through the moss in about 6-8 weeks.
✂️ Step 3: Sever and Plant the New Branch
Once the roots are 2-3 inches long (you'll see them growing through the moss), it's time to cut the branch below the rooted section. Use clean, sharp shears to make the cut at a 45-degree angle, about ½ inch below the root ball. This angle helps water run off and prevents rot. Remove the plastic wrap and gently separate the moss from the branch to check root development.
Plant the new branch in a pot filled with well-draining potting mix, burying the roots about 1 inch deeper than they were on the original tree. Water thoroughly and place the pot in a spot with bright, indirect light for the first 2 weeks. After that, gradually introduce it to more sunlight. Keep the soil consistently moist but not soggy—this is the most critical phase for survival. In about 3-4 months, your new bushy tree will be ready to transplant into the ground.
Tips & tricks for perfect tree branching with air layering
Air layering can transform a leggy tree into a lush, bushy beauty—but these small details make all the difference between success and frustration.
Branch Selection: I can't stress enough how critical this first step is. Look for branches that are ½ inch thick or thicker—thinner branches may not produce strong enough roots. Also, avoid branches that are too close to the trunk (under 12 inches) or too far out (over 18 inches). The 12-18 inch range gives roots enough space to develop while still being supported by the parent tree. Pro tip: Test flexibility by gently bending the branch—it should bend slightly without snapping.
Cutting Technique: When making your 1-inch vertical cut through the bark, use a sharp knife and angle it slightly downward. This prevents water from pooling in the cut, which can cause rot. I like to make the cut on the underside of the branch where it naturally bends—this helps guide the roots downward. Be extra careful not to cut into the wood itself, as this can damage the branch and reduce your chances of success.
Moisture Management: The 3-4 day check-ins are crucial for maintaining consistent moisture in your sphagnum moss. I've learned the hard way that letting the moss dry out—even just slightly—can stall root development. Keep it damp like a well-wrung sponge, not soaking wet. A spray bottle makes this easy to check and maintain without over-saturating. Remember, the moss should stay moist but not dripping to prevent mold.
Root Development Timeline: While you'll see tiny white roots poking through the moss in about 6-8 weeks, don't rush to cut the branch. Wait until roots are 2-3 inches long for the best chance of survival. This might take up to 3 months for some tree species. Patience here pays off—stronger roots mean a healthier new plant. I've seen some impatient gardeners cut too early, and their new branches often struggle to establish properly.
Pro Tips for Tree Branching Out
- Air layering can transform a leggy tree into a lush, bushy beauty—but these small details make all the difference between success and frustration.
- Branch Selection: I can't stress enough how critical this first step is.
- Cutting Technique: When making your 1-inch vertical cut through the bark, use a sharp knife and angle it slightly downward.
Frequently asked questions
Got questions about making your trees bushier through branching? You’re not alone!
Here are some of the most common queries—and straightforward answers—to help you get started with confidence.
How do I know if my tree is ready for branching-out pruning?
Look for healthy but flexible branches (about pencil-thick or smaller) and signs of new growth in spring or early summer. Avoid pruning dormant trees in winter—they’re less resilient. If your tree is young (<3 years old), focus on shaping rather than heavy cuts to encourage natural branching.
How long does it take to see noticeable bushier growth after pruning?
Patience is key! You’ll start seeing new shoots within 4–6 weeks, but fuller growth may take 1–2 seasons. Consistent pruning (2–3 times per year) speeds up results. Over-pruning can stress the tree, so stick to light, strategic cuts for best outcomes.
Can I use regular pruning shears, or do I need special tools?
For most trees, bypass pruners or hand pruners work great for small branches. For thicker stems (½ inch or larger), invest in loppers or a pruning saw. Always sterilize tools with rubbing alcohol to prevent disease spread. Pro tip: Sharp tools = cleaner cuts = faster healing!
What if my tree doesn’t branch out after pruning?
If you’ve pruned correctly but see little to no new growth, check these:
Yes! Try these low-effort methods:
For best results, combine pruning with regular care (watering, mulching, and fertilizing).
Are there alternatives to pruning for bushier trees?
Wrapping up and next steps
Transforming your tree into a lush, bushier masterpiece is simpler than you think! 🌿 By mastering the art of tree branching out through strategic layering and pruning, you’ve unlocked the secret to vibrant growth.
Remember: patience, precision, and proper tools are your best allies—now go ahead and give your tree the care it deserves!
Ready to see real results? Start with one branch at a time and observe how your tree responds. Over time, you’ll watch it flourish into a stunning, fuller specimen. Happy pruning!