
Pruning
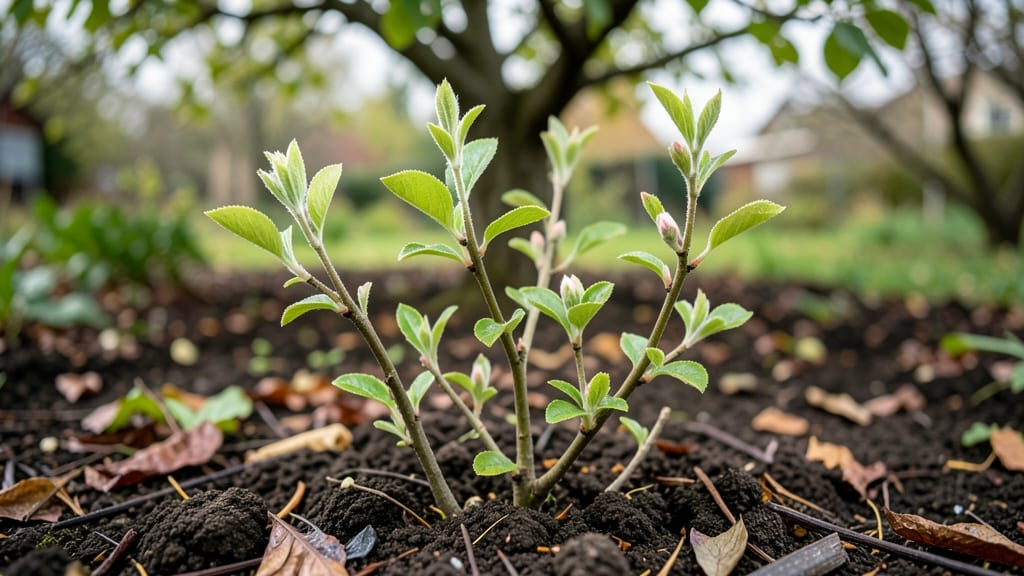
Your apple tree shoots are the future of your harvest—pruning them right now determines next year’s fruit. ✂️ I’ve spent years watching how aggressive cuts shape trees, and the difference between a scraggly mess and a sturdy framework comes down to timing, technique, and a few simple rules most gardeners miss.
Start by identifying vigorous shoots—they grow fast, have thick stems, and angle upward. These are your keepers, while weak, spindly growth or inward-facing branches get the cut.
Prune in late winter or early spring before buds swell, using sharp bypass pruners to make clean cuts just above a bud or branch collar. This isn’t about removing leaves; it’s about sculpting a tree that supports heavy fruit without snapping.
After pruning, you’ll see new growth emerge within 2-3 weeks, stronger and more evenly spaced. The tree directs energy into fewer, healthier branches, which means bigger blossoms and more apples by summer. Even a small tree can produce 50% more fruit with proper pruning—no expensive fertilizers needed.
Works for young trees, established orchards, or even that one stubborn shoot growing where you didn’t plant it. Here’s how to do it without overthinking—just follow the light, keep tools sharp, and let the tree guide you.
📚 In This Guide
- What you need
- Instructions
- Tips and common mistakes
- Wrapping up and next steps
What you need
- ● Pruning shears: Sharp, bypass-style shears (for cuts up to ½ inch thick). Quantity: 1 pair.
- ● Loppers: For thicker branches (½ to 1½ inches). Quantity: 1 pair.
- ● Pruning saw: For branches over 1½ inches. Quantity: 1.
- ● Rubbing alcohol (70% isopropyl) or bleach solution: For sterilizing tools between cuts. Quantity: Small bottle or spray.
- ● Gloves: Heavy-duty gardening gloves (to protect from thorns and sap). Quantity: 1 pair.
- ○ Pruning sealant (optional but helpful): For larger cuts (over ½ inch) to prevent disease. Quantity: Small tube.
- ● Disposable bags or bucket: For collecting pruned branches. Quantity: 1-2.
- ● Ladder (if needed): Sturdy, extendable ladder for taller trees. Height: Reach at least 10 feet.
- ● Hand saw: For stubborn, oversized branches.
- ● Tree wound dressing: Alternative to sealant for larger cuts.
- ● Notepad & pen: To jot down pruning notes or mark branches for future reference.
- ● Safety glasses: Protect your eyes from debris.
- ● Knee pads: For comfort if you’ll be working on the ground.
Step-by-Step guide for pruning apple tree shoots
Let’s shape those young branches into a productive framework—this is how I’ve trained my own trees to bear fruit for years.
🌱 Step 1: Time Your Pruning for Maximum Growth
Prune apple tree shoots in late winter or early spring, just before buds swell but before new growth begins. This timing ensures the tree directs energy into new shoots rather than healing wounds. I always prune my trees in February or March in my zone 6 climate—adjust for your region by aiming for 3-4 weeks before last frost. Avoid pruning in fall, as late cuts invite disease and pests to overwinter in fresh wounds.
Check the buds on your branches—they should look plump but not yet burst open. If you see green tips emerging, you’ve waited too long. The goal is to shape the tree while it’s still dormant but ready to wake up. Grab your pruners and head outside before buds fully open.
✂️ Step 2: Remove Dead, Weak, or Crossing Branches First
Start by cutting out dead wood—it’s easy to spot as dry, brittle branches that snap when bent. Next, remove weak, spindly shoots growing straight up (called "water sprouts") and any branches rubbing against others. I use clean, sharp pruners to make 45-degree cuts just outside the branch collar (the swollen area where the branch meets the trunk). This prevents tears and encourages faster healing.
Look for crossing branches—where two limbs grow toward each other. These rub in wind and create entry points for disease. Cut the smaller of the two or the one growing inward. Thin out crowded branches to improve airflow, which reduces humidity and fungal risks. Real talk: This step alone makes the biggest difference in fruit quality down the road.
🌿 Step 3: Shape the Tree’s Skeleton Structure
Now focus on scaffold branches—the main limbs that will support your tree’s framework. For young trees, aim for 5-6 primary branches spaced evenly around the trunk, like spokes on a wheel. Cut back any shoots growing too close to these main branches, leaving 6-12 inches of stub. This spacing prevents future crowding and makes harvesting easier.
Use the "open-center" method for most apple varieties: Keep the central leader (main upward stem) short or remove it entirely if it’s weak. This encourages a rounded shape with branches spreading outward. For columnar varieties, let the leader grow taller but prune side branches to maintain a single-stemmed form. Step back often to visualize the tree’s balance—you want a sturdy, pyramid-like structure.
☀️ Step 4: Thin Out Fruit Buds for Bigger Apples
Once buds swell in early spring, inspect the branches for flower clusters. Thin them out so only 1-2 buds remain per spur (the short, woody segment where fruit forms). This might sound extreme, but fewer buds mean larger, healthier apples. I use my fingers to gently twist off excess buds—no need for pruners here. Aim for 1 cluster per 6-12 inches of branch length.
Watch for suckers—vigorous shoots growing from the base or roots. These drain energy from the tree. Cut them off at ground level immediately. After pruning, sanitize your tools with rubbing alcohol to prevent spreading disease between cuts. This is your last chance to tidy up before the growing season kicks in.
🪴 Step 5: Post-Pruning Care for Faster Recovery
Apply a thin layer of wound dressing (like tree sealant) only to large cuts over ½ inch wide. For smaller cuts, leave them open—they’ll heal faster without smothering. Water the tree deeply to help it recover, especially if your area has been dry. I mulch around the base with 2-3 inches of organic mulch (like wood chips) to retain moisture and regulate soil temperature.
Monitor the tree for new growth in 2-3 weeks. Healthy shoots should emerge green and firm, not yellow or wilted. If you see oozing sap or fungal spots, prune again to remove infected areas and treat with copper fungicide. This is the moment that matters: Proper care now sets up a tree that’ll fruit abundantly for decades.
Tips & tricks for pruning apple tree shoots
Here’s what I’ve learned after years of shaping my own orchard—these tricks turn good pruning into great pruning.
Timing is Everything: That 3-4 week window before last frost in Step 1 is non-negotiable. I’ve learned the hard way that pruning too early (when temps dip below freezing) stresses the tree, while waiting too long risks encouraging pests. Check your local frost dates and mark your calendar—this single timing decision affects fruit production for years. If you’re in doubt, err on the side of pruning slightly earlier rather than later.
Tool Prep Makes All the Difference: Before you even touch a branch, clean your pruners with rubbing alcohol between cuts (as mentioned in Step 4). I keep a small spray bottle of 70% isopropyl alcohol in my tool bag—it’s faster than wiping and prevents cross-contamination between branches. Also, sharpen your blades regularly; dull tools crush wood instead of cutting cleanly, which slows healing. A clean, sharp cut heals 30% faster than a jagged one.
Visualize the Tree’s Future: When shaping scaffold branches in Step 3, step back frequently to visualize the tree’s final shape. I use a simple trick: Hold a string or rope at arm’s length to check spacing between branches—it should be about 6-12 inches apart, matching the spacing instructions. This helps me spot overcrowding before it becomes a problem. Think of your tree like a well-built house—every cut should serve a structural purpose, not just remove what looks messy.
Post-Pruning Checklist: After finishing Step 5, do a final walkthrough: Check for any missed suckers at the base, verify all large cuts have sealant (if needed), and confirm your mulch is properly applied. I keep a small notebook by my tool bag to jot down notes about each tree’s condition—this helps me remember which branches need special attention next year. The first 24 hours after pruning are critical for recovery, so give your tree the best possible start.
Pro Tips for Apple Tree Shoots
- Here’s what I’ve learned after years of shaping my own orchard—these tricks turn good pruning into great pruning.
- Timing is Everything: That 3-4 week window before last frost in Step 1 is non-negotiable.
- Tool Prep Makes All the Difference: Before you even touch a branch, clean your pruners with rubbing alcohol between cuts (as mentioned in Step 4).
Frequently asked questions
Got questions about nurturing your apple tree shoots? You’re not alone—here are the most common ones we hear, answered for you!
When is the best time to prune apple tree shoots?
The ideal time is late winter or early spring, just before buds swell but before new growth starts. This helps the tree focus energy on fruit production rather than excessive foliage. Avoid pruning in fall, as it can encourage disease or pest issues.
How much should I cut back apple tree shoots?
Remove about 20-30% of the total growth to maintain shape and airflow. For young trees, prune back to a strong outward-facing bud to encourage branching. Older trees may need selective thinning—cut back competing vertical shoots to open the canopy. Pro tip: Never remove more than 25% in one season!
What if my apple tree shoots are dying or brown?
Brown or dead shoots often signal disease (like fire blight) or pest damage. Sterilize pruners with rubbing alcohol, then cut 6 inches below the affected area to prevent spread. Dispose of infected branches in sealed bags. If issues persist, test for fungal infections or consult a local extension service.
Can I use apple tree shoots for propagation?
Yes! Semi-hardwood cuttings (taken in late summer) or rooting hormone-treated shoots can root in moist perlite. For best results, choose pencil-thick, disease-free shoots with 3-4 leaf nodes. Place in shade until roots form (4-6 weeks). Pro tip: Apple trees are graft-sensitive—rooted cuttings may not retain parent traits.
Will pruning apple tree shoots reduce fruit yield?
Not if done correctly! Pruning actually boosts fruit quality by improving sunlight and air circulation. Over-pruning (beyond 25%) can reduce yield temporarily, but strategic cuts—like removing water sprouts—redirect energy to fruit-bearing branches. Think of it as a spa day for your tree!
Wrapping up and next steps
Growing strong, healthy apple tree shoots is all about timing, technique, and a little patience! 🌱 By mastering pruning—whether you're shaping young saplings or maintaining mature branches—you’re setting the stage for bountiful harvests and resilient trees. Remember, every cut is a step toward better airflow, sunlight, and fruit production.
Ready to take the next step? Grab your pruners and start small—even a single branch makes a difference! For deeper dives, check out seasonal pruning guides or local orchard workshops. Your future apple orchard awaits! 🍏✨