
Landscaping
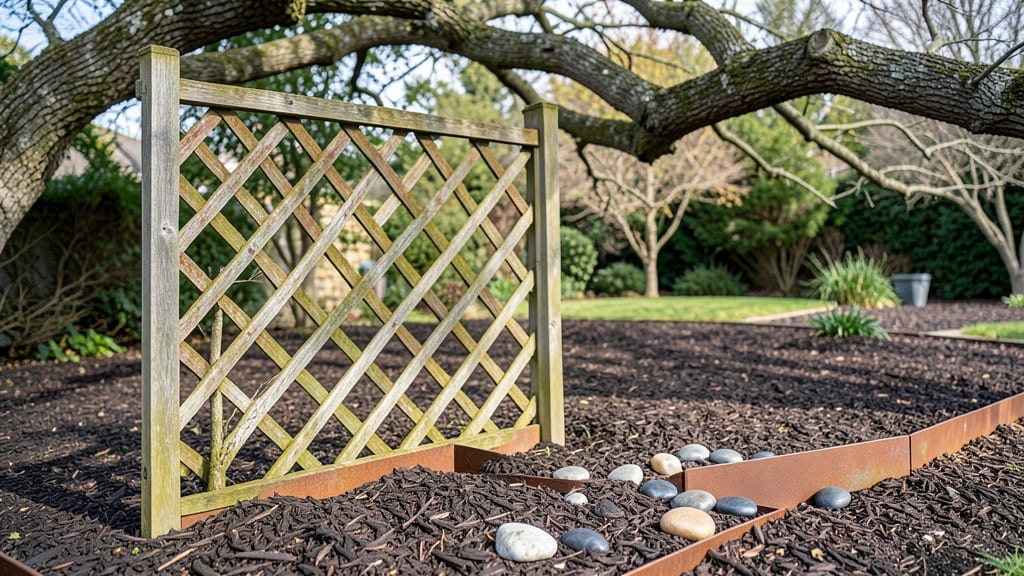
My garden’s borders transformed when I swapped plastic edging for tree branches—it’s like wrapping your yard in a living frame. 🌿 The rustic charm doesn’t just look stunning; it’s free, sustainable, and takes less than an hour to install.
No more digging trenches or wrestling with rigid materials—just natural lines that blend seamlessly with your landscape. You’ll need branches 4-6 feet long (thicker than a pencil, thinner than your wrist), a hammer, and some basic tools.
Gather them after a storm or prune your own trees—just make sure they’re dry and free of bark or pests. For extra longevity, soak them in a vinegar-water mix to deter insects, though they’ll still break down over time (that’s the natural look!).
The designs are endless: weave them into a lattice for a cottage garden, stack them vertically for a modern twist, or spiral them for a whimsical touch. My favorite? A simple low border that guides visitors without blocking views. The best part?
It’s a project that evolves with your garden—replace branches as they weather, or let them blend into the soil over time. Perfect for cottage gardens, woodland escapes, or even modern minimalist spaces. Here’s how to make it work for your yard—no green thumb required!
📚 In This Guide
- What you need
- Instructions
- Tips and common mistakes
- Wrapping up and next steps
What you need
- ● Tree branches – 10–20 medium-sized, flexible branches (1–2 inches thick, 2–3 feet long). Look for fallen or pruned branches from trees like willow, oak, or maple.
- ● Garden twine or wire – 50–100 feet (for securing branches). Opt for natural jute or durable galvanized wire.
- ● Stakes or posts – 6–10 wooden or metal stakes (1–2 feet tall) to anchor the edging.
- ○ Optional: Natural twine, burlap, or biodegradable netting for a softer, woven look.
- ● Pruners or loppers (for trimming branches to size).
- ● Hammer or mallet (to drive stakes into the ground).
- ● Measuring tape (to mark your edging path).
- ● Gloves (to protect your hands while handling branches).
- ○ Optional: Staple gun (if securing twine to stakes), drill (for pre-drilling stake holes in hard soil).
- ● Clear the area of weeds, rocks, or debris along your desired edging line.
- ● Mark the path with spray paint or a garden hose for a straight guide.
- ● Check local regulations—some areas restrict using fallen branches without permits.
Step-by-Step instructions for creating tree branch garden edging
Transform your garden's borders with this simple, natural technique that adds texture and charm.
🪴 Step 1: Gather and Prepare Your Branches
Collect straight, sturdy branches from your yard or a local park—think 3-6 feet long and about 1-2 inches thick. I prefer branches with natural curves for added visual interest. Clean them thoroughly by wiping off dirt and debris with a damp cloth, then let them dry completely in the sun for 24 hours. This prevents mold and ensures they're ready to handle.
If you find branches with loose bark or small twigs, trim them off with pruning shears. The goal is smooth, clean branches that will look intentional in your garden. I like to bundle them by size—thicker branches for the base and thinner ones for the top layers. This creates a natural, tiered effect that looks more organic than uniform.
☀️ Step 2: Plan Your Edging Layout
Sketch a rough outline of where you want the edging to go. Measure the length of your garden bed and mark the starting point. For a 4-foot border, you’ll need about 12-15 branches (depending on thickness). Space them 6-8 inches apart at first—you can always adjust as you go. I like to lay them out in a staggered pattern, like a natural fence, for a more relaxed look.
Dig small holes along your marked line, about 4-6 inches deep, using a trowel. The depth ensures the branches stay upright and stable. If your soil is rocky or hard to dig, use a hand shovel to loosen it first. This step is all about preparation—take your time to get the spacing just right. You’ll see how the branches lean slightly as you place them, so adjust the holes to compensate.
🌿 Step 3: Install the Branches Securely
Insert each branch into its prepared hole, pressing the soil firmly around the base to secure it. For extra stability, especially in windy areas, dig the hole slightly deeper and pack the soil tightly. I like to angle the thicker branches slightly outward at the bottom and inward at the top—this mimics how branches naturally grow and adds a sense of movement to the edging.
If you’re working with a longer border, tie branches together at the top with twine or zip ties for temporary support while the soil settles. Avoid using wire or anything that could cut into the branches over time. Check each branch to ensure it stands straight and doesn’t wobble. This is the moment that matters: a wobbly branch now will look sloppy later, so take your time to get it right.
✂️ Step 4: Secure and Refine the Edging
Once all branches are in place, use a mallet to gently tap the soil around each base. This firms everything up and eliminates gaps. For added security, especially in clay soil, mix in a handful of garden compost around the base of each branch. This helps the soil hold together and encourages roots to grow if you’re using live branches.
Trim any branches that stick out too far or look uneven with pruning shears. I like to leave a slight taper at the top—this makes the edging look more intentional and natural. If you notice gaps between branches, fill them with smaller twigs or even moss for a seamless finish. Step back and admire your work: the goal is a border that looks like it belongs in the garden, not like it was forced in.
💧 Step 5: Maintain and Enjoy Your Natural Border
Water the base of the branches lightly after installation to help the soil settle. If you’re using live branches, keep them moist for the first 2-3 weeks to encourage root growth. For dead branches, a light watering helps them blend into the landscape by keeping the soil around them consistent. I like to add a layer of mulch around the base to retain moisture and suppress weeds—this keeps everything looking tidy.
Over time, you might notice branches shifting slightly as the soil settles or roots grow. Simply readjust them as needed. If any branches lean too far, dig them up, reposition, and firm the soil again. This edging is designed to evolve with your garden, so don’t stress about perfection. The charm comes from its natural, organic feel—exactly what makes it so special.
Tips & tricks for perfect tree branch garden edging
Here's what nobody tells you—these tricks will make your natural border look intentional and last longer.
Branch Selection Matters: In Step 1, don't just grab any branches—look for ones with smooth bark and natural curves. I've learned the hard way that rough or splintery branches can look messy and even pose safety risks. For a more refined look, choose branches with a consistent diameter throughout. If you're using dead branches, make sure they're completely dry before installing to prevent rot. The 24-hour drying time is critical for preventing mold, so don't skip this step!
Layout Planning Secret: When planning your 4-foot border in Step 2, I recommend laying out all your branches first before digging any holes. This lets you visualize the staggered pattern and make adjustments without wasting time. Pro tip: Use a garden hose or spray paint to mark your layout line—it's temporary and won't damage your lawn. The 6-8 inch spacing between branches creates that natural fence look while allowing room for plants to peek through.
Stability is Everything: In Step 3, the secret to branches that stay upright is in the hole preparation. For windy areas, dig holes about 8-10 inches deep instead of the standard 4-6 inches. I've found that packing the soil tightly around the base with a mallet creates a solid foundation. For extra security, especially with taller branches, drive a wooden stake into the hole alongside each branch and tie them together with twine before filling in the soil.
Natural Finishing Touches: In Step 4, don't be afraid to get creative with the gaps between branches. I've filled spaces with everything from small pebbles to wildflower seeds for a textured look. For a cohesive finish, trim branches at a slight angle—this mimics how branches naturally taper. The key is to step back frequently and look at your edging from different angles before you're satisfied. Remember, the goal is rustic charm, not perfection.
Pro Tips for Tree Branch Garden Edging
- Here's what nobody tells you—these tricks will make your natural border look intentional and last longer.
- Branch Selection Matters: In Step 1, don't just grab any branches—look for ones with smooth bark and natural curves.
- Layout Planning Secret: When planning your 4-foot border in Step 2, I recommend laying out all your branches first before digging any holes.
Frequently asked questions
Got questions about using tree branches for garden edging?
You’re not alone! Here are answers to the most common queries to help you create a stunning, natural border with ease.
What’s the best time of year to install tree branch garden edging?
The ideal time is late winter or early spring when the ground is workable but before new growth starts. This gives branches time to settle before summer heat. For existing gardens, fall works too—just avoid freezing temperatures. Pro tip: If using fresh-cut branches, let them dry for 1–2 weeks to prevent mold or rot.
How do I prepare tree branches for edging without damaging them?
Start by trimming branches into 2–4 ft lengths (thicker than a pencil, thinner than your wrist). Remove leaves and saplings, then soak in a fungicide solution (like copper-based spray) for 24 hours to deter pests. Let them dry completely in a shaded area before installing. Avoid branches with cracks or signs of disease—they won’t last!
Can I reuse tree branches for edging year after year?
With proper care, yes! Branches can last 2–5 years if treated with linseed oil or outdoor wood sealant to repel moisture. Bury the bottom 6 inches in soil or secure with landscape staples to extend their lifespan. Replace any branches that splinter or rot— a quick swap keeps your edging looking fresh!
What’s a good alternative if I don’t have access to tree branches?
No problem! Try these natural (or low-maintenance) swaps:
- Bamboo stakes – Durable and affordable.
- Vines (like wisteria or ivy) – Grow over time for a lush look.
- Stacked stones or logs – Adds rustic texture.
- Recycled plastic lumber – Mimics wood without rotting.
How do I keep pests (like termites or rodents) away from my branch edging?
Prevention is key! Apply a borax or cedar oil spray before installation, and avoid placing branches directly against wooden structures. Elevate them slightly with gravel or hardware cloth if nesting pests are a concern. For extra protection, rotate branches annually—this disrupts pest cycles and keeps your edging pest-free.
Wrapping up and next steps
Transforming your garden with tree branch edging isn’t just about aesthetics—it’s about blending nature’s raw beauty with your outdoor space. Whether you’re drawn to the rustic charm of natural borders or the eco-friendly appeal of upcycling fallen branches, this project is both rewarding and sustainable. 🌿✨
Ready to elevate your landscape? Start by gathering materials, sketching your design, and diving into the creative process. Take that first step today—your garden’s natural masterpiece awaits!