
Pruning
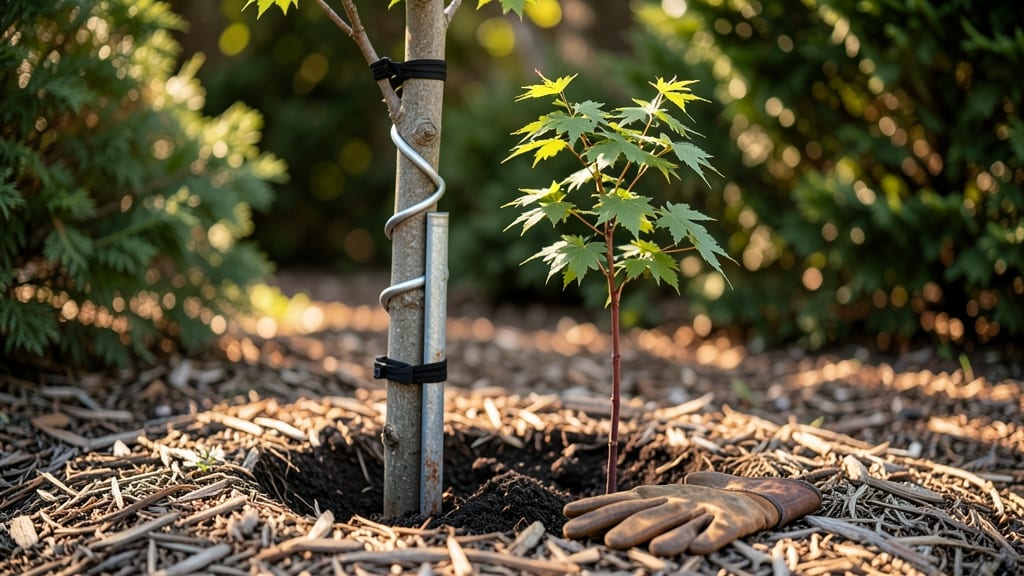
Lightweight tree brace supports can save your young saplings from toppling in the first windstorm. 🌳 I’ve seen firsthand how a simple brace transforms a wobbly 3-foot sapling into a sturdy, upright grower—without strangling the trunk or stunting its growth.
The key is choosing the right type of brace (tree straps work best for most species) and installing it at the perfect angle to let the tree sway just enough to strengthen its stem.
You’ll need just a few supplies: a tree brace kit (or repurposed materials like soft plastic straps), a mallet, and some flexible stakes. The installation takes about 10 minutes per tree, and the results are immediate—no more leaning trunks or snapped stems.
These supports are especially critical for newly planted trees in exposed areas or during high-wind seasons, but they’re also a game-changer for trees recovering from transplant shock.
Once installed, your saplings will grow with confidence, developing stronger stems that can handle future storms. The braces stay in place for 1-2 growing seasons, just long enough for the tree to establish itself.
I’ve even used them on trees up to 6 feet tall when they needed extra support during their first winter. The secret? Checking the fit every few months and adjusting as the tree grows.
No more worrying about your investment toppling over—these supports work quietly in the background while your trees focus on growing. Whether you’re planting a single oak or a row of fruit trees, this method keeps them standing tall without the bulk of traditional staking. Ready to give it a try?
📚 In This Guide
- What you need
- Instructions
- Tips and common mistakes
- Wrapping up and next steps
What you need
- ● Tree brace support kit (or DIY alternative): 1–2 lightweight, flexible tree straps (3/4"–1" wide, 6–10 ft long) – adjust based on tree height.
- ● 1–2 adjustable metal or plastic tree collars (for anchoring straps without digging into bark).
- ● Sturdy stakes (2–4, depending on tree size): 1/2"–3/4" diameter, 3–5 ft tall (bamboo or treated wood work well).
- ○ Tree ties or soft garden twine (optional but helpful for securing stakes).
- ● Hand saw or pruners (for trimming excess brace material).
- ● Measuring tape (to ensure proper spacing).
- ● Mallet or rubber hammer (for gently driving stakes into the ground).
- ● Gloves (to protect your hands from splinters or rough bark).
- ● A young sapling or tree under 3 inches in diameter (ideal for lightweight braces).
- ● Soft, well-drained soil (for easy stake insertion).
- ● Sunny or partially shaded spot (to avoid overwatering the brace area).
How to install tree brace supports for young saplings
Here's the simple method I use to keep saplings sturdy without damaging their growth.
🪴 Step 1: Choose the Right Brace Support System
Select a lightweight yet sturdy brace support system designed for young trees. I prefer adjustable tree stakes with flexible straps or soft fabric ties—they distribute weight evenly without digging into the bark. For wind-prone areas, opt for a T-post or metal stake driven into the ground at a 45-degree angle toward the prevailing wind direction.
The brace should fit snugly but not too tight—you want to support the trunk without restricting natural sway. A good rule of thumb is to position the brace one-third of the way up the trunk from the base. This height prevents the tree from leaning too much while still allowing flexibility for root development.
💧 Step 2: Prepare the Sapling and Installation Site
Gently loosen the soil around the sapling’s base with your hands or a small trowel—no deeper than 6 inches—to create space for the stake. Avoid disturbing the root ball or compacting the soil further. If the sapling is already leaning, you’ll need to dig a shallow trench on the side opposite the lean to guide the trunk upright before securing the brace.
Water the sapling thoroughly 24 hours before installing the brace so the soil is moist but not soggy. This helps stabilize the roots and makes the tree less likely to snap under stress. If the soil is dry, wait until it’s damp to the touch before proceeding—installing in dry soil can cause the stake to pull away as the tree grows.
✂️ Step 3: Secure the Brace Without Restricting Growth
Position the stake 2-3 inches away from the trunk and drive it into the ground at a 45-degree angle until it’s firm but not wobbling. For flexible braces, wrap the strap around the trunk and stake, leaving 1-2 inches of slack—enough room for the tree to sway slightly in the wind. Tighten the strap just enough to hold the trunk upright; you should be able to fit a finger between the strap and the bark.
Here’s the thing—never wrap the brace directly around the trunk like a belt. This can girdle the tree as it grows, cutting off circulation. Instead, use a soft fabric tie or padded strap that spreads the pressure evenly. Check the brace every 4-6 weeks and adjust as the tree grows—you’ll need to loosen or replace it to prevent constriction.
☀️ Step 4: Monitor and Adjust Over Time
After installation, give the sapling a gentle shake to test stability. It should hold firm but still have some give—no snapping sounds or excessive movement. Watch for signs of stress: if the brace digs into the bark or the tree leans more than 15 degrees, it’s time to adjust. Saplings grow fast, so recheck the brace every 3-4 weeks during the first year.
Remove the brace once the sapling is 3-4 feet tall and the trunk is at least 1 inch in diameter—usually by the second growing season. You’ll know it’s time when the tree stands upright on its own and the brace feels loose. Cut the strap or unscrew the stake carefully to avoid damaging the bark or roots.
⏰ Step 5: Maintain Soil and Water for Long-Term Stability
Keep the soil evenly moist but not waterlogged around the sapling’s base—water deeply once a week unless rainfall provides enough moisture. Mulch with 2-3 inches of organic mulch (like wood chips) within a 2-foot radius of the trunk to retain moisture and protect roots from temperature swings. Avoid piling mulch against the trunk itself, as this can trap moisture and invite rot.
Real talk: don’t overwater. Saplings in braces are already stressed, and soggy soil weakens roots faster than dryness. You’ll see healthy growth when the leaves stay bright green and firm, not yellowing or wilting. If the soil feels dry 1 inch below the surface, it’s time to water again.
Tips & tricks for perfect tree brace installation
Here's what I've learned from years of keeping saplings standing strong—these tricks make all the difference.
Positioning is Everything: When placing your brace at one-third the height of the trunk, use a tape measure or even a simple ruler to mark the spot before you begin. This consistency prevents uneven support that can cause leaning. I've seen saplings lean dramatically when braces were placed too high or too low—this simple measurement step saves hours of adjustments later.
Soil Prep Matters More Than You Think: The 24-hour pre-watering isn't just about moisture—it's about creating the perfect working environment. Too much water makes the soil unstable, while too little causes the stake to pull away as roots try to anchor. Test soil moisture by squeezing a handful: it should hold together but not be dripping wet. This small preparation step prevents the most common installation failure.
Angle Accuracy Prevents Leaning: That 45-degree angle isn't arbitrary—it's what creates proper leverage against wind forces. Use a small carpenter's square or even a protractor app on your phone to get it precise. I've seen braces at 30 degrees fail completely in moderate winds while properly angled stakes held firm through storms. The extra 15 degrees makes all the difference in stability.
Growth Monitoring is Non-Negotiable: The 3-4 week check-ins in Step 4 aren't just suggestions—they're essential for long-term success. I've seen braces that looked perfect at installation fail completely within 6 weeks because they weren't adjusted as the tree grew. Keep a small notebook near your planting area to track growth patterns and adjustment dates. This simple habit prevents the most common long-term failure.
Pro Tips for Tree Brace Support
- Here's what I've learned from years of keeping saplings standing strong—these tricks make all the difference.
- Positioning is Everything: When placing your brace at one-third the height of the trunk, use a tape measure or even a simple ruler to mark the spot before you begin.
- Soil Prep Matters More Than You Think: The 24-hour pre-watering isn't just about moisture—it's about creating the perfect working environment.
Frequently asked questions
Got questions about tree brace supports?
You’re not alone! Here are answers to the most common concerns—from installation to long-term care—so you can keep your young saplings thriving with confidence.
When is the best time to install a tree brace support?
Install tree brace supports immediately after planting or when you notice leaning, wobbly saplings—especially in windy conditions. Early installation (within the first year) prevents root stress and gives young trees the stability they need to grow upright. Avoid extreme heat or frost; spring or early fall is ideal for most climates.
How tight should the brace be around the trunk?
The brace should fit snugly but not constrict the trunk. Aim for a gap of about 1–2 inches between the brace and the bark, allowing room for natural trunk expansion. Over-tightening can girdle the tree, while too-loose braces may fail to support it. Adjust as the tree grows!
Will a tree brace support work for large or mature trees?
Tree brace supports are designed for young saplings and small trees (typically under 3–4 inches in diameter). For larger or mature trees, consider tree stakes with wider straps or professional cabling systems. Brace supports alone may not provide enough leverage for heavy canopies or deep-rooted trees.
What should I do if the brace starts digging into the trunk over time?
If you notice grooves or pressure marks, loosen the brace immediately and adjust the fit. Use a soft padding (like tree wrap or foam) between the brace and trunk to prevent damage. Check periodically—especially after storms—as growing trees may outpace the brace’s initial snugness.
Are there alternatives to tree brace supports for windy areas?
Yes! For high-wind zones, combine a tree brace with a single stake (angled 45° away from prevailing winds) or use multiple stakes in a triangular pattern for extra stability. Another option is biodegradable tree ties paired with lightweight stakes for a temporary, eco-friendly solution.
Wrapping up and next steps
Investing in a tree brace support is a game-changer for nurturing young saplings—offering the perfect balance of lightweight durability and ease of use.
Whether you're a gardening novice or a seasoned green thumb, these supports provide the stability needed to help your trees grow strong and healthy without the hassle. 🌱
Ready to give your trees the boost they deserve? Start by selecting the right brace for your saplings, gather your tools, and get planting! With a little care, you’ll watch your young trees thrive in no time.