
Pruning
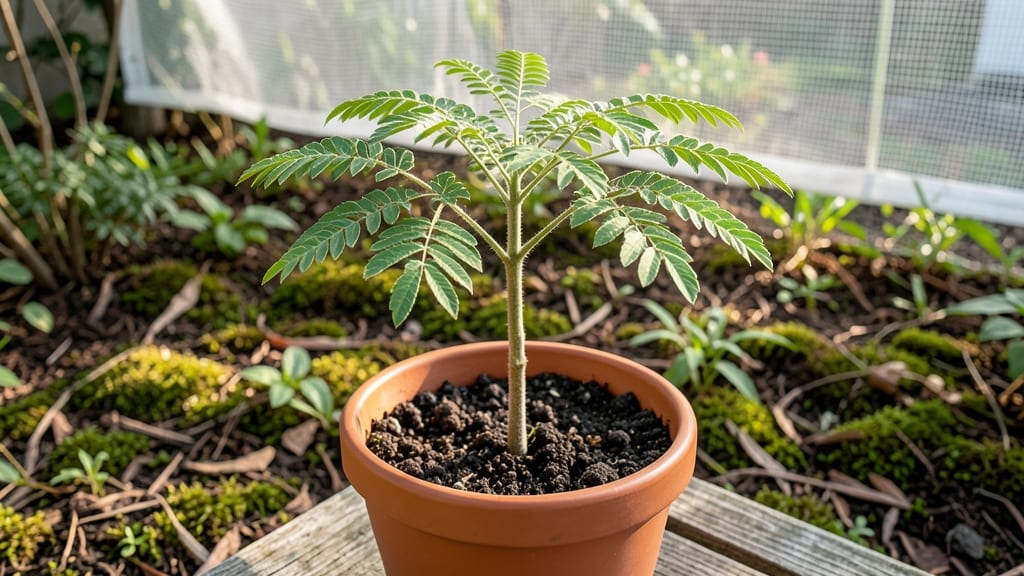
Growing silk tree seedlings (Albizia julibrissin) starts with one critical move: pinching those first shoots to shape a tree that’ll dazzle you with fuzzy pink blooms and elegant branches. 🌿 I’ve watched these delicate seedlings transform into stately trees with the right early care—and I’ll show you exactly how to avoid the leggy, weak growth that frustrates so many beginners.
The secret lies in balancing soil, sunlight, and pruning from day one. Silk trees thrive in well-draining loam with a touch of sand, and they’ll reward you with fast growth if planted in full sun after the last frost.
But here’s the catch: those first few months determine whether your tree grows straight up like a pole or develops that graceful, multi-stemmed habit you’ll love.
By summer’s end, you’ll have a tree with lush, feathery foliage and the foundation for those signature blooms. The key is consistent watering—keeping soil moist but never soggy—and strategic pruning to encourage branching. I’ve seen seedlings go from scraggly to stunning in just three months with this approach.
Whether you’re planting in a container or the ground, silk trees adapt beautifully to urban settings and even tolerate drought once established.
The real magic happens when you combine proper care with patience—their blooms arrive in late spring, and with the right technique, they’ll keep producing through summer and into fall.
📚 In This Guide
- What you need
- Instructions
- Tips and common mistakes
- Wrapping up and next steps
What you need
- ● Silk tree seedling: 1 healthy, disease-free sapling (3–6 feet tall, preferably from a nursery).
- ● Well-draining soil: 5–10 lbs of a mix of 60% topsoil, 30% perlite, and 10% compost (silk trees thrive in slightly acidic to neutral soil, pH 6.0–7.5).
- ● Container or planting site: For containers: 1 large pot (15–20 gallons) with drainage holes.
- ● For outdoor planting: A sunny spot with at least 8+ hours of sunlight daily and space to grow (mature silk trees can reach 60+ feet!).
- ● Pruning tools: 1 pair of bypass pruners (for small branches).
- ● 1 pruning saw (for thicker branches).
- ● 1 sharp bypass loppers (for medium branches).
- ● Organic mulch: 2–3 inches of shredded bark or wood chips (to retain moisture and regulate soil temp).
- ● Fertilizer: 1 bag of balanced, slow-release fertilizer (10-10-10 or similar) or organic options like composted manure.
- ● Watering can or hose: With a gentle spray nozzle for hydration.
- ● 1 tree support stake (for young seedlings in windy areas).
- ● 1 pH testing kit (to monitor soil acidity).
- ● 1 spray bottle with neem oil (for pest prevention).
- ● 1 tree banding wrap (to protect the trunk from pests).
- ● 1 notebook & pencil (to track pruning dates and growth progress!).
Step-by-Step guide to pruning silk tree seedlings for strong growth
Here’s how I shape silk tree seedlings into sturdy, fruit-bearing trees with deliberate pruning—no guesswork involved.
🌱 Step 1: Identify and Remove Weak or Crowded Growth
Examine your silk tree seedling for any stems growing inward or crossing others—these compete for nutrients and weaken the tree. Use sharp, sterilized pruning shears to cut these out at the base. I always look for stems thinner than a pencil; these rarely survive long-term and should go first.
Focus on the lower third of the seedling where branches emerge. Remove any suckers or water sprouts (thin, upright shoots) that appear along the main trunk. These divert energy from the tree’s structure. If you see a branch growing straight up instead of outward, snip it off—it’ll never support fruit well.
✂️ Step 2: Shape the Canopy for Balance and Airflow
Step back and visualize the tree’s mature shape. Silk trees thrive with an open, vase-like form, so aim for a wider base that narrows slightly toward the top. Prune back any branches that grow too close together, leaving at least 6 inches between them. This prevents disease by improving airflow and sunlight penetration.
Cut just outside the branch collar (the swollen area where the branch meets the trunk) at a 45-degree angle. Avoid leaving stubs—these invite rot. If a branch is too thick to cut cleanly with shears, use a pruning saw. I always make my cuts on the underside of the branch to encourage faster healing.
☀️ Step 3: Encourage Outward Branching with Strategic Cuts
To promote horizontal growth, trim the tips of the remaining branches by about ⅓ of their length. This signals the tree to produce side shoots instead of elongating upward. Focus on the outer third of the canopy first—these cuts will create the tree’s framework.
Watch for new growth emerging from the leaf axils (the angle between the branch and leaf stem) within 2-3 weeks. These lateral shoots are your future fruit-bearing branches. If any new shoots grow straight up, pinch them off early to redirect energy outward. This is where patience pays off—consistent pruning now means a fuller tree later.
🌿 Step 4: Maintain Pruning Through the Growing Season
Prune again in late spring to remove any crossed or rubbing branches that may have formed since your last session. Check for dead or diseased wood—silk trees are prone to fungal issues if branches stay damp. Remove any suckers that sprout from the base or trunk, as they drain the tree’s energy.
By early fall, give the tree a light pruning to clean up any weak growth before dormancy. Avoid heavy cuts this late in the season, as new growth won’t harden off before winter. I always finish with a 10% reduction of the previous year’s growth to keep the tree’s energy balanced.
⏰ Step 5: Time Pruning for Maximum Fruit Production
For year-round fruit, prune lightly in winter (when the tree is dormant) to remove any deadwood and shape the canopy. Then, in early summer, do a second pruning to encourage new growth that will bear fruit the following season. This two-step approach ensures the tree never gets overloaded with too much foliage at once.
After pruning, apply a balanced fertilizer (like 10-10-10) to support new growth. Water deeply but avoid soaking the foliage—wet leaves invite fungal spores. Within 4-6 weeks, you’ll see fresh, vigorous shoots forming the tree’s future fruit clusters. This is the payoff: deliberate pruning now means a tree that produces steadily for years.
Tips & tricks for pruning silk tree seedlings
These precision techniques will transform your seedling into a thriving, fruit-producing tree with minimal effort.
Tool Prep: Sterilize your pruning shears with rubbing alcohol before each use—this prevents spreading disease between cuts. I also keep a small spray bottle of diluted bleach (1 part bleach to 9 parts water) on hand to disinfect tools between trees. For thicker branches, a pruning saw with a fine-toothed blade creates cleaner cuts without tearing the bark.
Seasonal Timing: The late spring and early summer pruning windows are non-negotiable for silk trees. In Step 4, when you're doing your late spring cleanup, focus on removing only what's absolutely necessary—this prevents stressing the tree before its summer growth spurt. The early summer pruning in Step 5 should happen just as new growth begins, but before it gets too tender (typically when you see 2-3 inches of new shoots).
Visual Cues for Perfect Cuts: When making your 45-degree cuts in Step 2, imagine you're slicing a pie—your cut should be just outside the branch collar, with the top of the cut facing away from the branch. This creates a natural barrier that prevents water from pooling and rotting the wound. For the ⅓ reduction in Step 3, hold your pruners parallel to the branch and cut where the blade's length equals about one-third of the branch's total length.
Post-Pruning Care: After your winter pruning in Step 5, apply a thin layer of wound dressing (like tree sealant) to any cuts larger than a pencil's diameter. This isn't about hiding the cut—it's about protecting the tree from pests and disease while the wound heals. Within those 4-6 weeks of new growth, keep an eye out for any shoots growing straight up from the base—these are your tree's way of compensating for lost branches, and they should be pinched off immediately to maintain that vase shape.
Pro Tips for Silk Tree Seedling
- These precision techniques will transform your seedling into a thriving, fruit-producing tree with minimal effort.
- Tool Prep: Sterilize your pruning shears with rubbing alcohol before each use—this prevents spreading disease between...
- Seasonal Timing: The late spring and early summer pruning windows are non-negotiable for silk trees. In Step 4, when ...
Frequently asked questions
Got questions about nurturing your silk tree seedling? You’re not alone! Here are answers to the most common queries to help you grow a thriving, fruit-bearing beauty.
How long does it take for a silk tree seedling to bear fruit?
A silk tree seedling (Albizia julibrissin) typically takes 3–5 years to produce its signature fluffy pink blooms and edible seed pods. Patience is key—focus on proper pruning and care in the early years to encourage strong growth. Pro tip: Young trees need full sun and well-draining soil to mature faster!
When is the best time to prune a silk tree seedling?
Prune your silk tree seedling late winter or early spring, just before new growth begins. Avoid heavy pruning in fall, as it can stimulate tender shoots vulnerable to cold. For shaping, trim back 20–30% of the canopy to encourage branching. Warning: Never prune during active bloom—it can reduce fruit production!
Can I grow a silk tree from seed, or should I buy a seedling?
While you can grow a silk tree from seed, it’s slower and less reliable than buying a seedling. Seeds may take 1–2 years to germinate and produce weaker, less predictable trees. Seedlings from nurseries are hardier, faster-growing, and already trained for better branching. Pro tip: If starting from seed, soak seeds in warm water for 24 hours to speed up germination!
Why are the leaves on my silk tree seedling turning yellow?
Yellowing leaves (chlorosis) usually signal overwatering, nutrient deficiency, or pests. Check the soil—it should be moist but not soggy. Lack of iron or zinc (common in alkaline soils) can cause this too. Treat with a chelated iron supplement or adjust watering. Pest alert: Spider mites or aphids can also stress leaves—spray with neem oil if needed!
Is a silk tree seedling suitable for containers, or does it need ground planting?
Silk trees grow best in the ground due to their deep root systems and large canopy, but young seedlings (1–3 years old) can thrive in containers for 1–2 seasons. Use a 5-gallon+ pot with drainage holes and repot annually. Caution: Container-grown trees may need winter protection in cold climates—wrap the pot in burlap or move it indoors!
Wrapping up and next steps
Growing a silk tree seedling into a thriving, fruit-bearing beauty is all about patience, precision, and a little love!
With the right pruning techniques—like open-centering, heading back, and thinning—you’ll encourage lush branching and bountiful harvests year-round. 🌿✨ Remember, every trim is a step toward a stronger, more graceful tree.
Ready to take the next step? Start small—pick one pruning method to practice this season, and watch your silk tree transform! Whether you’re a beginner or a seasoned gardener, your green thumb will shine. Happy pruning!