
Blooming
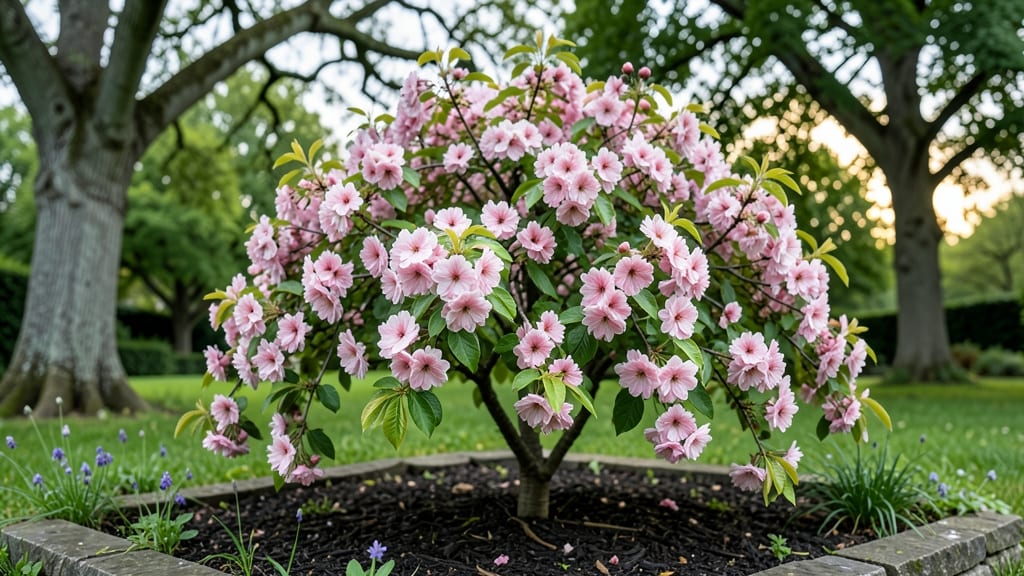
Your Rainier cherry tree blossom transforms spring into a fragrant, pink-and-white spectacle that hummingbirds adore. 🌸 I still remember the first time I saw mine explode with blooms—it felt like the garden had finally woken up.
These trees aren’t just pretty; they’re productive, yielding sweet, firm Rainier cherries that taste like summer in every bite.
The secret to that stunning floral display starts with the right conditions: full sun, well-draining soil, and a spot where winter winds won’t scorch the blossoms. In zones 5-8, planting in early spring gives roots time to establish before summer heat arrives.
Prune in late winter to shape the tree and encourage next year’s blooms—just avoid heavy cuts, or you’ll sacrifice flowers for wood.
By late spring, your efforts pay off with weeks of fragrant blossoms that attract pollinators and set the stage for a bountiful harvest. The key to keeping them healthy? Consistent watering (especially during fruit set) and annual pruning to improve airflow.
A mature tree can produce 100+ pounds of cherries, but only if you nurture those delicate spring blooms.
Even in small yards, a Rainier cherry fits—just choose a dwarf variety if space is tight. The trade-off? Slightly smaller fruit, but the blossoms still steal the show. Here’s how to make yours thrive from bud to harvest.
📚 In This Guide
- What you need
- Instructions
- Tips and common mistakes
- Wrapping up and next steps
What you need
- ● Rainier cherry tree (Prunus avium 'Rainier'): 1-2 bare-root or container-grown saplings (3–5 ft tall for best blooms)
- ● Ensure it’s self-pollinating or plant a compatible variety (like Bing or Stella) within 50 ft for fruit production.
- ● Planting site: Full sun (6+ hours/day) in a well-draining location
- ● Space: 20–25 ft between trees (or 15 ft if dwarf variety)
- ○ Soil amendments (optional but helpful): Compost (5–10 lbs) or aged manure to enrich soil
- ● Lime (if soil pH is < 6.0; test kit recommended)
- ● Digging tools: Shovel or trowel (for planting)
- ● Garden fork (to loosen soil)
- ● Watering supplies: Hose with nozzle or watering can (5+ gallons capacity)
- ● Mulch (2–3 inches of wood chips or straw)
- ○ Safety gear (optional but wise): Gloves (gardening or work gloves)
- ● Knee pads (for comfort)
- ● Check local hardiness zone (Rainier cherries thrive in zones 5–8 🌡️).
- ● Verify frost dates—plant after last frost (spring) or in early fall.
- ● Confirm no cherry tree diseases (e.g., bacterial canker) in your area.
- ● Permit check: Some regions require approval for fruit-bearing trees.
Step-by-step guide to encouraging stunning Rainier cherry tree blossoms
Here’s how to coax your Rainier cherry into a fragrant spring spectacle—year after year.
🌱 Step 1: Prune for Airflow and Light in Late Winter
Start by removing any dead, crossing, or inward-growing branches with clean, sharp pruners. I aim to open up the center of the tree so light and air can reach all the way to the trunk—this prevents fungal diseases and encourages robust blooms. Cut just outside the branch collar where it meets the trunk, and avoid leaving stubs.
Focus on thinning rather than heading back (cutting the ends). You’ll see a more natural shape and better fruit set. Aim to remove about 20-30% of the previous year’s growth—this rejuvenates the tree without shocking it. Prune on a dry day when the tree is still dormant but buds have started swelling.
☀️ Step 2: Provide Full Sun and Winter Protection
Rainier cherries need at least 6-8 hours of direct sunlight daily for strong blooms. If your tree is in partial shade, consider transplanting it to a sunnier spot—even a few hours less sun can reduce flowering. I’ve found that morning sun paired with afternoon shade works best in hot climates, but full sun is ideal.
Protect young trees from late winter frost with burlap wraps or a lightweight frost cloth if your area gets sudden cold snaps. The blossoms are incredibly sensitive to frost damage, which can ruin the entire season’s fruit. Once buds break in early spring, remove any protective coverings immediately to avoid overheating.
💧 Step 3: Water Deeply During Critical Growth Stages
Water your Rainier cherry deeply once a week during the dormant season (late fall to early winter) to build root reserves. Then, increase to every 5-7 days once buds begin to swell in early spring. You’ll know you’ve watered enough when the soil is moist 12 inches down—stick a screwdriver into the ground to check.
Avoid overhead watering once blossoms appear. Instead, use a soaker hose or drip irrigation to keep the roots hydrated without wetting the flowers. Wet blossoms can attract pests like aphids or develop fungal issues. Mulch around the base with 2-3 inches of organic mulch (like wood chips) to retain moisture and regulate soil temperature.
✂️ Step 4: Thin Fruit for Larger, Healthier Cherries
Once the cherries form, thin them to 6-8 inches apart when they’re about the size of a dime. This ensures the remaining fruit gets enough nutrients and sunlight to mature properly. I use clean pruning shears to gently twist off excess fruit—never pull, as this can damage the stem.
Thinning also improves air circulation, reducing the risk of fungal diseases like brown rot. You’ll see thicker, juicier cherries with better flavor if you’re patient during this step. Time it right: too early, and the tree may produce more fruit; too late, and the cherries won’t have room to grow.
🌿 Step 5: Fertilize for Blooms and Fruit Production
Apply a balanced 10-10-10 fertilizer in early spring, just as the buds begin to swell. Use ½ pound per 100 square feet of canopy—this gives the tree enough nutrients without overloading it. Water the soil thoroughly after applying to help the granules dissolve and reach the roots.
In mid-summer, switch to a low-nitrogen, high-phosphorus fertilizer (like 5-10-10) to support fruit development. Avoid high-nitrogen fertilizers in late summer, as they encourage new growth that won’t harden off before winter. You’ll notice stronger blooms and fewer dropped blossoms if the tree gets consistent nutrition.
Tips & tricks for perfect Rainier cherry tree blossoms
Here’s what I’ve learned after years of watching my own Rainier cherry transform into a fragrant spring showstopper.
Pruning Precision: When you’re removing that 20-30% of last year’s growth in Step 1, look for branches that are thinner than a pencil—they’re often the ones stealing energy from your blossoms. These smaller branches rarely produce quality fruit anyway, so you’re actually doing your tree a favor by removing them. And always make your cuts at a 45-degree angle just outside the branch collar to prevent water from pooling and causing rot.
Sunlight Strategy: The 6-8 hours of direct sunlight requirement is non-negotiable for those stunning blossoms, but here’s the trick: if your tree is in partial shade, don’t just accept fewer flowers. Instead, consider strategically removing nearby shade trees or shrubs that are blocking light. Even just a few more hours of morning sun can make a dramatic difference in bloom intensity. I’ve seen trees go from sparse blooms to full canopies just by clearing some low-hanging branches from an overgrown hedge.
Watering Wisdom: That 12-inch deep watering check in Step 3 is crucial, but don’t stop there. The best time to water is actually in the early morning—this gives the soil all day to absorb moisture before evaporation sets in. I’ve found that watering at noon can lead to wasted water as much as 50% of it evaporates before it even reaches the roots. And if you notice the soil staying wet longer than usual, that’s a sign your mulch layer might be too thick—stick to those 2-3 inches of organic mulch.
Fertilizer Timing: The switch from 10-10-10 to 5-10-10 in mid-summer is where many gardeners go wrong. The key is to apply that second fertilizer when you see the first cherries starting to form, not just because it’s summer. This timing ensures your tree has the phosphorus it needs for fruit development without overloading it with nitrogen that would encourage leafy growth at the expense of blossoms. Think of it as giving your tree a little energy boost just when it needs it most for the next season’s flowers.
Pro Tips for Rainier Cherry Tree Blossom
- Here’s what I’ve learned after years of watching my own Rainier cherry transform into a fragrant spring showstopper.
- Pruning Precision: When you’re removing that 20-30% of last year’s growth in Step 1, look for branches that are thinner than a pencil—they’re often the ones stealing energy from your blossoms.
- Sunlight Strategy: The 6-8 hours of direct sunlight requirement is non-negotiable for those stunning blossoms, but here’s the trick: if your tree is in partial shade, don’t just accept fewer flowers.
Frequently asked questions
Got questions about cultivating and enjoying your Rainier cherry tree blossoms? You’re not alone! Here are some of the most common queries—plus expert answers to help you grow a stunning, pollinator-friendly tree with minimal stress.
When do Rainier cherry blossoms typically bloom?
The Prunus avium (Rainier cherry) usually bursts into bloom in late April to early May, depending on your climate zone. Cooler springs may delay flowers by 1–2 weeks, while warmer regions might see earlier blooms. Track local frost dates to avoid late frosts, which can damage delicate blossoms.
Are Rainier cherry blossoms good for pollinators like bees?
These pink-and-white double blossoms are a magnet for bees, butterflies, and hummingbirds. Unlike some hybrid varieties, Rainier cherries produce abundant nectar and pollen, making them a top choice for native pollinator gardens. Just avoid pesticides during bloom season!
Will my Rainier cherry tree produce fruit if I only have one tree?
Rainier cherries are self-pollinating but benefit from cross-pollination. While you might get a few cherries solo, planting a second cherry tree (like Stella or Lapins) nearby will dramatically increase fruit yield. Pro tip: Space trees 30–40 feet apart for optimal pollination.
How do I prune a Rainier cherry tree to encourage more blossoms?
Prune in late winter (dormant season) to shape the tree and stimulate blooms. Focus on:
- Removing dead or crossing branches (use clean, sharp shears).
- Thinning out overcrowded areas to improve airflow.
- Avoid heavy pruning—never cut more than 25% of the canopy at once.
Why aren’t my Rainier cherry blossoms opening, or they’re falling off?
Blossom drop is often caused by:
- Late frost (below 28°F) damaging flowers.
- Overwatering or poor drainage stressing the tree.
- Pests like cherry fruit flies or diseases (e.g., bacterial canker).
Check for yellowing leaves, holes in buds, or oozing sap. If frost is the culprit, mulch heavily next winter and consider frost cloths for young trees.
Can I grow a Rainier cherry tree in a container or small yard?
Rainier cherries need plenty of space (20–30 feet wide) and deep, well-draining soil. While possible in large containers (30+ gallons), growth will be stunted, and fruit production may suffer. For small yards, consider dwarf varieties like Stella or Montmorency—they’re just as stunning!
Wrapping up and next steps
The Rainier cherry tree blossom isn’t just a stunning sight—it’s a gift to nature and your garden! 🌸 From supporting pollinators to promising sweet summer fruit, this tree brings beauty, function, and joy.
Whether you’re a first-time gardener or a seasoned green thumb, planting one is a rewarding step toward a thriving, fragrant landscape.
Ready to take the next step? Research local nurseries, mark your planting spot, and start your journey toward a blooming paradise. Your future self—and the bees—will thank you!