
Pruning
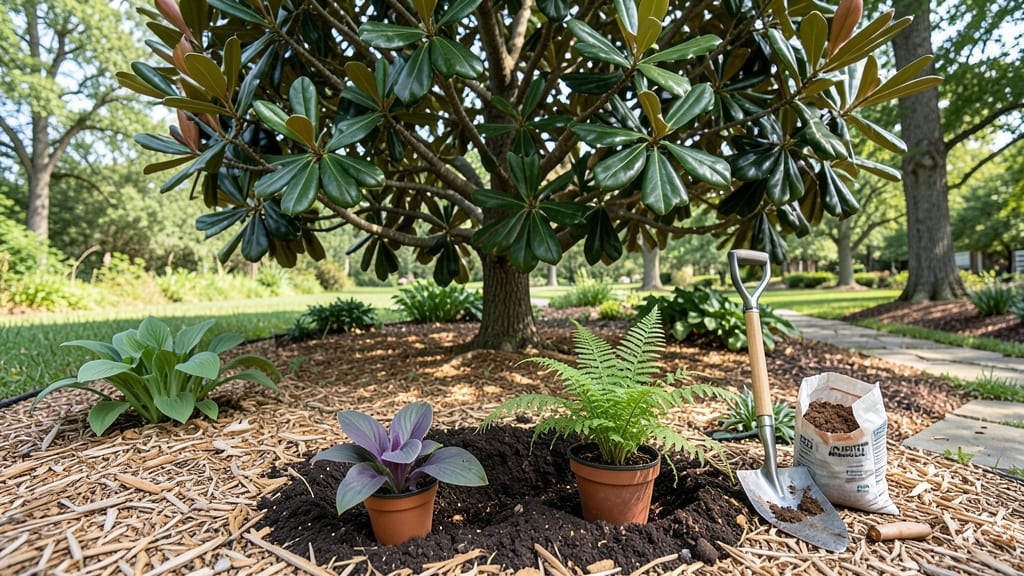
That tree stump isn't dead space—planting around a tree stump is your chance to turn it into your garden's most charming corner with shade-loving plants. 🌿 I've transformed several stumps into thriving mini-ecosystems where ferns unfurl beside hostas and wildflowers dance in the dappled light.
The key is matching plants to the stump's unique conditions: moist soil, root competition, and filtered sunlight. Skip the sun-lovers here—they'll wilt faster than a forgotten watering can. Instead, choose plants like astilbes, bleeding hearts, or even dwarf fruit trees that thrive where others struggle.
By summer, you'll have a lush ground cover that softens the stump's edges and draws pollinators. The right mulch keeps roots happy while suppressing weeds, and a few strategic rocks add texture without fighting the plants for space.
This works for city yards, woodland gardens, or even that awkward spot between your house and the neighbor's oak. Let's make that stump the centerpiece of your garden's next chapter.
📚 In This Guide
- What you need
- Instructions
- Tips and common mistakes
- Wrapping up and next steps
What you need
- ● Soil amendments (1–2 bags): Compost (2–3 cubic feet)
- ● Peat moss or coconut coir (1 bag, ~3 cubic feet)
- ● Garden soil (2–3 cubic feet, well-draining)
- ● Mulch (2–4 bags): Shredded bark, wood chips, or pine straw (2–3 inches deep)
- ● Plants (3–5, depending on size): Shade-tolerant perennials (e.g., ferns, hostas, or astilbes)
- ● Ground covers (e.g., creeping thyme, ivy, or sedum)
- ○ Optional: Small shrubs (e.g., boxwood or azaleas) for structure
- ● Tools: Garden trowel or hand shovel
- ● Pruners (for trimming plants)
- ● Rake (for leveling soil)
- ● Garden hose or watering can
- ● Tree stump cap or decorative cover (if keeping the stump visible)
- ● Slow-release fertilizer (for nutrient boost)
- ● Mulch ring or edging (for clean lines)
- ● Garden gloves (to protect your hands)
- ● Kneeling pad (for comfort)
Step-by-Step guide for planting around a tree stump
Here’s how to turn that empty circle into a vibrant, functional garden space—no special tools required.
🪴 Step 1: Prepare the Soil Around the Stump
Start by clearing away any weeds or debris within your planting area. Use a garden fork to loosen the soil around the stump’s perimeter, working about 12 inches outward from the edge. This helps roots establish more easily. If the soil is compacted or poor, mix in 2-3 inches of compost to improve drainage and fertility.
I like to rake the area smooth afterward—this creates an even surface for planting. Avoid piling soil directly against the stump itself; leave a 2-inch gap to prevent rot or fungal issues. If the stump has a hollow center, fill it with mulch instead of soil to deter pests.
🌱 Step 2: Choose the Right Plants for the Space
Select plants that thrive in partial shade and won’t compete aggressively with the tree’s roots. Good options include hostas, ferns, astilbes, or shade-tolerant perennials like coral bells. Avoid deep-rooted plants like shrubs—they’ll steal moisture from the tree.
For a pop of color, try impatiens or begonias in containers near the stump’s edge. If you want height, ornamental grasses or bamboo (in contained pots) add texture without crowding. Space smaller plants 6-12 inches apart and larger ones 18-24 inches away from the stump.
☀️ Step 3: Plant and Mulch Strategically
Dig holes just deep enough to accommodate the root ball, then place each plant gently into the soil. Firm the soil around the roots and water deeply to settle everything. For containers, place them 3-4 inches away from the stump’s edge to avoid root interference.
Spread 2-3 inches of mulch (like wood chips or shredded bark) over the soil, keeping it 2 inches away from plant stems. Mulch helps retain moisture and suppresses weeds. Replenish it annually—this keeps the area looking tidy and healthy without smothering your new plants.
💧 Step 4: Water and Monitor Growth
Water newly planted areas once a week for the first month, giving the soil a deep soak until water drains through. After that, adjust based on rainfall—shade plants usually need less water than sun-lovers. Check soil moisture by sticking your finger 1 inch deep; if it’s dry, water again.
Watch for signs of stress like yellowing leaves or wilting. If you notice these, adjust watering or add a layer of mulch to retain moisture. Over time, your garden will fill in naturally, creating a lush, low-maintenance space that hides the stump entirely.
Tips & tricks for planting around a tree stump
These simple strategies will help you create a thriving garden around that stump without any of the common pitfalls.
Soil Prep Pro Tip: When loosening soil in Step 1, work the garden fork about 12 inches outward from the stump's edge, but don't dig deeper than 6-8 inches. Shallow loosening prevents damaging any remaining tree roots while still improving drainage. If your soil feels dense, mix in that 2-3 inches of compost right where you're loosening—this creates a perfect root zone for your new plants. Confession: I skipped this step my first time and struggled with poor plant establishment.
Plant Selection Secret: In Step 2, focus on plants that naturally thrive in partial shade—hostas and ferns are my go-tos because they're shade-lovers that won't compete with your tree. For containers near the stump, consider impatiens or begonias—they add instant color and can handle the reflected light from the stump. Pro tip: Avoid anything with aggressive roots like mint or bamboo unless you're using contained pots, because those will battle with your tree.
Mulching Magic: That 2-3 inches of mulch in Step 3 is your secret weapon. Spread it evenly but keep it 2 inches away from plant stems to prevent rot. I like to use wood chips because they break down slowly, but shredded bark works too. Here's what nobody tells you—replenish your mulch every spring. I've seen gardens where mulch disappeared over winter, leaving bare soil that compacts and prevents new roots from growing.
Watering Wisdom: The once-a-week deep soak in Step 4 is perfect for establishing roots, but there's a trick: water in the morning so plants have all day to absorb moisture before evening. Check that soil moisture by sticking your finger 1 inch deep—if it's dry, water again. I've learned the hard way that shade plants still need consistent moisture, especially during dry spells. For the first month, I set a reminder on my phone to keep track of that weekly watering.
Pro Tips for Planting Around A Tree Stump
- These simple strategies will help you create a thriving garden around that stump without any of the common pitfalls.
- Soil Prep Pro Tip: When loosening soil in Step 1, work the garden fork about 12 inches outward from the stump's edge,...
- Plant Selection Secret: In Step 2, focus on plants that naturally thrive in partial shade—hostas and ferns are my go-...
Frequently asked questions
Got questions about planting around a tree stump? You’re not alone! Here are some of the most common concerns—and their solutions—to help you turn that empty spot into a thriving garden.
What’s the best time of year to plant around a tree stump?
The ideal time is spring or fall when temperatures are mild. This gives plants time to establish roots before extreme heat or cold. Avoid planting in peak summer—drought stress can harm young plants. Pro tip: If you must plant in summer, water deeply and mulch heavily to retain moisture!
Will planting near a tree stump compete with its roots for water and nutrients?
Yes, but smart planning minimizes competition! Choose drought-tolerant plants like ornamental grasses, ferns, or shade-loving perennials. Keep them at least 3–5 feet away from the stump’s edge. Mulch generously (but avoid piling it against the stump) to protect roots while giving your new plants a fighting chance.
Do I need to remove the stump entirely before planting?
Not necessarily! If the stump is small or decaying, you can plant directly around it. For larger stumps, consider stump grinding (leaving a 2–3 inch stub) or covering it with landscape fabric before adding soil. This prevents regrowth and creates a cleaner planting area. Warning: Avoid planting near live roots—test with a probe or call a pro if unsure!
How much water do new plants around a stump need?
Newly planted shrubs or flowers need 1–1.5 inches of water per week (more in hot/dry climates). Water deeply 2–3 times per week for the first month, then taper off as roots establish. A drip irrigation system works best—it delivers water slowly without disturbing the soil. Watch for: Wilting leaves (overwatering) or crispy edges (underwatering).
What if pests or weeds take over after planting?
Weeds and pests love bare soil! Apply pre-emergent herbicide (like corn gluten meal) in early spring to block weeds, and mulch with 3–4 inches of wood chips or shredded bark. For pests, hand-pull weeds or use organic sprays like neem oil. Bonus: Plant ground covers (e.g., creeping thyme or clover) to outcompete weeds naturally.
Can I plant flowers or vegetables around a tree stump?
Flowers like hostas, impatiens, or shade-tolerant annuals thrive here! For veggies, stick to shallow-rooted crops like lettuce, radishes, or herbs (basil, parsley). Avoid deep-rooted plants (carrots, potatoes) near stumps—they’ll compete for space. Pro move: Use containers if the soil is too compacted!
Wrapping up and next steps
Transforming that empty tree stump space into a vibrant garden oasis isn’t just possible—it’s empowering! 🌱 With the right plants, a little creativity, and some thoughtful planning, you’ve got the power to turn dead space into a thriving, low-maintenance landscape.
Whether you’re a seasoned gardener or just starting out, every small step counts—so grab those tools, pick your favorites, and make it happen.
Ready to dive deeper? Next up: Sketch a simple design, gather your supplies, and start planting—your future garden will thank you!