
Lawn
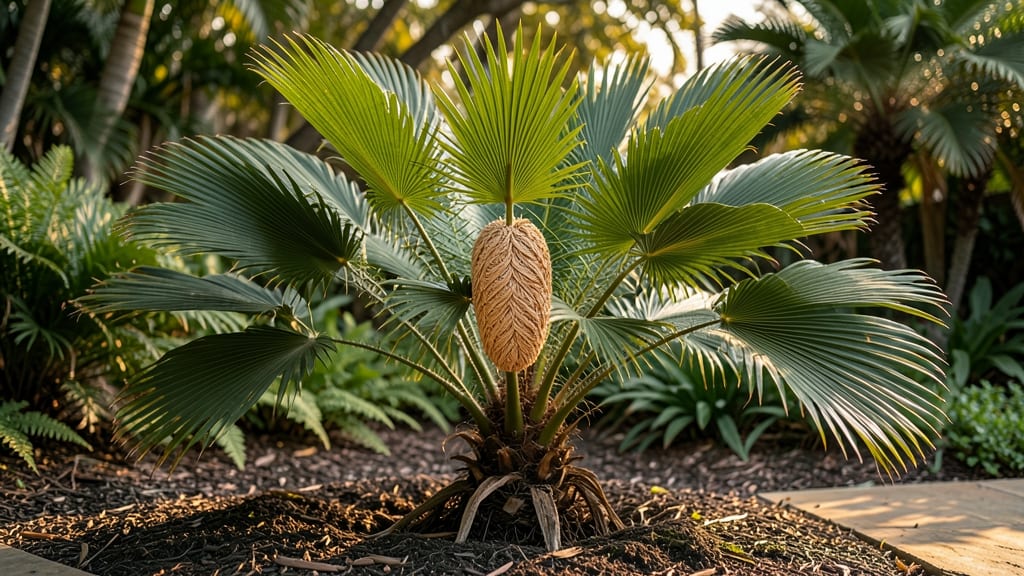
Turn your palm tree seed pods into whimsical garden sculptures that look like they belong in a fairy tale. 🌿 I’ve transformed these natural treasures into everything from rustic wall art to tabletop centerpieces, and the best part?
They’re completely free if you’ve got palm trees nearby. The pods’ unique shapes and textures create organic patterns that elevate any outdoor space—whether you’re going for boho-chic or earthy elegance.
You’ll need just a few simple supplies: seed pods (cleaned and dried), strong adhesive like E6000, a hot glue gun, and optional embellishments like twine, paint, or small pebbles. The process is beginner-friendly—no fancy tools required.
Start with a small project, like a mini wreath or a hanging mobile, to get a feel for how the pods arrange themselves before tackling larger installations.
Imagine a sunlit pathway lined with seed pod lanterns or a cozy seating area framed by a pod sculpture. These pieces age beautifully outdoors, developing a weathered charm over time.
They also make thoughtful gifts—handmade with love and zero waste. The possibilities are endless, and the best part? Every creation tells a story of where it came from.
Perfect for gardeners who love upcycling, nature lovers with a creative streak, or anyone looking to add a touch of organic artistry to their outdoor space. Let’s get crafting with what nature provides!
📚 In This Guide
- What you need
- Instructions
- Tips and common mistakes
- Wrapping up and next steps
What you need
- ● Palm tree seed pods: 10–20 pods (fresh or dried, depending on your project—coconut, date, or royal palm pods work beautifully!)
- ● Natural adhesives: Epoxy resin (for durability, ~16 oz kit)
- ● OR strong craft glue (like E6000, 4 oz tube)
- ● Base materials: Wooden dowels or stakes (½" diameter, 12–18" long)
- ● OR small terracotta pots (for lightweight designs)
- ○ Decorative elements (optional but fun!): Acrylic paint (earth tones or vibrant colors, ~4 oz bottles)
- ● Twine, beads, or small shells (for texture)
- ● Wire or fishing line (for structural support)
- ● Safety gear: Gloves (nitrile), safety goggles, and a well-ventilated workspace (resin fumes can be strong!)
- ● Cutting tools: Utility knife or craft scissors (for trimming pods)
- ● Wire cutters (if using metal accents)
- ● Assembly tools: Toothpicks or small wooden skewers (for securing pieces while glue dries)
- ● Clamps or rubber bands (to hold components in place)
- ● Prerequisites: Patience! Some designs take 24–48 hours to fully cure.
- ● Access to outdoor space (for drying or weatherproofing)
Step-by-step instructions for crafting palm tree seed pod art
Turn nature’s discarded treasures into playful garden sculptures—here’s how to make it easy and fun!
🪴 Step 1: Gather and Prepare Your Seed Pods
Start by collecting palm tree seed pods from your garden or a local park. Look for ones that are dry, intact, and free of cracks—these will hold their shape best. Rinse them gently with water to remove dirt or debris, then let them air-dry completely in a sunny spot. This ensures they’re clean and ready for crafting without warping later.
If you find pods with stubborn dirt, soak them in warm water for 10-15 minutes before scrubbing lightly with a soft brush. Avoid soaking too long, or the pods may absorb too much moisture and become brittle. Once dry, sort them by size and shape—you’ll want a mix for texture and visual interest in your final piece.
🎨 Step 2: Design Your Garden Sculpture Layout
Sketch a simple design on paper first—whether it’s a whimsical animal, a face, or an abstract shape. Palm seed pods come in all sizes, so group smaller ones together for details and larger ones as the base. For example, a 6-inch pod could be the body of a bird, while 2-inch pods might form wings or a tail.
Arrange your pods on a flat surface to visualize the composition. Play with balance—heavier pods (like coconut husks) should go at the bottom, while lighter ones can perch on top. This step is all about creativity, so don’t overthink it! If a pod doesn’t fit, swap it out for another. The goal is to make something uniquely yours.
✂️ Step 3: Secure the Pods Together
Use hot glue or strong craft glue to attach the pods to a base—like a wooden plank, a large rock, or even a repurposed plant pot. Start with the largest pods first, pressing them firmly into place. For smaller pods, dab glue on the back of one pod and press it against another until it holds. Let each layer dry completely before adding more.
If you’re making a freestanding sculpture, reinforce the base with wire or twine wrapped around the pods to add stability. For hanging pieces, drill a small hole through the top pod and thread a sturdy string or wire through it. Pro tip: Work in sections—build one part at a time, then step back to check the overall look before moving forward.
🌿 Step 4: Add Finishing Touches
Once your sculpture is fully assembled, let the glue dry for at least 24 hours to ensure it’s secure. If any pods feel loose, add a bit more glue to the back. For extra durability, seal the entire piece with a clear outdoor varnish or acrylic sealer to protect it from rain and sun. This step keeps your art looking fresh for years.
Now’s the time to get creative with details! Add pebbles, shells, or moss to fill gaps or enhance texture. A few paint strokes (if you want a pop of color) or a spray of gold leaf can elevate the piece into something truly special. Place your finished sculpture in a shady garden spot where it can be admired year-round.
Tips & tricks for Perfect palm tree seed pod art
Transforming seed pods into art is all about patience and creativity—here’s how to make every step shine!
Selection Tip: When gathering pods, focus on ones with smooth, intact surfaces—these will hold paint and glue better. Avoid pods with holes or cracks, as they’ll weaken your structure. I’ve found that slightly larger pods (around 4-6 inches) make the best base pieces, while smaller ones (2-3 inches) work perfectly for details like eyes or leaves. Pro tip: Collect pods after a rain shower—they’re often cleaner and easier to handle!
Design Strategy: Before gluing anything, sketch your design on paper first! This helps visualize proportions and saves time. For example, if you’re making a bird, place your largest pod as the body and arrange smaller pods around it to create wings. I like to use masking tape to temporarily hold pods in place while I adjust the layout—it’s a game-changer for getting the composition right before committing to glue.
Adhesive Wisdom: Hot glue is your best friend for quick projects, but for extra durability, I recommend using a two-part epoxy glue for outdoor pieces. Always apply glue sparingly—too much can ooze out and create a messy finish. Let each layer dry completely (usually 5-10 minutes) before adding more pods. For hanging sculptures, use a heavy-duty fishing line instead of twine—it’s stronger and won’t stretch over time.
Finishing Touches: The 24-hour drying time is non-negotiable—rushing can cause pods to shift or fall apart. Once dry, seal your sculpture with outdoor varnish to protect it from moisture. For extra flair, try mixing acrylic paint with a bit of varnish before applying to make it more weather-resistant. Place your finished piece in partial shade to preserve its natural beauty for years!
Pro Tips for Palm Tree Seed Pod Art
- Transforming seed pods into art is all about patience and creativity—here’s how to make every step shine!
- Selection Tip: When gathering pods, focus on ones with smooth, intact surfaces—these will hold paint and glue better....
- Design Strategy: Before gluing anything, sketch your design on paper first! This helps visualize proportions and save...
Frequently asked questions
Got questions about crafting palm tree seed pod art? We’ve got answers!
Whether you’re a beginner or a seasoned nature artist, these FAQs will help you turn those unique seed pods into stunning garden decor with ease.
What’s the best way to clean and prepare palm tree seed pods for art?
Start by rinsing pods under lukewarm water to remove dirt. For stubborn grime, soak in a vinegar-water mix (1:3 ratio) for 10–15 minutes, then scrub gently with a soft brush. Let them dry completely in sunlight—this prevents mold and ensures paint adheres smoothly. Avoid bleach; it can weaken the natural fibers!
How long does it take for painted seed pod art to dry?
Drying time depends on humidity and paint type. Acrylics typically dry in 2–4 hours, while outdoor-safe varnishes may need 6–12 hours. For speed, place your art in a well-ventilated, shaded spot. Pro tip: Apply a thin layer of paint—thick coats slow drying and can crack.
Can I use regular craft paint on seed pods for outdoor use?
Nope! Outdoor elements like rain and UV rays will fade or damage regular craft paint. Opt for acrylic paints labeled “outdoor” or “weather-resistant”, or seal your finished piece with a non-toxic polyurethane varnish. For extra durability, add a waterproof sealant after painting.
What if my seed pods crack or split while drying?
Don’t stress—cracks are fixable! Fill small gaps with hot glue or epoxy resin, then sand lightly once dry. For larger splits, wrap the area with waterproof tape (like duct tape) before painting. If the damage is severe, consider repurposing the pod as part of a textured mosaic instead.
Are there alternatives to palm tree seed pods for similar art?
Try these nature-friendly swaps:
- Pinecones – Lightweight and great for hanging decor.
- Acorn caps – Perfect for tiny, intricate designs.
- Dried citrus slices – Add a pop of color and texture.
- Seed pods from lotus or hibiscus – Unique shapes for one-of-a-kind pieces.
Wrapping up and next steps
Transforming palm tree seed pods into whimsical garden art is a creative and eco-friendly way to breathe life into your outdoor space! 🌿✨ These natural sculptures not only add charm but also tell a story of sustainability.
Whether you're a beginner or a seasoned crafter, the possibilities are endless—let your imagination run wild with each unique piece.
Ready to bring your vision to life? Start small—gather a few pods, sketch your design, and dive into the process. Before you know it, your garden will be a gallery of nature-inspired masterpieces! 🌟