
Pruning
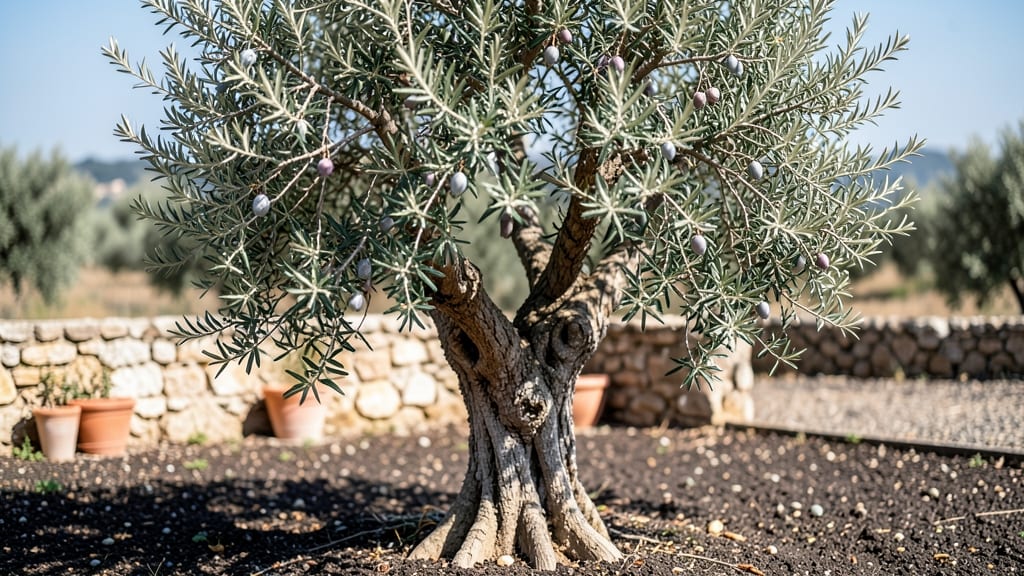
Strategic pruning transforms your olive tree into a stunning garden centerpiece. ✂️ I’ve shaped mine into a cascading fountain form, and the difference in visual impact is night and day—it’s now the focal point of my Mediterranean-inspired patio, drawing compliments every summer.
The key isn’t just cutting branches; it’s understanding how olive wood responds to pressure and where to guide new growth for that sculpted elegance.
Start with clean, sharp pruners and a clear vision—whether you want a formal square, a flowing spiral, or a modern asymmetrical shape. Olive trees handle pruning well, but timing matters: late winter or early spring, just before new growth begins, gives you the best control.
For artistic forms, use soft ties or stakes to gently shape branches while they’re still flexible, and always cut just above a bud or leaf node to encourage healthy regrowth.
What you’ll end up with is a tree that looks like it belongs in a Tuscan villa, not just your backyard. The silvery-green leaves create a striking contrast against any backdrop, whether it’s a rustic stone wall or a sleek modern terrace.
Regular maintenance keeps the shape crisp—think of it like giving your tree a haircut every few months to maintain that polished look.
Works for both container-grown olives and in-ground trees, so you can create this look in small urban spaces or sprawling estates. The only rule? Be patient—olive trees grow slowly, so each pruning session builds toward that perfect silhouette over time.
Ready to turn your tree into a living work of art?
📚 In This Guide
- What you need
- Instructions
- Tips and common mistakes
- Wrapping up and next steps
What you need
- ● Pruning shears: Bypass pruners (for small branches, 4–6 inches long) or anvil pruners (for thicker branches, up to ½ inch in diameter). Pro tip: Sharpen blades before use to make clean cuts! ✨
- ● Loppers: 8–12 inch bypass loppers for medium branches (½–1½ inches thick).
- ● Pruning saw: A curved-tooth pruning saw for branches thicker than 1½ inches.
- ● Gloves: Heavy-duty, cut-resistant gloves (e.g., leather or synthetic mesh) to protect your hands.
- ○ Disinfectant: 70% rubbing alcohol or a pruning sealant (optional but recommended to prevent disease).
- ● Twine or zip ties: For temporary support if training young branches (3–5 mm width).
- ○ Pruning paste: Optional, for sealing large cuts (1–2 oz tube).
- ● Ladder or step stool: If your tree is taller than 6–8 feet (ensure it’s stable!).
- ● Notebook & pencil: To sketch your design or track progress.
- ● A healthy, mature olive tree (minimum 3–5 years old for best results).
- ● Knowledge of basic pruning techniques (or willingness to research!).
- ● Ideal weather: Prune during dormant season (late winter/early spring) for best healing.
How to shape an olive tree for natural elegance
Transform your olive tree into a graceful, sculpted beauty with these simple pruning techniques.
✂️ Step 1: Assess the Tree’s Natural Structure
Start by examining your olive tree’s existing branches. Look for the strongest central leader—the main vertical trunk—and identify any competing leaders that might create a weak structure. I always begin by removing any branches growing straight upward from the trunk, as these compete with the central leader and weaken the tree’s form.
Next, scan for branches that cross or rub against each other. These will eventually damage the bark and create entry points for disease. Mark these with a piece of twine or a small flag so you can easily spot them during pruning. The goal here is to create a balanced, open canopy that allows sunlight and air to circulate freely.
✂️ Step 2: Prune for a Balanced Canopy
Begin pruning by cutting back any branches that are growing inward or downward. Use clean, sharp pruning shears to make cuts just above a leaf node or outward-facing bud. I like to step back every few cuts to visualize the tree’s shape—this helps me avoid over-pruning or creating uneven gaps in the canopy.
Focus on thinning out the lower branches first to create an open, airy base. Olive trees naturally grow with a dense, bushy habit, so thinning encourages better airflow and reduces the risk of fungal diseases. Aim to remove about 20-30% of the tree’s foliage in one session—this is enough to shape it without shocking the plant.
☀️ Step 3: Encourage an Upright, Tiered Form
To create a tiered, elegant shape, prune the lower branches slightly shorter than the upper ones. This encourages the tree to grow in horizontal layers, which is especially important for younger olive trees. I usually target 3-5 main branches spaced evenly around the trunk, each pruned to a slightly different length to create visual interest.
If your olive tree has a natural fork or split in the trunk, avoid cutting back the branches at the fork—this can weaken the tree’s structure. Instead, focus on shaping the branches above the fork to maintain a strong, stable form. Water the tree deeply after pruning to help it recover and reduce stress.
⏰ Step 4: Maintain Shape Through Seasonal Trims
Olive trees respond best to gradual shaping, so plan to prune lightly 2-3 times per year. The best time to prune is in late winter or early spring, just before new growth begins. Avoid heavy pruning in the fall, as this can stimulate tender new growth that won’t survive winter frosts.
During the growing season, do light maintenance pruning to remove any suckers (shoots growing from the base or trunk) or water sprouts (fast-growing, vertical shoots). These compete with the tree’s main structure and should be removed as soon as they appear. A little attention now keeps your olive tree looking polished and healthy year-round.
Tips & tricks for perfect olive tree shaping
Here's what nobody tells you about sculpting your olive tree without stressing it out.
The Pruning Angle Matters: When cutting branches in Step 2, make your cuts at a 45-degree angle just above a leaf node or outward-facing bud. This encourages new growth in the direction you want—toward the outside of the tree. I learned this the hard way after creating awkward stubs that looked unnatural. Always cut on the outer side of the branch collar (the swollen area where the branch meets the trunk) to promote faster healing.
Tool Sharpness is Non-Negotiable: Dull pruning shears tear bark and damage branches, inviting disease. Before you begin Step 1, test your tools on a small branch—if they don't cut cleanly, sharpen them immediately. I keep a small file in my toolkit specifically for this purpose. Clean tools also prevent spreading fungal spores between cuts, which is especially important for olive trees prone to canker diseases.
Seasonal Timing is Everything: The late winter/early spring timing in Step 4 isn't just about convenience—it's about the tree's natural cycle. Pruning during dormancy (when the tree isn't actively growing) reduces stress and allows it to put energy into new growth rather than healing wounds. If you must prune outside this window, do it on a cool, overcast day to minimize moisture loss through the fresh cuts.
Visualize the Final Shape: Before making any cuts in Step 3, sketch a rough outline of your desired shape on paper. This helps you see the big picture and avoid impulsive cuts. I often use string or twine to outline the basic tiers before making any permanent cuts. Remember, olive trees respond well to gradual shaping—you're not carving a sculpture, you're guiding growth over time.
Pro Tips for Olive Tree Shaped
- Here's what nobody tells you about sculpting your olive tree without stressing it out.
- The Pruning Angle Matters: When cutting branches in Step 2, make your cuts at a 45-degree angle just above a leaf node or outward-facing bud.
- Tool Sharpness is Non-Negotiable: Dull pruning shears tear bark and damage branches, inviting disease.
Frequently asked questions
Got questions about shaping your olive tree into a stunning, sculpted masterpiece? You’re not alone! Here are some of the most common queries—plus expert answers to help you prune like a pro.
How often should I prune my olive tree for shaping?
Prune young olive trees once a year during late winter or early spring (before new growth starts) to establish structure. Mature trees may need light shaping twice a year: a major trim in late winter and minor touch-ups after harvest. Avoid heavy pruning in summer—it stresses the tree!
Can I shape an olive tree into any form, or are there limits?
Olive trees are highly adaptable! You can create formal shapes like espalier, topiary, or even a classic "vase" form. Just avoid extreme cuts (never remove more than 25% of foliage in one session) to prevent shock. Start with a skeletal framework and refine gradually for the best results.
What should I do if my olive tree looks stressed after pruning?
If leaves yellow, wilt, or drop after pruning, act fast! Water deeply, avoid fertilizing for 4–6 weeks, and prune only essential cuts until recovery. Stress is often temporary—healthy trees bounce back in 2–4 weeks. For severe cases, consult a local arborist.
Are there olive tree varieties better suited for shaping?
Yes! Dwarf varieties like ‘Arbequina’ or ‘Little Ollie’ are ideal for topiary or small-space shaping. Standard varieties (e.g., ‘Manzanillo’) can also be shaped but require more patience and structural support. Always choose a variety that matches your climate and space!
What’s the best alternative if I don’t want to prune heavily?
Try selective pruning to maintain natural beauty without drastic cuts. Focus on removing dead or crossing branches, thinning out dense areas, and shaping only the outer silhouette. Olive trees thrive with minimal intervention—let their organic form shine!
Wrapping up and next steps
Shaping your olive tree into a work of art is all about patience, precision, and passion—and now you’ve got the tools to make it happen! 🌿 Whether you’re aiming for a classic espalier, a lush standard tree, or a whimsical topiary, strategic pruning transforms a wild shrub into a stunning centerpiece.
Remember: consistency is key, and every trim brings your vision closer to life.
Ready to take the next step? Start small—pick one shape, gather your tools, and get hands-on. Watch as your olive tree blooms into the masterpiece you’ve always imagined! 🌟