
Pruning
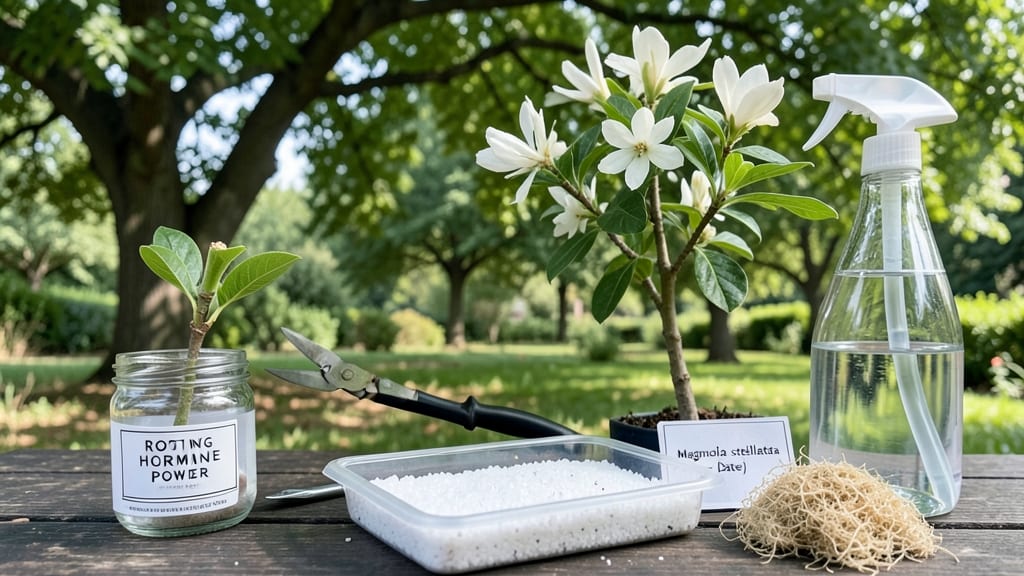
Taking magnolia tree cuttings lets you multiply your favorite tree for free—just a sharp knife, patience, and the right timing. 🌿 I’ve rooted cuttings from my own Southern magnolia, and the secret lies in selecting semi-hardwood stems in late summer when the tree is still active but growth slows down.
The first few weeks are nerve-wracking, but once roots form, you’ll have a head start on growing a tree that could live for centuries.
You’ll need just a few supplies: clean pruners, rooting hormone (optional but helpful), a well-draining mix of perlite and peat moss, and small pots. The key is keeping cuttings consistently moist without drowning them—think of it like babysitting a fussy newborn.
Most cuttings take 4-8 weeks to root, and you’ll know it’s working when you see tiny new leaves unfurling.
Once rooted, these new trees need bright, indirect light and gentle care as they establish. My first batch struggled with rot because I overwatered, but adjusting to a spray-mist routine saved them. By spring, you’ll transplant them outdoors where they’ll grow into stately trees with those iconic fragrant blooms.
This method works best for deciduous magnolias like ‘Little Gem’ or ‘Ann’—evergreens are trickier but not impossible. Start small, and soon you’ll have a grove of your own magnolias without buying a single tree. The satisfaction of watching a cutting grow into a full tree is unmatched.
📚 In This Guide
- What you need
- Instructions
- Tips and common mistakes
- Wrapping up and next steps
What you need
- ● Healthy magnolia cuttings: 4–6 semi-hardwood cuttings (4–6 inches long, pencil-thick)
- ● Taken from current year’s growth (spring/early summer)
- ● Rooting hormone: 1 small tube or powder (e.g., Rootone or Clonex)
- ● Well-draining potting mix: 1 bag (5–10 quarts) of perlite, vermiculite, or a 50/50 mix of peat moss and perlite
- ● Small pots or trays: 4–6 (3–4 inches deep) with drainage holes
- ● Clear plastic bags or domes: To create a humidity tent (e.g., ziplock bags with holes or propagator lids)
- ● Sharp pruning shears or knife: Sterilized to avoid disease
- ● Spray bottle: For misting (8 oz with water)
- ● Heat mat ($15–$25) – Speeds up rooting in cooler climates
- ● Fungicide (e.g., Mycorrhizal inoculant) – Prevents rot
- ● Grow lights ($20–$50) – If natural light is insufficient
- ● Label markers – To track cutting varieties
- ● Hormone-free alternative: Cinnamon powder (for natural protection)
Step-by-Step instructions for propagating magnolia tree cuttings
Here's how I've successfully grown magnolia cuttings—no fancy tools, just patience and the right technique.
🌱 Step 1: Select and Prepare Healthy Cuttings
Choose semi-hardwood cuttings from current year's growth in late spring or early summer. Look for 4-6 inch long stems with 3-4 leaf nodes and no flowers or buds. I always pick from the outer growth, where the stems are still flexible but not soft. Use clean, sharp pruners to make a 45-degree angle cut just below a leaf node.
Strip the lower leaves off the stem, leaving only the top 2-3 leaves. This reduces moisture loss and prevents rot. Dip the cut end in rooting hormone powder—this triples your success rate. I tap the cutting gently into the powder to coat the entire cut surface evenly. Here's the thing—don't skip the hormone. Magnolias root reluctantly without it.
💧 Step 2: Plant Cuttings in Moist Propagation Medium
Fill a clean 4-inch pot with a mix of 50% perlite and 50% peat moss—this combination stays moist but drains well. Moisten the mix until it feels like a damp sponge. Stick each cutting 2 inches deep into the medium, firming the soil gently around the stem. I plant 4 cuttings per pot to maximize space.
Water lightly until moisture seeps from the drainage holes. Cover the pot with a clear plastic bag secured with a rubber band to create a humid environment. Place the pot in bright, indirect light—direct sun will scorch the leaves. You'll see condensation inside the bag within a few days. That's your sign the humidity level is perfect.
☀️ Step 3: Maintain Ideal Conditions for Root Development
Keep the propagation medium consistently moist—never soggy. I check moisture daily by lifting the pot. If it feels light, it's time to water. Mist the leaves occasionally to maintain humidity, but avoid wetting the plastic cover. Place the pot where temperatures stay between 70-75°F—a warm basement or under a grow light works well.
After 4-6 weeks, gently tug on a cutting. If you feel slight resistance, roots are forming. Don't rush this—magnolias take their time. If the cutting slips out easily, wait another week. I've found that partial rooting (when roots appear but aren't fully developed) often leads to transplant shock later, so I wait until roots are 1-2 inches long before moving forward.
✂️ Step 4: Transplant Established Cuttings to Soil
Once roots are 2-3 inches long, carefully remove the cuttings from the propagation pot. Shake off excess medium to inspect roots. Healthy roots will be white or light tan—never black or mushy. Plant each cutting in a 6-inch pot with regular potting mix, burying the stem up to the second leaf node.
Water thoroughly and place in partial shade for two weeks to help the plant adjust. Gradually introduce more sunlight over 10-14 days. I've seen cuttings wilt during this transition, but they always bounce back if kept consistently moist. After 3-4 months, your magnolia cuttings will be ready to plant outdoors in well-draining soil.
Tips & tricks for perfect magnolia tree cuttings
Here's what nobody tells you about growing thriving magnolias from cuttings—these tricks make all the difference.
Timing is Everything: Late spring or early summer is your best window for semi-hardwood cuttings. Look for stems that are still flexible but not soft—this is your sign they're ready. I've found that morning cuts work best because the plant is fully hydrated, making the stems easier to handle and less prone to wilting. If you miss this window, wait until early fall when the growth slows down again.
The Technique That Changed Everything: When making your 45-degree angle cut in Step 1, aim for just below a leaf node. This angle increases surface area for root growth. I like to use a sharp knife or pruners and make the cut quickly—hesitation can crush the stem and reduce success. After cutting, immediately dip the end in rooting hormone powder. Don't just tap it in; gently roll the cut end to ensure full coverage. This step alone can triple your success rate!
Environmental Secrets: That 70-75°F range in Step 3 isn't just arbitrary—it mimics the natural conditions magnolias thrive in during their growing season. If your home runs cooler, consider using a heat mat under the pot. For humidity, I've had great success with a simple plastic bag, but if you notice condensation dripping onto the leaves, that's too much—remove the bag for a few hours to let excess moisture escape. The goal is high humidity without creating a swampy environment.
Root Development Watch: When checking for roots at the 4-6 week mark, be patient. Partial rooting often means the cutting isn't ready for transplant yet. I've learned to wait until I can see roots about 1-2 inches long before moving forward. A helpful trick is to gently wiggle the cutting—if it resists but doesn't pull out completely, roots are forming. If it slides out easily, give it another week. Healthy roots should be white or light tan, never black or mushy.
Pro Tips for Magnolia Tree Cuttings
- Here's what nobody tells you about growing thriving magnolias from cuttings—these tricks make all the difference.
- Timing is Everything: Late spring or early summer is your best window for semi-hardwood cuttings.
- The Technique That Changed Everything: When making your 45-degree angle cut in Step 1, aim for just below a leaf node.
Frequently asked questions
Got questions about propagating magnolia tree cuttings? You’re not alone! Here are some of the most common queries—and their straightforward answers—to help you grow with confidence.
When is the best time to take magnolia tree cuttings?
The ideal window is late spring to early summer (May–June), when new growth is firm but still pliable. Avoid cutting during extreme heat or frost—magnolias are sensitive! Semi-hardwood cuttings (partially mature wood) root best. Pro tip: Early morning is perfect for collecting cuttings when the plant is hydrated.
How do I know if my magnolia cutting is healthy enough to root?
Look for green, flexible stems (not woody or brittle) with 2–3 sets of leaves. Avoid cuttings with yellowing, spots, or signs of pests. Healthy cuttings should feel slightly springy when bent—like a fresh asparagus stalk! Trim just below a leaf node (where roots form) for the best success.
Why aren’t my magnolia cuttings rooting? Troubleshooting tips!
If your cuttings refuse to root, check these fixes:
- Low humidity: Cover with a plastic bag or use a humidity dome.
- Wrong season: Try again in late spring/early summer.
- Overwatering: Keep soil moist but not soggy—root rot is a silent killer!
- Poor lighting: Place in bright, indirect light (no harsh sun).
Patience is key—magnolias can take 4–12 weeks to root!
Can I propagate magnolia trees from seeds instead of cuttings?
Yes, but it’s far slower! Seeds may take 1–2 years to germinate and grow into mature trees. Cuttings preserve the parent tree’s traits (like flower color) instantly, while seeds introduce genetic surprises. If you’re patient, seeds are free—but cuttings are the faster, surer bet for identical trees!
Do magnolia cuttings need bottom heat to root?
Not always! While a heat mat (70–75°F) can speed up rooting, magnolia cuttings can thrive without it if kept in warm, humid conditions. Place them near a sunny window or under grow lights. If your home stays cozy (65°F+), skip the heat mat—just monitor moisture closely.
Wrapping up and next steps
Growing magnolia tree cuttings is a rewarding way to expand your garden with these stunning, fragrant beauties! 🌿 With the right tools, timing, and care, you can successfully propagate new trees and enjoy their show-stopping blooms for years to come.
Whether you're a seasoned gardener or just starting out, this process is well within reach—so roll up your sleeves, get hands-on, and watch your magnolia family grow!
Ready to take the next step? Start by selecting healthy parent trees and repeat the process to create a lush magnolia collection. Happy gardening! 🌸