
Pruning
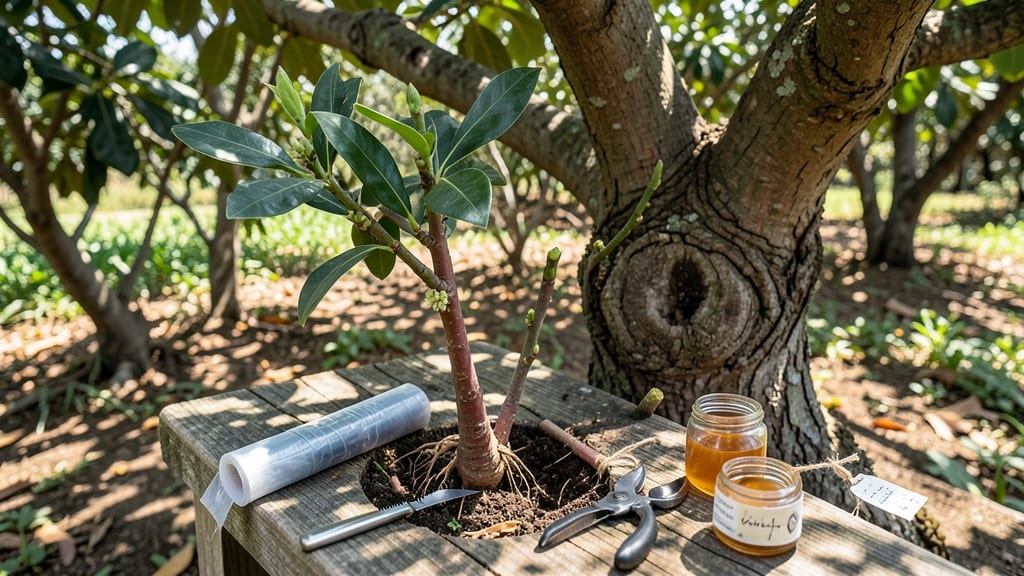
Grafting lychee fruit trees turns a single rootstock into a treasure trove of varieties—imagine one tree bearing both sweet Hong Kong and Thai lychees. ✨ The precision in those cuts determines whether your graft takes or fails, but once you master the technique, you’ll unlock harvests that dwarf what nurseries offer.
My first lychee graft took three tries before success, but now I’ve got a tree producing two types of fruit from one trunk.
Start with healthy rootstock (a young, vigorous lychee tree) and compatible scions (cuttings from the varieties you want). You’ll need sharp grafting tools—a clean knife or grafting saw, grafting tape, and sealing wax.
Timing matters too: late winter or early spring, when sap is flowing but before buds break. The whip-and-tongue method works best for lychees—it creates extra surface area for the graft to bond.
After grafting, wrap the union tightly with tape to hold everything in place, then seal with wax to prevent disease. Keep the tree in a humid, shaded environment for the first few weeks, misting daily to encourage the graft to take.
Within 4-6 weeks, you’ll see new growth at the graft line—proof it worked. Patience is key; full fruit production takes 2-3 years, but the wait is worth it.
Troubleshooting is half the battle. If the graft fails, check for poor fit, disease, or drying out. For beginners, start with one graft at a time to practice. Advanced gardeners can experiment with multiple scions on a single rootstock for a true lychee smorgasbord.
The key? Precision, timing, and a little luck—though I’ve found luck favors those who prepare.
📚 In This Guide
- What you need
- Instructions
- Tips and common mistakes
- Wrapping up and next steps
What you need
- ● Scion wood: Healthy, disease-free lychee saplings (1–3 years old) with 3–5 buds per cutting (4–6 inches long). Choose varieties that thrive in your climate.
- ● Rootstock: A compatible lychee rootstock (e.g., Litchi chinensis varieties like ‘Brewster’ or ‘Mauritius’). Ensure it’s 1–2 years old with a trunk diameter of ½–1 inch.
- ● Grafting tape or rubber bands: ¼-inch-wide, stretchy, and sterile (2–3 rolls). Avoid plastic wrap—it can suffocate the graft.
- ● Pruning shears or grafting knife: Sharp, clean, and sterilized (blade should be razor-sharp for clean cuts). A budding knife works for whip-and-tongue grafts.
- ○ Grafting wax or sealing compound: Optional but recommended (e.g., Tanglefoot or beeswax-based sealant) to prevent drying.
- ● Alcohol wipes or rubbing alcohol (70%+): For sterilizing tools and cutting surfaces.
- ● Horticultural spray (e.g., Benlate or copper fungicide): To treat rootstock/scions before grafting (prevents infection).
- ○ Plastic bags or grafting clips: To create a humid microenvironment (optional for tropical climates).
- ● Potting mix (well-draining): If rootstock isn’t field-grown (e.g., cactus mix or 50% sand).
- ● Shade cloth (30–50% coverage): To protect grafts from direct sun post-surgery.
- ● Timing: Graft in late winter/early spring (before new growth) or rainy season (for tropical climates). Avoid extreme heat/cold.
- ● Weather: Overcast day or morning grafting (prevents scion desiccation).
- ● Skill level: Basic knowledge of grafting techniques (e.g., whip-and-tongue or cleft grafting). Practice on non-lychee plants first if needed!
Step-by-Step instructions for lychee fruit tree grafting
Here's how I approach grafting lychee trees—smooth, precise, and designed for strong unions every time.
🪴 Step 1: Select and Prepare Your Scion and Rootstock
Choose a healthy lychee scion (the top part you want to grow) with 3-4 buds and 1/4-inch diameter. The rootstock should be a compatible lychee variety with a smooth, pencil-thick stem that’s 12-18 inches tall. I always inspect both for pests or disease—anything questionable gets discarded immediately.
Trim the scion just above a bud, leaving 2-3 inches of stem. For the rootstock, make a clean, slanted cut about 3-4 inches above the ground. This ensures the graft will sit at the perfect height for future growth. Keep everything in a shady, humid spot while you work—lychee cambium (the growth layer) needs to stay alive and moist.
✂️ Step 2: Make the Precision Cuts for the Graft
Start with the rootstock by slicing vertically down the center, about 1-1.5 inches long, stopping just before the pith (the white core). This creates a flat surface where the scion will sit flush. I use a sharp grafting knife—dull tools crush the cambium, and that’s a failed graft before you even begin.
Now for the scion: cut a matching slant on the bottom, ensuring the cambium layers align perfectly when joined. The goal is a tight fit—no gaps, no overlaps. If the scion is too thick, shave it down slightly until it slips into the rootstock like a puzzle piece. Test-fit before applying any grafting wax.
🌱 Step 3: Join and Seal the Graft
Slide the scion into the rootstock cut, pressing firmly until you feel a slight resistance—this means the cambium layers are touching. Wrap the union tightly with grafting tape or plastic wrap, leaving no air gaps. The tape should hold the scion in place while the wound heals. I like to add a drop of grafting wax over the top to seal moisture in and keep pests out.
Place the grafted tree in a humid propagation chamber (a clear plastic bag over a pot works well) and keep it in bright, indirect light. The key now is patience—lychee grafts take 4-6 weeks to fully heal. Watch for new growth at the scion’s buds; that’s your signal the graft has succeeded. If the scion wilts or turns brown, you’ve got a failed union—start over.
☀️ Step 4: Harden Off and Transplant
Once the grafted scion shows new leaves (usually 6-8 weeks after grafting), it’s time to harden it off. Remove the plastic bag for 1-2 hours daily, gradually increasing exposure over 10-14 days. This slow transition prevents shock when you move it outdoors permanently.
Transplant the grafted lychee tree into its permanent location on an overcast day to reduce stress. Water deeply at the base, keeping the soil evenly moist but not soggy. The first year is critical—lychee trees need full sun, well-draining soil, and consistent moisture to establish strong roots. If you see yellowing leaves, it’s usually a sign of overwatering or poor drainage—adjust immediately.
⏰ Step 5: Monitor and Maintain for Long-Term Success
After transplanting, prune any suckers (shoots growing below the graft) as soon as they appear. These divert energy from the scion. Keep the graft union clean and dry—moisture here can rot the wound. I also apply a light layer of mulch around the base to retain moisture and regulate soil temperature.
Lychee trees grafted this way typically bear fruit in 3-5 years, but the wait is worth it. The key to a bountiful harvest? Patience and precision—every cut, every seal, and every watering matters. Once established, your grafted lychee will reward you with juicy, sweet fruit for decades.
Tips & tricks for perfect lychee fruit tree grafting
Here's what nobody tells you about getting your lychee grafts right the first time.
Tool Prep is Non-Negotiable: Sharpen your grafting knife right before you start—it should slice through the cambium layer cleanly without tearing. I test it on a scrap piece of lychee stem first. A dull knife crushes the delicate growth layer, and that's a failed graft before you even begin. Sharp tools mean strong unions. You can even use a razor blade for the final cuts if you're working with particularly thick stems.
Cambium Alignment is Everything: In Step 2, when making your precision cuts, focus on aligning the cambium layers—the green ring just under the bark—perfectly. These layers need to touch completely around the graft for successful healing. I like to make a small notch in the cambium on one side of both cuts to help guide the alignment. If you're unsure, slice both pieces slightly thinner until they fit snugly without forcing.
Humidity Control Makes or Breaks Success: The 4-6 week healing period in Step 3 is where most grafts fail. Maintain humidity between 80-90% using a propagation chamber or clear plastic bag. I add a small tray of water inside the bag to create a microclimate. Check daily for condensation—if it's dripping, you're overdoing it. Too little humidity causes the graft to dry out, while too much can lead to mold.
Harden Off Gradually: When you're ready to transplant after 6-8 weeks, don't rush the hardening process in Step 4. Start with just 1-2 hours of exposure and increase by no more than 30 minutes each day. I've seen many grafted trees fail because they were moved too quickly to full sun. Think of it like sunbathing—you wouldn't go from zero to full sun exposure either!
Pro Tips for Lychee Fruit Tree Grafting
- Here's what nobody tells you about getting your lychee grafts right the first time.
- Tool Prep is Non-Negotiable: Sharpen your grafting knife right before you start—it should slice through the cambium layer cleanly without tearing.
- Cambium Alignment is Everything: In Step 2, when making your precision cuts, focus on aligning the cambium layers—the green ring just under the bark—perfectly.
Frequently asked questions
Got questions about grafting your lychee fruit tree? You’re not alone!
Here are answers to the most common concerns—from timing to troubleshooting—so you can confidently tackle your grafting project.
When is the best time to graft a lychee tree?
The ideal window is late winter to early spring (just before buds swell) or mid-summer (when the tree is actively growing). Avoid grafting during extreme heat or cold—lychee trees hate stress! For tropical climates, early summer works too.
What’s the easiest grafting method for beginners?
Start with whip-and-tongue grafting—it’s beginner-friendly and works well for lychee trees. Use a sharp knife, make clean cuts, and align the cambium layers (that green layer under the bark) for the best success rate. Check our materials guide for tools!
Can I graft a lychee tree onto a different rootstock?
Yes! Common rootstocks include Chinese lychee (Litchi chinensis) or wax apple (Syzygium malaccense) for better disease resistance. Just ensure the rootstock is compatible—lychee trees are picky about partners! Research local varieties for the best match.
What should I do if my graft fails to take?
Don’t panic! Check for poor cambium alignment, drying out, or pest damage. Re-graft with fresh cuts, secure the union tightly with grafting tape, and keep the area moist. If multiple attempts fail, consult a local nursery for rootstock alternatives.
How long does it take for a grafted lychee tree to bear fruit?
Patience is key! With proper care, grafted lychee trees may take 2–5 years to produce fruit. Young trees focus on root and branch growth first—provide balanced fertilizer and protect from frost. Good things come to those who wait!
Still stumped?
Drop your question in the comments—we’re happy to help!
Wrapping up and next steps
Grafting your lychee fruit tree is a rewarding way to boost productivity, improve fruit quality, and extend your harvest season. With the right tools, timing, and technique, you can transform a struggling tree into a thriving one—full of juicy, aromatic lychees! 🌱✨
Now that you’re armed with knowledge, take the next step: choose a healthy scion, find a compatible rootstock, and start practicing your cuts. Whether you’re a beginner or a seasoned gardener, every graft is a chance to grow something extraordinary. Happy grafting—and may your future harvests be abundant! 🍈🌿