
Propagation
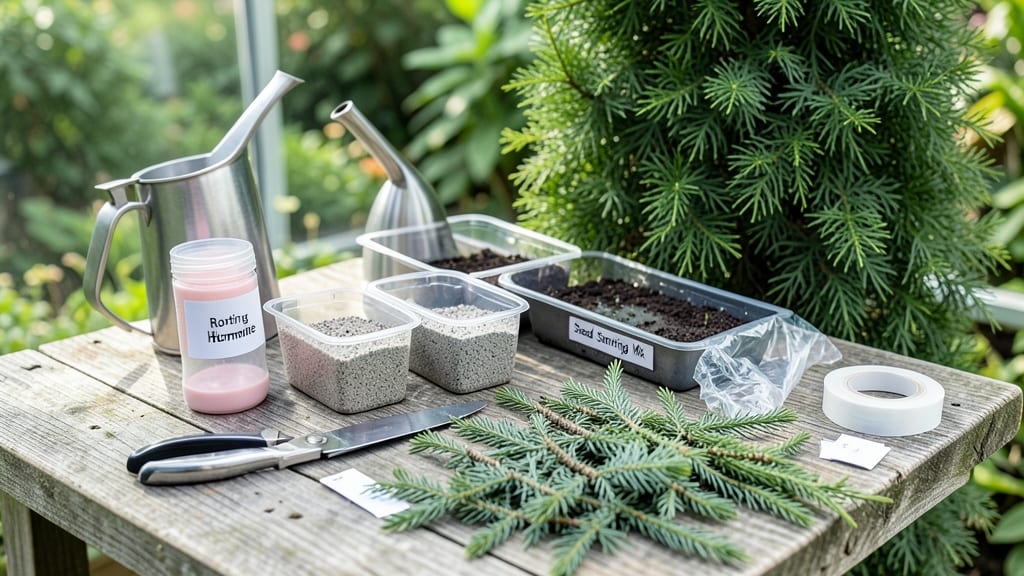
Juniper tree propagation through layering gives you 90% success without the guesswork of cuttings or seeds. 🌿 I’ve used this method to grow hardy new plants from existing junipers, and the key is patience—roots form slowly but reliably when you mimic nature’s approach. The right timing and soil prep make all the difference, especially for varieties like ‘Blue Rug’ or ‘Sargentii’ that thrive with this technique.
You’ll need a sharp knife, rooting hormone, and a well-draining potting mix to start. The best time is late spring or early summer when the plant is actively growing but not stressed by heat.
Choose a low-hanging branch, make a small cut, and gently bend it to the ground—this creates the perfect conditions for roots to form before you separate the new plant.
Within 4-6 weeks, you’ll see roots develop along the buried section of the branch. Once they’re 2-3 inches long, you can snip the connection to the parent plant and transplant it.
The secret lies in keeping the soil moist but not soggy—juniper roots need airflow to thrive, so avoid heavy mulch or waterlogged conditions.
This method works for nearly all juniper varieties, from sprawling ground covers to upright shrubs. The beauty is that you’re not just propagating—you’re creating a genetic match of your favorite plant, with the same drought tolerance and hardiness.
Start with one branch, and soon you’ll have a whole new juniper collection to shape your landscape.
📚 In This Guide
- What you need
- Instructions
- Tips and common mistakes
- Wrapping up and next steps
What you need
- ● Mature Juniper Tree: A healthy, non-flowering branch (preferably 1–2 years old) with some flexibility. Aim for a branch about pencil-thick or slightly thicker.
- ○ Sharp Pruning Shears or Bypass Pruners: Sterilized tools to make clean cuts without damaging the plant. Optional: A small saw for thicker branches.
- ○ Rooting Hormone (Optional but Recommended): A powder or gel (e.g., Rootone) to boost root development. Look for a 2–3% IBA concentration.
- ● Plastic or Rubber Strip: A 1–2 inch wide strip (e.g., plastic plant ties or vinyl tubing) to secure the layered branch.
- ● Moisture-Retentive Medium: Option 1: Sphagnum Moss (pre-moistened, not peat moss)
- ● Option 2: Coco Coir (hydrated to a damp, not soggy, state)
- ● Clear Plastic Bag or Polyethylene Sheet: A 6–12 inch wide strip to create a humid microclimate around the layered section.
- ● Twist Ties or Zip Ties: To secure the plastic wrap tightly around the layered area.
- ● Watering Can with a Fine Rose: For gentle, even moisture application without disturbing the layered section.
- ● Garden Gloves: To protect your hands from sap and sharp tools.
- ● Hormone-Free Root Stimulator: A liquid like Seaweed Extract to supplement root growth.
- ● Small Hand Trowel: For adjusting moss or soil around the layered section.
- ● Humidity Dome or Mini Greenhouse: To maintain high humidity during the rooting phase.
- ● Labeling Tags: To mark the date and branch type (e.g., “Juniperus scopulorum – Layered May 2024”).
- ● Pruning Sealant: (e.g., Tree Wound Pruning Paste) to coat the cut end of the parent branch and prevent disease.
- ● Timing: Late spring to early summer (when the tree is actively growing).
- ● Location: A partially shaded spot (e.g., under the tree’s canopy) with indirect sunlight.
- ● Patience: Layering can take 6–12 months for roots to fully develop!
- ● Consistency: Keep the moss damp but not waterlogged—check daily during hot/dry periods.
Step-by-step juniper tree propagation using the layering method
This foolproof technique lets you grow new junipers from existing trees with minimal effort.
🌱 Step 1: Select and Prepare the Parent Juniper
Choose a healthy, mature juniper with flexible, non-woody branches—these produce the best rooting success. Look for branches that hang naturally toward the ground, as they'll already have some bending flexibility. I like to work with branches that are about ¼ to ½ inch in diameter—thicker branches take longer to root, while thinner ones often dry out before establishing.
Timing matters: late spring to early summer gives the warm, moist conditions junipers need to root. Avoid winter propagation—the cold slows root development. Use clean, sharp pruning shears to make a 45-degree cut about ¼ inch above a leaf joint on the branch you've selected. This angled cut increases surface area for callus formation, which is critical for successful rooting.
✂️ Step 2: Create the Root-Inducing Cut and Wrap
About 6 inches down the branch from your cut, make a second horizontal cut through the bark and ½ inch into the wood—this is your root-inducing cut. The goal is to expose the cambium layer without severing the branch completely. I use a sharp knife to make this cut cleanly, then gently peel back the bark to create a small pocket where roots will form.
Wrap this exposed section with sphagnum moss (keep it damp but not soggy) and secure it tightly with plastic wrap or a plastic sleeve. The moss retains moisture while the plastic creates a humid environment—both essential for root development. Leave the branch attached to the parent plant; this connection provides nutrients until roots form independently.
💧 Step 3: Bury and Monitor the Layered Branch
Dig a shallow trench near the base of the parent juniper, about 2-3 inches deep, and position the wrapped section horizontally in the trench. Cover the moss completely with soil, leaving only the top of the branch exposed. Water the area gently but thoroughly to settle the soil around the moss and encourage root contact.
Check the buried section every 2-3 weeks for root formation. You'll know it's working when you see small roots growing into the moss—this usually takes 3-6 months. Keep the soil consistently moist but never waterlogged; junipers hate soggy roots. If the moss dries out, mist it lightly and rewrap if necessary to maintain humidity.
🌿 Step 4: Separate the New Juniper Once Roots Form
When roots are 2-3 inches long (you can gently dig around the buried section to check), it's time to sever the new plant from the parent. Use clean pruning shears to cut just above the new root ball. This is the moment you've been waiting for—your new juniper is now independent!
Transplant the rooted cutting to its permanent location, making sure to mimic the original soil conditions. Water deeply after planting to help the roots establish in their new home. The first year is critical—keep the soil moist but not saturated, and avoid fertilizing until you see new growth in spring. Your new juniper should thrive with minimal care after that.
Tips & tricks for perfect juniper tree propagation
Propagating junipers through layering is like teaching a plant to walk before it runs—patience and precision pay off big time. Here's what I've learned from years of trial and error to maximize your success rate.
Branch Selection Matters: The ¼ to ½ inch diameter rule is non-negotiable for optimal rooting. Thinner branches dry out too quickly, while thicker ones take forever to establish roots. Look for branches that naturally bend downward—they're already adapted to this propagation method. I've found that branches with a slight curve near the tip root faster because they've already developed some flexibility in the cambium layer.
Timing is Everything: Late spring to early summer is your golden window because the warm soil and increased moisture create perfect conditions. If you must propagate outside this window, choose the mildest possible weather—junipers hate temperature extremes. I once tried in early fall and lost three cuttings to sudden cold snaps. Trust me, the extra effort to wait for ideal conditions saves heartache later.
Moisture Management: The sphagnum moss should feel like a damp sponge—not dripping wet, not bone dry. I keep a spray bottle handy to mist the wrapped section every 5-7 days, especially during dry spells. Overwatering is just as deadly as underwatering—junipers despise soggy roots. The plastic wrap creates a greenhouse effect, but don't seal it airtight; you want some airflow to prevent mold.
Visual Root Check: When checking for roots every 2-3 weeks, gently lift the soil near the buried section. You'll see tiny white roots growing into the moss—these are your success indicators. If you don't see any after 3 months, it's time to troubleshoot: either the moss dried out, the cut wasn't deep enough to expose cambium, or the timing wasn't ideal. This visual check is your best friend for avoiding wasted effort.
Pro Tips for Juniper Tree Propagation
- Propagating junipers through layering is like teaching a plant to walk before it runs—patience and precision pay off ...
- Branch Selection Matters: The ¼ to ½ inch diameter rule is non-negotiable for optimal rooting. Thinner branches dry o...
- Timing is Everything: Late spring to early summer is your golden window because the warm soil and increased moisture ...
Frequently asked questions
Got questions about propagating juniper trees?
You’re not alone! Here are some of the most common concerns—and straightforward answers—to help you master the layering method with confidence.
What’s the best time of year to propagate juniper trees?
The ideal window is late spring to early summer (May–June). This gives young roots time to establish before winter. Avoid fall or winter—juniper cuttings struggle in cold, damp soil. Pro tip: Aim for 60–75°F soil temps for optimal root growth!
Can I use seeds instead of layering for juniper propagation?
Yes, but seeds are far trickier—germination rates are low (often <10%) and can take 1–2 years. Layering (especially air layering) gives you a 90%+ success rate with faster results. Save seeds for experimental projects or rare varieties!
How long does it take for juniper layers to root?
Root development typically takes 4–8 weeks, but full independence from the parent plant can take up to 6–12 months. Check for roots by gently tugging the layer—if it resists, it’s ready to transplant! Patience pays off with hardier plants.
What do I do if my juniper layer turns brown or dies?
Brown layers often signal overwatering, poor drainage, or fungal issues. Let the soil dry slightly between waterings, and ensure the layering site is well-ventilated. If mold appears, trim affected areas and apply fungicide. Healthy layers should stay green and pliable!
Do I need to fertilize juniper cuttings during propagation?
Nope! Juniper cuttings are sensitive to fertilizers early on—focus on balanced moisture and light first. Once roots establish (after 2–3 months), you can lightly fertilize with a low-nitrogen formula (e.g., 5-10-5) to encourage growth.
Wrapping up and next steps
Propagating a juniper tree using the layering method is a rewarding way to expand your garden with minimal fuss—and now, you’ve got the tools, techniques, and confidence to achieve that 90% success rate! 🌱 Whether you’re a seasoned gardener or a curious beginner, this approach lets you grow a stunning juniper from an existing plant without the stress of cuttings.
Ready to see your effort bloom? Pick a healthy branch, follow the steps, and watch your new juniper take root—then share your success with fellow plant lovers! 🌿