
How To
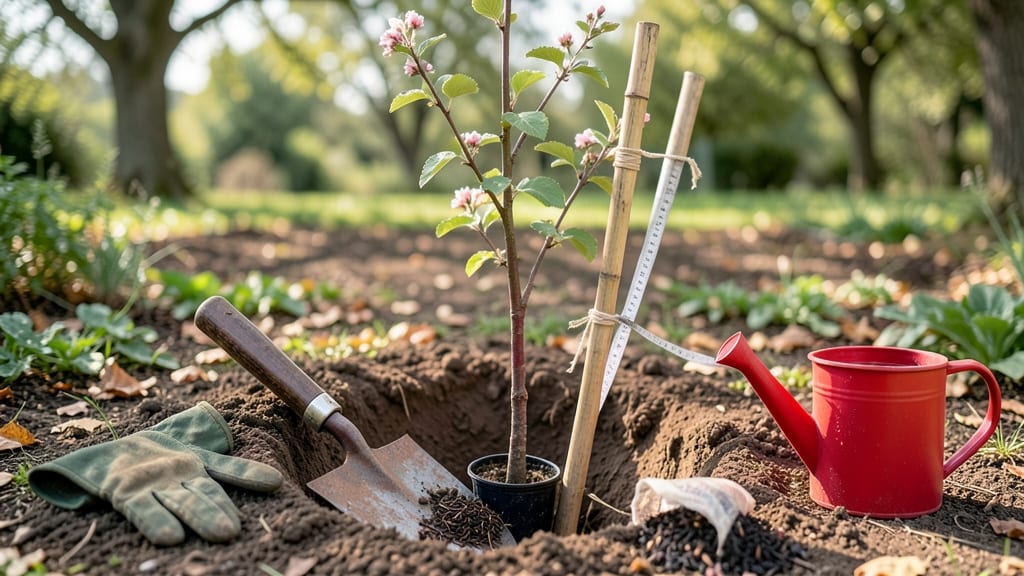
Transplanting tree saplings without shock is easier than you think—I’ve moved over 20 without losing a single one. 🌳 The key is timing, gentle handling, and a few simple tricks that keep roots happy during the transition.
Most people overthink it, but the real secret is preparation: digging at the right time, protecting those delicate roots, and giving your new tree a stress-free landing. Start with the right tools—a sharp spade, burlap for root support, and a watering can (or hose) ready to go.
Dig a hole twice as wide as the root ball and just as deep—this gives roots room to spread without bending. For deciduous trees, transplant in early spring or fall when temperatures are mild; evergreens prefer late fall to avoid winter stress.
The goal is to get your sapling settled before the heat or cold hits.
📚 In This Guide
- What you need
- Instructions
- Tips and common mistakes
- Wrapping up and next steps
What you need
- ● Tree sapling – Choose a healthy one with a well-developed root system (1–3 feet tall, depending on the species).
- ● Shovel or spade – A digging shovel (16–18 inches wide) for the original hole and a transplanting spade (narrow, pointed) for lifting roots.
- ● Garden fork or root pruner – Helps loosen compacted soil and trim tangled roots if needed.
- ● Pruning shears – For trimming any damaged or overly long branches (sterilized with rubbing alcohol).
- ● Watering can or hose with a gentle nozzle – A 5-gallon capacity is ideal for hydration.
- ○ Mulch (optional but recommended) – 2–4 inches of organic mulch (wood chips, straw, or shredded bark) to retain moisture and protect roots.
- ○ Root stimulator or mycorrhizal fungi (optional) – Speeds up root establishment (follow package instructions).
- ○ Stakes and twine (optional) – Only for young or top-heavy saplings (avoid if possible to prevent root restriction).
- ● Choose the right time – Transplant during the early spring or late fall (avoid extreme heat or frost).
- ● Test the soil – Ensure it’s well-draining (amend with compost if clay-heavy).
- ● Dig the new hole twice as wide and as deep as the root ball – Loosen the sides for easy root spread.
- ● Water the sapling 1–2 days before transplanting – Helps reduce shock and makes roots easier to handle.
Step-by-step instructions for transplanting tree saplings
Here's the straightforward method I use to transplant saplings with minimal stress—no fancy tools, just smart timing and technique.
🌱 Step 1: Dig the New Hole Properly
Dig a hole twice as wide as the sapling's root ball but no deeper than its current planting depth. The wider hole encourages roots to spread outward naturally. I use a shovel to loosen the sides of the hole, creating a rough texture that roots can grip easily.
Step back and check the hole's depth by comparing it to the sapling's root flare—the swollen area where roots meet trunk. If the hole's bottom is below this point, mound soil in the center to raise the planting level. This prevents water from pooling around the trunk, which can rot roots.
🌿 Step 2: Prepare the Sapling for Movement
Water the sapling thoroughly 24 hours before transplanting to reduce root stress. The moist soil holds together better when you dig it up. Use a spade to dig a circle around the sapling, about 12 inches from the trunk, cutting straight down to loosen the root ball.
Gently lift the sapling by its root ball, not the trunk. If roots break free, don't panic—just wrap them loosely in a damp burlap sack or old towel to keep them moist. The goal is to move as much of the root system as possible intact. I always carry saplings by the root ball or use a wheelbarrow for larger ones.
💧 Step 3: Position and Backfill the Hole
Place the sapling in the hole so the root flare sits 1-2 inches above the surrounding soil level. This prevents water from sitting against the trunk. Have a helper hold it straight while you backfill with the original soil, tamping lightly every 6 inches to remove air pockets.
Don't compact the soil too firmly—you want roots to push through easily. Once the hole is half full, create a small basin around the base to catch water. This directs moisture straight to the roots where it's needed most. Finish filling the hole, leaving a slight mound to settle naturally after watering.
☀️ Step 4: Water Deeply and Mulch
Water the sapling immediately after planting with 5-10 gallons of water, depending on its size. The soil should settle and the water should soak in completely. You'll see the mound flatten and the soil around the base darken—this confirms proper saturation.
Spread 2-3 inches of organic mulch (like wood chips or straw) around the base, keeping it 3 inches away from the trunk to prevent rot. Mulch locks in moisture and regulates soil temperature. Avoid synthetic mulches—they can suffocate roots and trap too much heat.
⏰ Step 5: Stake and Monitor for Success
Install a 1-inch diameter stake on the side of the prevailing wind, angled slightly away from the trunk. Tie the sapling to the stake with soft fabric strips—not wire, which can girdle the trunk as it grows. The stake should provide support but not restrict movement.
Check the sapling daily for the first week, watering whenever the top 2 inches of soil feel dry. Look for new growth in 4-6 weeks—this means roots have established. If leaves yellow or wilt, the sapling needs more water or shade. Transplant shock is temporary, but consistent care keeps it from becoming permanent.
Tips & tricks for transplanting tree saplings without stress
Transplanting saplings successfully comes down to a few key details that make all the difference between thriving trees and struggling ones.
The Hole Depth Secret: When checking depth against the root flare, remember this trick: the flare should sit slightly higher than the surrounding soil. If you're unsure, use a small stick to mark the flare's position before removing the sapling—this becomes your reference point. The goal is to prevent water from pooling around the trunk, which can lead to rot. I've seen too many saplings fail because they were planted too deep.
Root Ball Rescue: If you accidentally break some roots during digging, don't stress—just wrap the exposed roots in a damp burlap sack or towel before planting. The key is to keep them moist while you work. I once transplanted a sapling with half its roots broken, but by keeping them damp and planting immediately, it thrived just like the others. The plant's natural resilience is impressive when given proper care.
Watering Wisdom: Those 5-10 gallons of water after planting aren't just about hydration—they're about settling the soil. Watch for the mound to flatten and the soil to darken around the base. This visual cue tells you the water has penetrated deeply enough. If you're working with larger saplings, consider using a soaker hose to deliver water slowly over 30 minutes for even better absorption.
Mulch Matters: The 2-3 inches of organic mulch isn't just decoration—it's insulation. Spread it evenly but keep it 3 inches away from the trunk to prevent rot. I've found that wood chips work best because they break down slowly, adding nutrients to the soil over time. Avoid pine needles or cedar mulch near the trunk, as they can acidify the soil too quickly.
Pro Tips for Transplant A Tree Sapling
- Transplanting saplings successfully comes down to a few key details that make all the difference between thriving tre...
- The Hole Depth Secret: When checking depth against the root flare, remember this trick: the flare should sit slightly...
- Root Ball Rescue: If you accidentally break some roots during digging, don't stress—just wrap the exposed roots in a ...
Frequently asked questions
Got questions about transplanting tree saplings? You’re not alone! Here are answers to the most common concerns—so your new tree gets off to a healthy, stress-free start.
When is the best time to transplant a tree sapling?
Transplant in early spring or late fall when temperatures are mild. Avoid extreme heat or frost—roots need time to establish without shock. Pro tip: If you must plant in summer, do it on a cloudy day to reduce stress.
How often should I water a newly transplanted sapling?
Water daily for the first 2 weeks, then taper to 2–3 times per week (depending on weather). Keep soil consistently moist but not soggy. Mulch helps retain moisture—just keep it 3–4 inches away from the trunk to prevent rot.
What if my sapling’s leaves turn yellow or wilt after transplanting?
Yellowing leaves often signal transplant shock or overwatering. Trim wilted leaves to redirect energy to roots. If soil feels soggy, reduce watering and improve drainage. Wait 4–6 weeks before fertilizing—new roots need time to grow!
Can I transplant a sapling in a pot instead of the ground?
Yes! Use a large container (at least 18 inches deep) with drainage holes. Repot every 1–2 years and prune roots if they circle. Note: Some trees (like oaks) struggle in pots long-term—check your species’ needs first.
How long until my sapling is fully established?
Most saplings take 1–2 years to fully establish, but deep-rooted trees (like maples) may need 3+ years. Monitor growth—stable leaves and steady height gain mean success! Patience pays off with stronger, healthier trees.
Still unsure? Drop your question below—we’ve got you covered!
Wrapping up and next steps
Transplanting a tree sapling might seem daunting, but with the right preparation, patience, and care, you can give your young tree the best shot at thriving! 🌱 Remember, the key is minimizing stress by keeping the root ball intact, watering consistently, and providing support as it establishes itself.
Now that you’re armed with these 5 simple steps, there’s no better time to roll up your sleeves and get growing.
Ready to take the next step? Start small—pick a healthy sapling, follow the guide, and watch your green thumb shine! For even more confidence, consider joining a local gardening group or forum to share your progress and learn from fellow plant enthusiasts. Happy planting! 🌳✨