
Pruning
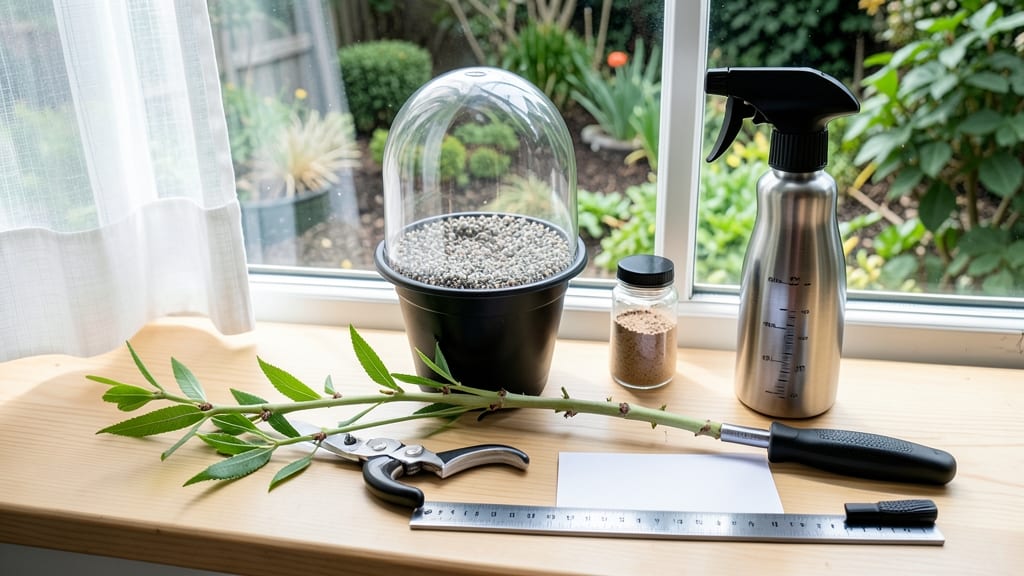
Starting tree cuttings lets you grow your own trees for free—no nursery needed. ✂️ I’ve propagated willows, olives, and bougainvilleas this way, and the best part? You get a head start on a mature plant in just a few months.
The secret is picking the right cuttings and giving them the perfect start. You’ll need sharp pruners, rooting hormone, small pots, and a mix of perlite and peat moss. Willow cuttings root in water alone, while woody plants like olive need soil and humidity.
The process is simpler than it looks—just follow the steps, and you’ll be watching roots form in weeks. Once rooted, your new plants will need bright, indirect light and consistent moisture. Transplant them carefully after a few months, and you’ll have thriving trees that cost you nothing but time.
The satisfaction of growing a full-sized tree from a single cutting? Unmatched. This method works for dozens of trees, from fruit varieties to ornamental species. Let’s get those cuttings growing!
📚 In This Guide
- What you need
- Instructions
- Tips and common mistakes
- Wrapping up and next steps
What you need
- ● Sharp pruning shears or bypass pruners – sterilized and clean (for making clean cuts).
- ○ Rooting hormone – powder or gel (optional but highly recommended for faster root growth).
- ● Well-draining potting mix – a blend of perlite, vermiculite, and peat moss (or coconut coir) (avoid garden soil).
- ● Small pots or propagation trays – 3-4 inches deep (with drainage holes).
- ● Clear plastic bags or humidity domes – to create a mini greenhouse effect.
- ● Spray bottle with water – for gentle misting (to maintain humidity).
- ● Rubbing alcohol or bleach solution – for sterilizing tools.
- ● Heat mat – to encourage root growth (especially for tropical plants).
- ● Fungicide – to prevent mold or rot.
- ● Label markers – to track plant types.
- ● Grow lights or sunny windowsill – for indirect light.
Step-by-Step instructions for propagating tree cuttings
Here’s my foolproof method for rooting cuttings—tested on willow, maple, and dogwood.
🌱 Step 1: Select and Prepare Healthy Cuttings
Choose 4-6 inch sections from non-flowering, new growth—this is where roots form most easily. Use clean, sharp pruners to make a 45-degree angle cut just below a leaf node (where leaves attach). This angled cut increases surface area for root growth.
Strip the lower 2 inches of leaves from the stem, leaving the top leaves intact. Too many leaves mean the cutting loses moisture faster than roots can form. Dip the cut end in rooting hormone (optional but helps speed up rooting)—I like to use a gel for precision. If you skip this, just make sure the cut is fresh.
💧 Step 2: Set Up Your Rooting Medium
Fill a 6-inch deep container with perlite and peat moss mix (equal parts) or use sphagnum moss—both hold moisture while allowing airflow. Moisten the mix until it’s damp like a wrung-out sponge, not soggy. Stick your finger in: if water drips out, it’s too wet.
Make a hole in the mix with your finger or a pencil, then insert the cutting 2-3 inches deep. Space 4 cuttings per container so they don’t compete for moisture. Gently firm the mix around the stem to eliminate air pockets. Label each cutting with the tree type and date—you’ll forget in 6 weeks!
☀️ Step 3: Create the Ideal Rooting Environment
Place the container in bright, indirect light—no direct sun yet. I use a clear plastic bag or humidity dome to trap moisture, which cuttings need to survive their first 4-8 weeks. Secure the bag loosely with a rubber band so air can circulate slightly. Check daily for condensation on the inside.
Keep the mix consistently moist—not dripping, just damp. Mist the leaves lightly if they look thirsty (they’ll droop slightly). Roots typically form in 4-8 weeks, but some fast growers like willow root in 2 weeks. Watch for new growth at the top—this means roots are working below!
✂️ Step 4: Transition to Soil and Harden Off
Once roots reach 2-3 inches long (gently tug the cutting—resistance means roots!), it’s time to plant. Fill a small pot with regular potting mix, bury the cutting 1 inch deeper than before, and water well. Keep it in the same humid, bright spot for a week while it adjusts.
After 7-10 days, start hardening off by moving the pot outside for 1-2 hours daily, gradually increasing time. By 2-3 weeks, it should handle full sun. Avoid transplanting to the ground until roots fill the pot—this usually takes another 4-6 weeks. Patience here prevents shock!
Tips & tricks for perfect tree propagation
These little details make all the difference between thriving new plants and wasted effort. I've learned these the hard way—after losing more cuttings than I care to admit!
Cutting Selection: In Step 1, focus on pencil-thick stems for best results. Thinner cuttings root faster but are more fragile, while thicker ones take longer but grow stronger. Willow and poplar are the easiest starters, while maple and oak require more patience. Always cut just below a leaf node—this is where the magic happens!
Hormone Hack: If you skip the rooting hormone in Step 1, make sure your cut is fresh—older cuts heal over and won't root. For best results, use a gel hormone rather than powder—it's easier to apply precisely and stays put. I've found that dipping the cut end for just 2-3 seconds is enough; there's no need to soak it.
Medium Consistency: In Step 2, the "wrung-out sponge" test is your friend. Too wet and you risk rot; too dry and roots won't form. I like to use a mix of 50% perlite and 50% peat moss because it holds moisture while allowing airflow. For faster results, you can add a handful of sand to improve drainage—just don't exceed 20% of the total mix.
Light Management: The bright, indirect light in Step 3 is crucial—direct sun will scorch your cuttings before roots even form. I place mine near an east-facing window where they get morning light but stay protected from harsh afternoon rays. If you don't have good natural light, a grow light on a timer (12-14 hours/day) works perfectly.
Pro Tips for Start Tree Cuttings
- These little details make all the difference between thriving new plants and wasted effort. I've learned these the ha...
- Cutting Selection: In Step 1, focus on pencil-thick stems for best results. Thinner cuttings root faster but are more...
- Hormone Hack: If you skip the rooting hormone in Step 1, make sure your cut is fresh—older cuts heal over and won't r...
Frequently asked questions
Got questions about tree cuttings? You’re not alone—propagation can feel tricky at first! Below, we’ve rounded up the most common queries to help you feel confident before diving in. Whether you’re a beginner or just need a quick refresher, these answers will keep your cuttings on the right track.
When is the best time of year to take tree cuttings?
The ideal time depends on your plant, but late spring to early summer (when new growth is active) is perfect for most trees. For deciduous trees, aim for just after flowering but before hardwood sets in. Evergreens, like olive or bay, can be taken in late winter or early spring. Avoid extreme heat or frost—your cuttings need energy to root!
Can I use regular scissors or do I need pruning shears?
While scissors can work for small, soft-stemmed plants (like herb cuttings), pruning shears or sharp bypass pruners are best for tree cuttings. They make cleaner cuts, reducing stress on the plant and preventing jagged edges that slow rooting. If you’re on a budget, sterilize your tools with rubbing alcohol to avoid disease.
How often should I water my tree cuttings?
Keep the soil consistently moist but not soggy—overwatering suffocates roots! Water lightly every 2–3 days (or when the top inch feels dry). Mist the leaves occasionally to maintain humidity, especially in dry climates. A clear plastic bag over the pot creates a mini greenhouse effect—just remove it daily for airflow to prevent mold.
What if my cuttings aren’t rooting after a few weeks?
Don’t panic! Root development can take 4–12 weeks depending on the species. Check for these red flags:
- Yellowing leaves: Could mean overwatering or low light.
- Wilted or mushy stems: Sign of rot—reduce water and improve airflow.
- No new growth: Try increasing humidity or moving to a brighter spot.
Are there any trees I shouldn’t try to propagate from cuttings?
Some trees are difficult or nearly impossible to grow from cuttings due to their complex root systems or seed-based propagation habits. Avoid:
When in doubt, research your tree’s genus—some, like oleander or hibiscus, are cutting superstars!
Wrapping up and next steps
Starting tree cuttings is a rewarding way to grow new plants from scratch—no green thumb required! 🌱 With the right tools, patience, and a few simple steps, you’ll soon be nurturing thriving cuttings into full-grown trees or shrubs.
The key is consistency: keep your cuttings moist, provide the right environment, and don’t rush the process.
Now that you’re armed with knowledge, take the next step—pick a healthy plant, grab your supplies, and get propagating! Whether you’re expanding your garden or sharing cuttings with friends, your green journey starts here. Happy growing! 🌿