
Propagation
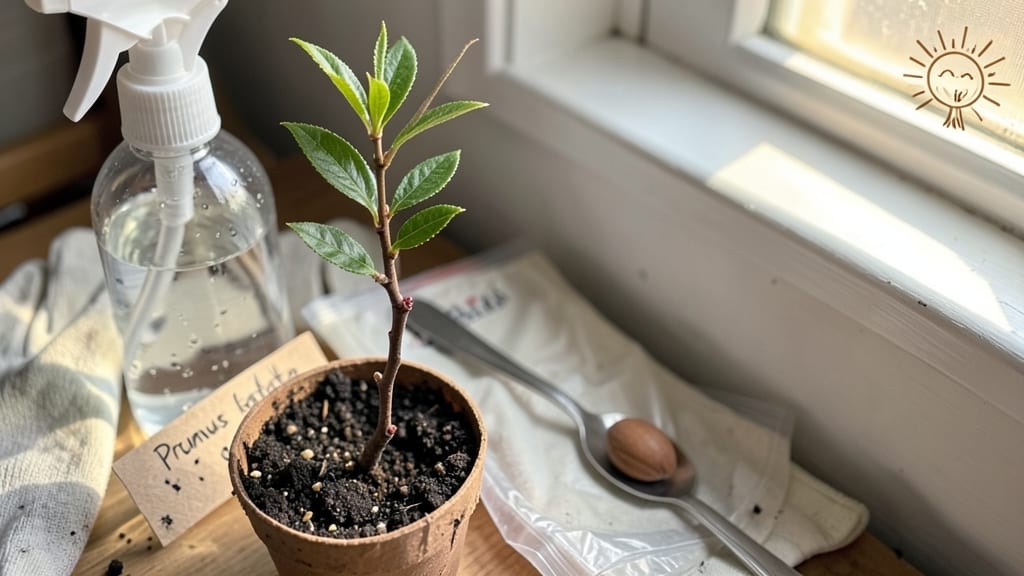
Growing a cherry blossom tree from seed is a 10-year patience test that rewards you with pink clouds of spring blooms. 🌸 I’ve tried it twice—once with a seed from my neighbor’s tree, once with a seedling I nurtured through winter—and both times, the wait made the first delicate blossoms feel like a miracle.
The catch? Seed-grown trees rarely bloom true to their parent’s beauty, but the journey teaches you more about trees than any nursery ever could.
You’ll need three things to start: fresh seeds (harvested from ripe fruit in late summer), a moist paper towel to break dormancy, and a sunny spot with well-draining soil. The real trick is timing—seeds need 60-90 days of cold stratification (mimicking winter) before they’ll sprout.
I use a plastic bag in the fridge, checking weekly for tiny roots. Once they do, it’s a 6-8 week wait for the first leaves, followed by years of slow growth before any chance of flowers.
By year three, your seedling will look like a shrubby sapling—not much to write home about, but full of potential. With proper pruning and care, it’ll reach 15-25 feet over a decade, though blooms might take 8-12 years to appear.
The trade-off? A tree with its own unique character, deep roots in your yard, and the quiet pride of growing something from scratch. (Yes, I know—it’s not the fastest way to get a showstopper blossom.)
For guaranteed pink blooms faster, consider grafting or buying a young tree. But if you love the idea of watching a tree grow from a single seed, this method delivers unmatched satisfaction—even if the flowers arrive decades later.
Here’s how to get started without losing your patience (or your seedlings).
📚 In This Guide
- What you need
- Instructions
- Tips and common mistakes
- Wrapping up and next steps
What you need
- ● Cherry blossom seeds: Fresh, viable seeds (preferably from a Prunus serrulata or similar variety). Aim for 5–10 seeds to increase success rates.
- ● Small seed-starting pots or trays: 3–4 inch pots with drainage holes (biodegradable options work too!).
- ● Seed-starting mix: A lightweight, well-draining mix (e.g., 50% peat moss, 30% perlite, 20% vermiculite). Avoid garden soil—it’s too dense!
- ● Plastic wrap or humidity dome: To create a mini greenhouse and retain moisture.
- ● Spray bottle: For gentle watering (avoid over-saturating the seeds!).
- ● Grow lights or sunny windowsill: A south-facing window or LED grow lights (12–16 hrs/day) for seedlings.
- ○ Heat mat (optional but helpful): Keeps soil 65–75°F to speed up germination.
- ● Larger pots (6–12 inches): For transplanting seedlings once they’re 3–4 inches tall.
- ● Balanced fertilizer: 10-10-10 or 20-20-20 (diluted to half-strength) once seedlings sprout 2–3 sets of leaves.
- ● Pruning shears: For shaping and maintaining your tree as it grows.
- ● Patience (and a notebook!): Track soil temps, watering, and growth—cherry blossom trees from seed can take 3–5 years to bloom!
Step-by-step instructions for growing a cherry blossom tree from seed
Here's how to nurture those delicate pink blooms from a single seed—it takes time, but the results are worth every season.
🌱 Step 1: Extract and Stratify the Seed
Cherry blossom seeds need a cold stratification period to break dormancy. Start by carefully removing the seed from its pit—it's encased in a hard stone-like shell. I like to soak the pit in lukewarm water for 24 hours first to soften the outer coating slightly. This helps prevent cracking later.
After soaking, place the seed in a plastic bag with slightly damp sphagnum moss (or a paper towel). Seal it tightly, leaving a small gap for airflow, and refrigerate for 8-12 weeks. Check monthly—if the moss dries out, mist it lightly. You'll know stratification is working when a tiny root (about ½ inch long) emerges. This is your signal to move to the next step.
🌿 Step 2: Plant the Stratified Seed
Fill a small 4-inch pot with sterile seed-starting mix—never garden soil, as it can harbor fungi that rot delicate seedlings. Plant the stratified seed ½ inch deep, covering it lightly with the mix. Press gently around the edges to ensure good soil contact. I use a clear plastic dome or wrap the pot in plastic wrap to retain humidity while the seed germinates.
Place the pot in a warm, dark location (around 70°F) until germination. Cherry blossom seeds can take 4-8 weeks to sprout—patience is key here. Avoid checking daily; moisture and warmth are more critical than frequent inspections. Once you see the first true leaves (not the initial cotyledons), move the seedling to bright, indirect light for 2-3 weeks before introducing direct sunlight.
☀️ Step 3: Transition to Sunlight and Outdoor Conditions
After the seedling develops 4-6 true leaves, it’s time to harden it off. Start by placing it near a south-facing window for a few hours daily, gradually increasing exposure. Within 2 weeks, the seedling should tolerate full sun for 4-6 hours a day. If your climate allows, transplant it to a protected outdoor spot in late spring, choosing a location with well-draining soil and partial shade initially.
Cherry blossom seedlings are sensitive to transplant shock. Water deeply once a week (or when the top 1 inch of soil feels dry) and mulch around the base to retain moisture. Avoid fertilizing for the first 3 months—the young roots need time to establish before competing for nutrients. You’ll know it’s thriving when new leaves appear consistently and the stem thickens.
⏰ Step 4: Long-Term Care for Bloom Potential
Cherry blossom trees grown from seed take 5-7 years to flower—far longer than grafted varieties. To encourage blooms, prune in late winter to remove dead wood and shape the tree. Always cut just above a bud or branch collar, never leaving stubs. In early spring, apply a balanced fertilizer (like 10-10-10) to support growth, but avoid heavy nitrogen—it promotes foliage over flowers.
Watch for Japanese beetles and aphids, which love young cherry blossoms. A neem oil spray or horticultural soap keeps pests at bay without harming the tree. By year 4, you may see small clusters of buds—this is your first sign of progress. With consistent care, those iconic pink blooms will arrive, proving the wait was worth it.
Tips & tricks for growing cherry blossom trees from seed
Real talk: Growing a cherry blossom from seed isn't just about planting and waiting—it's about understanding the delicate balance of time, temperature, and patience. Here's what nobody tells you about nurturing these iconic pink bloomers.
Stratification Secret: That 24-hour soak in lukewarm water before cold stratification is your first critical step—don't skip it! The softening prevents cracking when the seed encounters cold temperatures. I've seen seeds split open during stratification when this step was missed, and once they crack, they're ruined. Pro tip: Use a small mesh bag for the moss to make checking moisture levels easier without disturbing the seed.
Germination Environment: The 70°F warm, dark location for germination isn't just arbitrary—it mimics the soil conditions where these seeds would naturally sprout in their native habitat. If your home runs cooler, consider using a seedling heat mat (set to 70°F) under the pot. The key is consistency—fluctuations can shock the seed into dormancy again.
Light Transition: Moving from dark germination to bright indirect light after the first true leaves appear is where most beginners fail. I recommend using a grow light on a timer for 12 hours daily during this 2-3 week period. Natural light can be too intense for young seedlings, causing leaf scorch. Watch for leaves that look pale or have brown edges—this is your signal to reduce light exposure slightly.
Transplant Timing: The 2-week hardening off period before full sun exposure is non-negotiable for cherry blossom seedlings. I've seen them wilt dramatically when rushed into direct sunlight too soon. Start with just 2 hours of morning sun, then gradually increase. Morning sun is gentler than afternoon sun, which can be too intense and cause heat stress.
Pro Tips for Grow A Cherry Blossom Tree From A Seed
- Real talk: Growing a cherry blossom from seed isn't just about planting and waiting—it's about understanding the delicate balance of time, temperature, and patience.
- Stratification Secret: That 24-hour soak in lukewarm water before cold stratification is your first critical step—don't skip it!
- Germination Environment: The 70°F warm, dark location for germination isn't just arbitrary—it mimics the soil conditions where these seeds would naturally sprout in their native habitat.
Frequently asked questions
Got questions about growing a cherry blossom tree from seed? You’re not alone—this process is as rewarding as it is tricky! Below, we’ve rounded up the most common queries to help you navigate the journey with confidence.
How long does it take for a cherry blossom seed to germinate?
Germination can take anywhere from 30 to 90 days, depending on temperature and moisture. Cold stratification (the chilling process) is key—most seeds need 60–90 days in the fridge before they’ll sprout. Patience is critical, so don’t rush it! If nothing happens after 4 months, the seed may not be viable.
Will my homegrown cherry blossom tree bloom like the ones in parks?
Probably not—seed-grown trees rarely produce true-to-type flowers. Park cherry blossoms are often grafted cultivars (like Prunus serrulata ‘Kwanzan’). For reliable blooms, consider buying a grafted sapling or rooting a cutting from a known variety. Still, growing from seed is a fun experiment!
What’s the best temperature for germinating cherry blossom seeds?
Ideal germination temps are 60–70°F (15–21°C) after stratification. Use a seedling heat mat if your home runs cooler. Avoid extreme heat (above 80°F/27°C), which can dry out seeds. A humidity dome or plastic wrap keeps moisture consistent—just check for mold weekly!
Can I grow a cherry blossom tree indoors, or does it need outdoor conditions?
Cherry blossom trees are outdoor plants and need full sun (6+ hours daily) to thrive. While you can start seeds indoors, transplant seedlings outside after the last frost and in well-draining soil. If you’re in a cold climate, choose a hardy variety like Prunus avium (wild cherry) for better survival.
Why did my cherry blossom seedling turn yellow and wilt?
Yellowing leaves often signal overwatering, root rot, or pests. Check soil moisture—it should stay lightly damp, not soggy. Inspect for aphids or spider mites (common in young trees). If roots look mushy, repot in fresh, sterile soil. Prune damaged leaves and adjust watering to once a week once established.
Pro Tip:
If you’re impatient for blooms, try layering (a propagation method for stems) or buying a small grafted tree from a nursery. Seed-grown trees take 5–10 years to flower—but the journey is half the magic!
Wrapping up and next steps
Growing a cherry blossom tree from seed is a rewarding journey that blends patience, care, and a touch of magic—just like watching those delicate pink blooms unfold.
While it may take years to see your tree in full glory, every step—from stratification to transplanting—builds your green thumb and deepens your connection to nature. 🌸
Now that you’re armed with the know-how, take the next step: grab those seeds, roll up your sleeves, and start your own blossom adventure! Whether you’re gifting a sapling to a loved one or simply savoring the process, your future tree is waiting for its grand debut.