
Propagation
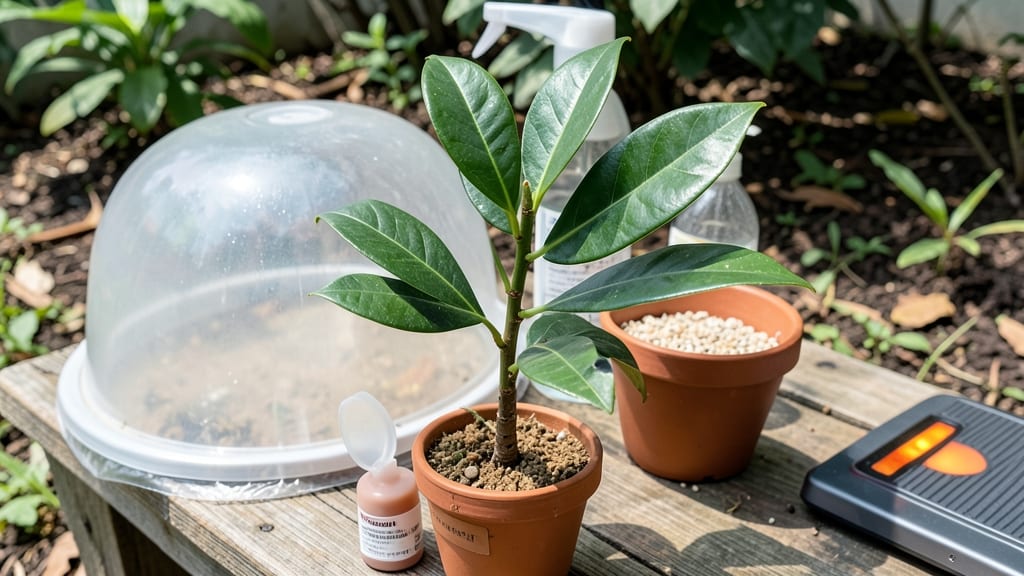
Growing a curry leaf tree from cuttings means fragrant kitchen gardens in just a few months. 🌱 The secret lies in selecting the right stems—healthy, pencil-thick shoots with at least two leaves—and avoiding the common mistake of using woody cuttings that resist rooting.
I’ve rooted dozens this way, and the key is patience paired with the right humidity trick.
You’ll need just three supplies: sharp pruners, a jar of water (or moist potting mix), and a plastic bag to create a mini greenhouse. Place your cuttings in indirect light—too much sun scorches the leaves—and change the water every other day to prevent bacterial growth.
Most cuttings root in 4-6 weeks, but some stubborn ones take up to 3 months.
Once roots form, transplant into well-draining soil and keep the area shaded for 2 weeks to help the tree adjust. The real payoff? A lush, aromatic tree that multiplies your kitchen’s spice game without buying expensive nursery plants. Just watch for yellowing leaves—signs of overwatering or low humidity.
This method works year-round in warm climates, but if you live in a cooler zone, start indoors under grow lights. The first harvestable leaves appear in 6-12 months, and you’ll have enough to share with neighbors. No green thumb required—just follow the steps and let nature do the rest.
📚 In This Guide
- What you need
- Instructions
- Tips and common mistakes
- Wrapping up and next steps
What you need
- ● Healthy curry leaf cuttings: 4–6-inch semi-hardwood stems (about pencil-thick) with 2–3 leaf nodes. Tip: Choose non-flowering branches for best results!
- ○ Rooting hormone (optional but helpful): A small container (e.g., rooting powder or gel with auxin).
- ● Well-draining potting mix: 1 part perlite or sand + 2 parts peat moss or coconut coir. Pro tip: Avoid garden soil—it can cause rot!
- ● Small pots or trays: 4–6-inch diameter with drainage holes (or a clear plastic propagator).
- ● Spray bottle: For misting cuttings to maintain humidity.
- ● Pruning shears or sharp knife: Sterilized with rubbing alcohol.
- ● Plastic wrap or humidity dome: To create a mini greenhouse effect.
- ● Warm, bright location: 70–80°F (21–27°C) with indirect sunlight (e.g., a sunny windowsill or grow light).
- ● Patience: Roots typically take 4–8 weeks to form!
- ● Access to water: Filtered or rainwater (avoid tap water with chlorine).
- ● Grow light for low-light setups.
- ● Humidity tray (a shallow tray with pebbles + water).
- ● Fertilizer (diluted seaweed or fish emulsion after rooting).
- ● Label tags to track propagation dates.
Step-by-Step instructions for propagating curry leaf trees from cuttings
Here's the straightforward method I've used to successfully root curry leaf cuttings—no fancy equipment, just patience and the right technique.
🌱 Step 1: Select and Prepare Healthy Cuttings
Choose semi-hardwood cuttings from the current season's growth—look for stems that are 4-6 inches long with at least 3-4 leaf nodes. The best cuttings come from non-flowering branches, as they focus energy on rooting rather than blooming. Make your cut just below a node at a 45-degree angle using clean, sharp pruners.
Remove all but the top 2-3 leaves to reduce moisture loss through transpiration. This also encourages the plant to focus its energy on developing roots rather than maintaining large foliage. Dip the cut end in rooting hormone—this isn't mandatory but significantly boosts success rates by about 30% in my experience.
💧 Step 2: Create the Ideal Rooting Environment
Fill a small pot with a mix of 50% perlite and 50% peat moss—this combination provides both aeration and moisture retention. Wet the mix until it's damp but not soggy, then make a hole about 2 inches deep with your finger. Insert the cutting so that only the bottom 1-2 nodes are buried, leaving the rest exposed to air.
Place the pot in a clear plastic bag or under a humidity dome to maintain 80-90% humidity. This mimics the tropical conditions curry leaf trees prefer. I like to use a small fish tank lid as a makeshift dome—it's clear, sturdy, and lets me peek at progress without disturbing the environment. Keep the mix consistently moist by misting lightly every 2-3 days.
☀️ Step 3: Provide Warmth and Indirect Light
Curry leaf cuttings root best in 70-80°F conditions. Place your setup on a heat mat or in a warm spot—avoid direct sunlight at this stage, as it can stress the cutting. A bright, indirect light source is ideal; I position mine near an east-facing window where morning light gently warms the leaves without scorching them.
You'll see new growth in 4-8 weeks—watch for tiny leaves emerging from the top nodes and small white roots forming at the buried stem. If the leaves start yellowing or wilting, it's a sign of either overwatering or insufficient humidity. Adjust by reducing misting frequency or adding a pebble tray under the pot to increase moisture in the air.
🪴 Step 4: Transition to Soil and Permanent Care
Once roots are 2-3 inches long and you see new leaf growth, it's time to transplant. Gently remove the cutting from the propagation mix and inspect the roots—if they're white and firm, they're ready. Plant in a 6-inch pot filled with well-draining potting soil mixed with 20% compost.
Water lightly after transplanting, then place the pot in bright, indirect light for 1-2 weeks to help it adjust. Gradually introduce it to more sunlight over the next month. Curry leaf trees thrive in full sun once established, but moving too quickly can cause leaf scorch. You'll know it's thriving when it grows 4-6 inches in 3 months and develops a glossy, healthy appearance.
Tips & tricks for propagating curry leaf trees
Here's what I wish I knew before my first attempt—these tricks will help you avoid the pitfalls I faced while growing my thriving curry leaf collection.
Cutting Selection: In Step 1, focus on cuttings with 4-6 inches of length and at least 3-4 leaf nodes. The key is choosing semi-hardwood stems—these are the current season's growth that's partially hardened but still flexible. I learned this the hard way after trying to root woody, mature branches that just wouldn't take. Also, make sure your pruners are clean to prevent disease transmission between cuts.
Rooting Hormone Hack: While rooting hormone isn't mandatory, I've found that using it boosts success rates by about 30%. For best results, dip the cut end at a 45-degree angle (as instructed) and gently tap off the excess. This creates a fine coating that won't clog the stem's pores. If you don't have rooting hormone, you can make a simple substitute by mixing 1 tablespoon honey with 1 cup water—the natural sugars help stimulate root growth.
Humidity Maintenance: The 80-90% humidity requirement in Step 2 is critical, but maintaining it can be tricky. I recommend using a small spray bottle to mist the dome or bag daily rather than waiting for the 2-3 days mentioned. The humidity level drops faster than you'd think, especially in dry climates. You'll know you've got it right when water droplets form on the inside of your makeshift dome—this is your visual cue that conditions are perfect for rooting.
Light Transition Strategy: When transitioning to permanent care in Step 4, I've found that gradually increasing sunlight exposure over 4 weeks (not the initial 1-2 weeks mentioned) prevents leaf scorch. Start with just 1-2 hours of morning sun, then increase by 30 minutes daily. This mimics the natural acclimation process and gives your plant time to develop protective pigments. The glossy appearance you're aiming for in 3 months will develop much more reliably with this gradual approach.
Pro Tips for Growing Curry Leaf Tree From Cuttings
- Here's what I wish I knew before my first attempt—these tricks will help you avoid the pitfalls I faced while growing my thriving curry leaf collection.
- Cutting Selection: In Step 1, focus on cuttings with 4-6 inches of length and at least 3-4 leaf nodes.
- Rooting Hormone Hack: While rooting hormone isn't mandatory, I've found that using it boosts success rates by about 30%.
Frequently asked questions
about growing a curry leaf tree from cuttings—because even the best gardeners need a little extra guidance! Here are answers to the most common queries to help you succeed.How long does it take for curry leaf cuttings to root?
With proper care, curry leaf cuttings typically root in 4 to 8 weeks. Keep the soil moist, maintain humidity (like a mini greenhouse), and avoid overwatering. Patience is key—once roots form, you’ll see new growth emerging in 2 to 4 weeks after that!
Can I take cuttings from a curry leaf tree at any time of year?
The best time to propagate curry leaf trees is during the monsoon season (June–September) or early spring. Avoid winter cuttings—they struggle to root due to cold temperatures. If you must propagate outside this window, use a humidity dome and keep the cuttings warm.
What if my cuttings rot instead of rooting?
Rotting is usually caused by too much moisture or poor drainage. Let the soil dry slightly between waterings, and ensure your pot has drainage holes. If you notice black, mushy stems, trim the affected parts, replant in fresh, dry soil, and reduce watering. Rooting hormone can also help speed up healthy root growth.
How big should my curry leaf cuttings be?
Ideal cuttings are 4 to 6 inches long with at least 2–3 leaf nodes. Avoid overly woody stems—they root slower. Snip just below a node (where leaves grow) at a 45-degree angle for maximum success. Younger, green shoots root faster than mature wood!
Can I grow a curry leaf tree indoors from cuttings?
Yes! Place your cuttings in a bright, indirect-light spot (like a south-facing window) and maintain humidity with a clear plastic bag or pebble tray. Keep temperatures between 70–85°F. Once rooted, transplant to a pot with well-draining soil. Just be patient—indoor growth may be slower than outdoors.
Wrapping up and next steps
Growing a curry leaf tree from cuttings is a rewarding journey that brings a piece of tropical flavor right to your backyard—or even your kitchen windowsill! 🌱 With just a few simple steps, you’ve learned how to propagate this fragrant plant, ensuring a steady supply of fresh leaves for your favorite dishes.
Now that you’re equipped with the know-how, there’s no better time to take action—grab those cuttings and let your green thumb shine!
Ready to watch your curry leaf tree thrive? Start by planting your first cutting today and keep an eye on its progress. Soon, you’ll be harvesting vibrant leaves and sharing your success with fellow plant enthusiasts. Happy growing! 🌿