
Blooming
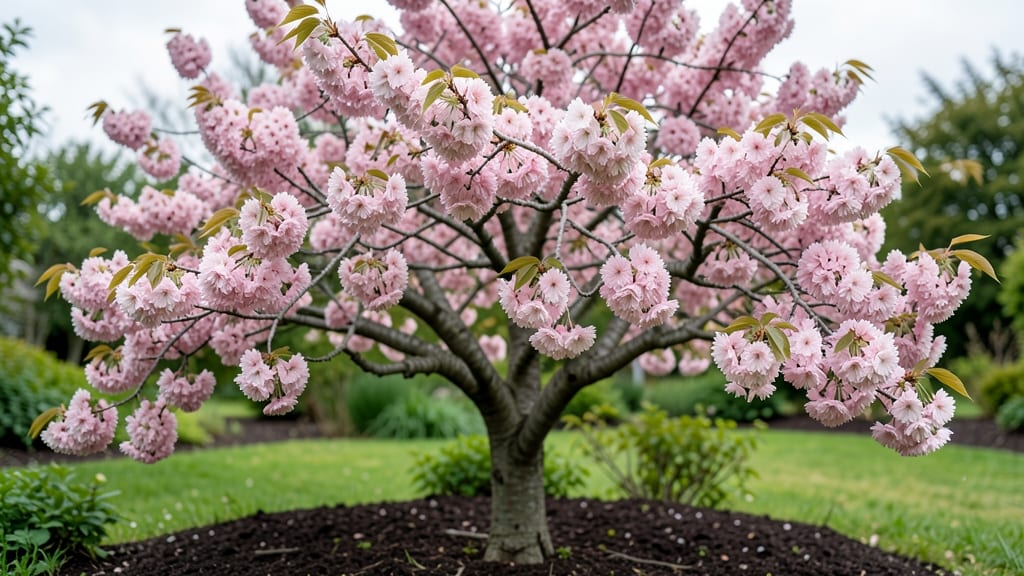
Your yard transforms into a dreamy pink-and-white sea when the cherry tree blossom time arrives—this fleeting spring spectacle emerges earlier than you think. 🌸 I’ve watched my own tree burst into bloom in mid-April, its fragrance drifting through open windows like liquid sunshine, but timing varies wildly by region and variety.
Some early bloomers open as soon as late March, while late varieties wait until May.
The magic of cherry blossoms isn’t just visual—it’s a seasonal rhythm that dictates when to prune, fertilize, or even plant nearby perennials. Too much nitrogen now? You’ll get more leaves than flowers next year.
The key is balancing care with the tree’s natural cycle, so you don’t disrupt the delicate balance that makes those petals fall like confetti. I’ve learned the hard way that pruning after blooms fade is critical for next season’s show.
When the tree is in full bloom, take time to soak in the moment—photograph the canopy, sketch the petals, or simply sit beneath it with a notebook. This is the only time your yard will look like a Japanese watercolor painting.
The trade-off? Those blossoms mean fruit later, but if you’re not growing cherries, you can deadhead to encourage more flowers (just don’t go overboard—some varieties need those blossoms for next year’s crop).
Plan your spring garden around this event: plant shade-tolerant bulbs beneath the tree now, or schedule a deep watering session when the petals start falling. The tree’s roots will thank you later when summer heat arrives.
And if you’re lucky enough to have multiple varieties, you’ll stretch that floral show from March through June—a gardener’s dream.
📚 In This Guide
- What you need
- Instructions
- Tips and common mistakes
- Wrapping up and next steps
What you need
- ● Cherry Tree: 1–3 dwarf, semi-dwarf, or standard cherry tree (depending on space and variety—e.g., Prunus serrulata for ornamental blooms or Prunus avium for fruit-bearing trees).
- ● Rootstock: Choose a hardy rootstock (e.g., Mazzard or Mahaleb) for grafted varieties.
- ● Soil Amendments: 5–10 lbs of compost or well-rotted manure (improves drainage and fertility).
- ● 2–3 lbs of balanced fertilizer (10-10-10) (apply in early spring before blooming).
- ○ Optional: Sulfur or lime (if soil pH is 7.0; cherry trees prefer slightly acidic to neutral soil (6.0–7.0)).
- ● Planting Supplies: 1 shovel (for digging).
- ● 1 garden trowel (for delicate root handling).
- ● 1 wheelbarrow or bucket (for mixing soil amendments).
- ● 1 measuring tape (to mark planting depth and spacing).
- ● 1 pruning shears (for trimming dead branches post-planting).
- ● Mulch: 3–4 inches of organic mulch (wood chips, bark, or straw) (keeps roots cool and retains moisture).
- ● Watering Tools: 1 hose with adjustable nozzle or watering can (for gentle watering).
- ○ 1 drip irrigation kit (optional) (for consistent moisture, especially in dry climates).
- ● Tree supports or stakes (for young or top-heavy trees in windy areas).
- ● Slow-release fertilizer spikes (for low-maintenance nutrition).
- ● Pest control (neem oil or horticultural soap) (prevents aphids or borers).
- ● Decorative stakes or labels (to mark varieties and add charm!).
- ● Birdhouses or feeders (cherry blossoms attract pollinators and birds—bonus beauty!).
Step-by-step guide to maximizing cherry tree blossom time
Timing is everything for those breathtaking cherry blossoms—here’s how to coax the most vibrant display from your tree.
🌱 Step 1: Prune for Airflow and Light in Late Winter
Start your prep work in late February or early March, before buds swell but before active growth begins. I always prune on a dry, sunny day—this helps wounds heal faster. Remove any dead, crossing, or inward-growing branches first, cutting back to the branch collar. These cuts improve airflow, which reduces disease and lets more sunlight reach the inner canopy where buds form.
Next, thin out dense areas by removing one-third of the smallest branches—this prevents overcrowding that can smother blossoms. Look for branches growing straight up; these often produce fewer flowers. Make clean cuts with sharp pruners at a 45-degree angle just outside the branch collar. Avoid heavy pruning now—you want to preserve next year’s blooms while encouraging this year’s.
☀️ Step 2: Apply Balanced Fertilizer at Bud Swell
When you see pink buds forming (usually late March to early April, depending on your climate), it’s time to feed. Use a balanced 10-10-10 fertilizer—this ratio supports both foliage and flower production without favoring one over the other. Spread 1 pound of fertilizer per inch of trunk diameter around the tree’s drip line, then water deeply to activate it.
I always split the dose into two applications: half now at bud swell, and the rest 4-6 weeks later when petals first appear. This prevents overstimulation that can lead to excessive leaf growth at the expense of blossoms. Water the tree 1-2 inches per week during this time, keeping the soil consistently moist but never soggy—root stress reduces bloom quality.
💧 Step 3: Monitor Watering During Bloom Season
The week before blossoms open is critical—increase watering to 2-3 inches per week. You’ll know you’re on track when the soil feels damp 2-3 inches deep (use your finger to check). Cherry trees are shallow-rooted, so focus watering on the outer third of the canopy’s reach. Drip irrigation or soaker hoses work best—they deliver moisture slowly without wetting the leaves, which helps prevent fungal diseases like powdery mildew.
Here’s the thing—don’t overwater once flowers appear. Too much moisture can cause buds to drop prematurely. If rain is forecast, reduce supplemental watering by half. Watch for wilting leaves in the afternoon—that’s your signal to water. But if petals start falling off within 24 hours of watering, you’ve likely overdone it.
✂️ Step 4: Light Structural Pruning After Bloom Fade
Once 90% of petals have fallen (usually late April to early May), it’s time for your second pruning pass. This is when you can shape the tree more aggressively. Remove any suckers (shoots growing from the base or roots) immediately—they drain energy from blossom production. Also cut back any branches that grew excessively during the bloom season, thinning to let light penetrate the center.
I like to step back and look at the tree from all sides—this helps me spot branches that block sunlight from reaching the interior. Aim to open up the canopy so at least 50% of the lower branches receive direct light. This ensures next year’s buds get the energy they need. Seal larger cuts (over ½ inch thick) with pruning sealant to prevent disease entry.
🌿 Step 5: Mulch and Protect for Next Year’s Blooms
After pruning, spread a 2-3 inch layer of organic mulch (like shredded bark or wood chips) over the root zone, keeping it 6 inches away from the trunk. This conserves moisture, regulates soil temperature, and adds nutrients as it breaks down. I always top off existing mulch rather than replacing it—this preserves beneficial microbes in the soil.
If your area experiences late frosts (common in Zone 5-7), cover young trees with frost cloth on nights when temperatures dip below 28°F. Cherry blossoms are sensitive to cold damage, and even a light frost can ruin the display. Remove the cloth during the day to let sunlight through. By mid-May, your tree should be established enough to handle normal spring weather without protection.
Tips & tricks for perfect cherry tree blossom time
Real talk: those stunning cherry blossoms don't happen by accident—they're the result of precise timing and smart care. Here's how to get the most out of your tree's natural beauty.
Timing is Everything: The late February to early March pruning window is critical—this is when buds are just starting to form but haven't swollen yet. I learned this the hard way after pruning too early one year and seeing fewer blossoms. Look for buds that are still tight and haven't started to plump up; they should feel firm when gently pressed. The goal is to shape the tree without disturbing next year's flower buds that are already forming.
Fertilizer Application Strategy: When you apply that 10-10-10 fertilizer at bud swell, focus on spreading it evenly in a 6-inch wide band around the drip line—not too close to the trunk. I always divide the fertilizer into two applications: half at bud swell (late March-early April) and the rest 4-6 weeks later when petals first appear. This two-step approach prevents overstimulation that can lead to more leaves than flowers. Think of it like giving your tree a balanced diet—too much at once and it'll bulk up instead of blooming.
Watering Wisdom: The week before blossoms open is when watering becomes most critical. Aim for 2-3 inches per week, but pay attention to the soil—it should feel damp 2-3 inches deep. I use a simple finger test: stick your finger into the soil and feel for moisture. If it's dry at that depth, it's time to water. Remember, cherry trees are shallow-rooted, so focus your watering efforts on the outer third of the canopy's reach. This targeted approach ensures roots get the moisture they need without creating soggy conditions that can stress the tree.
Frost Protection: If you're in Zone 5-7, late frosts can be devastating. I've seen beautiful blossoms ruined by a single night below 28°F. When covering with frost cloth, make sure it's secured tightly but not touching the branches. The cloth should create a small air pocket that traps heat from the ground. Remove it during the day to allow sunlight and air circulation—this prevents moisture buildup that can lead to fungal issues. Think of it like putting a blanket on your tree at night but taking it off during the day for fresh air.
Pro Tips for Cherry Tree Blossom Time
- Real talk: those stunning cherry blossoms don't happen by accident—they're the result of precise timing and smart care.
- Timing is Everything: The late February to early March pruning window is critical—this is when buds are just starting to form but haven't swollen yet.
- Fertilizer Application Strategy: When you apply that 10-10-10 fertilizer at bud swell, focus on spreading it evenly in a 6-inch wide band around the drip line—not too close to the trunk.
Frequently asked questions
Got questions about cherry tree blossom time? You’re not alone! Here are some of the most common queries—and their answers—to help you make the most of this magical season.
When is the best time to plant a cherry tree for optimal blossoms?
Plant your cherry tree in early spring or fall (after the last frost or before winter dormancy). This gives roots time to establish before the first big bloom. For spring-blooming varieties, plant in late fall so roots grow during winter, ensuring a stronger canopy by blossom time. Avoid planting in summer heat!
How do I know when my cherry tree will bloom?
Blossom timing depends on climate, variety, and age. Mature trees (5+ years) bloom reliably, often between late March and early May in most U.S. regions. Check your USDA Hardiness Zone—warmer zones (7-9) bloom earlier than colder ones (4-6). Young trees may take 2-3 years to flower. Local nurseries can pinpoint your tree’s expected schedule!
Why aren’t my cherry tree blossoms opening this year?
Several factors can delay blooms: young age (patience!), poor nutrition (test soil for nitrogen/phosphorus), disease (like silver leaf fungus), or weather stress (late frost or drought). Prune dead branches, ensure 6+ hours of sunlight, and fertilize in early spring. If issues persist, consult an arbortist.
Can I extend cherry blossom season with care?
While you can’t lengthen the bloom period (nature sets the timeline!), you can enhance their vibrancy. Water deeply 1-2 times weekly during dry spells, mulch to retain moisture, and avoid heavy pruning before blooms fade. For potted cherry trees, move them to a sheltered spot to protect against wind or frost.
Are there cherry tree alternatives for shorter bloom seasons?
If your climate has brief springs, consider these longer-blooming options:
For year-round interest, pair cherry trees with evergreen shrubs or ornamental grasses.
Wrapping up and next steps
Watching cherry tree blossoms paint your yard in soft pinks and whites is a magical experience that truly captures the essence of spring! 🌸 Whether you're admiring their beauty, planning a new planting, or simply soaking in the seasonal charm, these trees bring joy, tranquility, and a touch of elegance to any outdoor space.
Now that you’re armed with tips and insights, why not take the next step? Visit a local nursery to pick out your perfect cherry tree—or simply step outside and savor the fleeting beauty of blossom time while it lasts!