
Planting
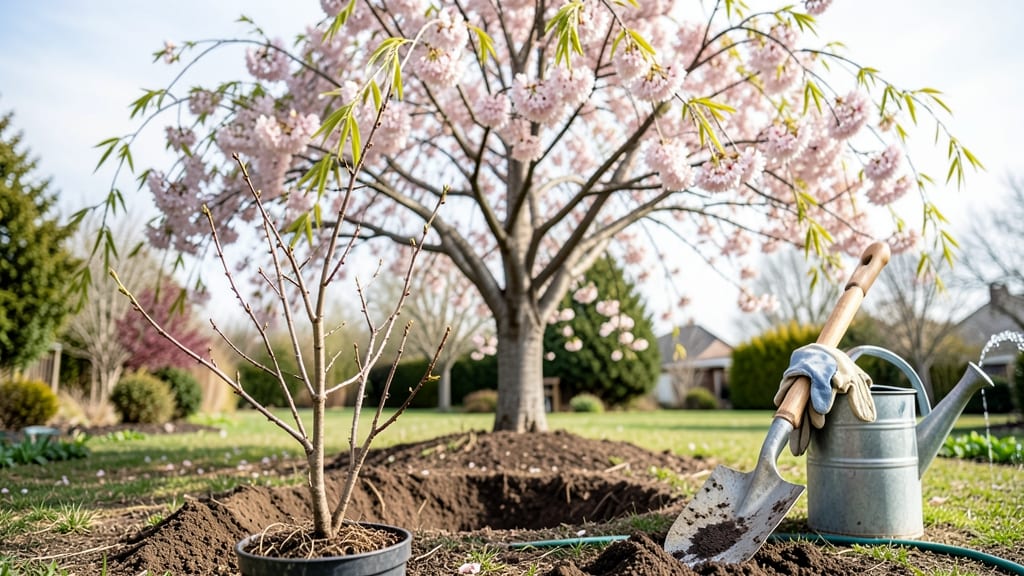
A cherry blossom tree planting guide means welcoming a burst of pink magic to your yard—just like the ones that line Washington’s Tidal Basin. ✨ The secret to their legendary beauty starts with the right spot, soil, and timing, not just the tree itself.
Most people overlook soil prep, which is where the real foundation for years of blooms begins.
You’ll need a sun-drenched site with well-draining soil, a shovel, compost, and mulch—plus a 20-foot radius of space for mature growth. Cherry blossoms thrive in zones 5-8, so check your frost dates: plant in early spring (before buds swell) or fall (6 weeks before first frost).
The first year is all about establishing roots, not showy flowers.
Dig a hole twice as wide as the root ball but no deeper—settling too low suffocates roots. Loosen the soil around the edges, mix in compost, and water deeply before planting.
Stake only if needed (windy sites), then mulch heavily to lock in moisture. By summer, you’ll see new growth—proof your tree is settling in for decades of springtime splendor.
Pro tip: Prune only dead branches now—wait until late winter to shape the tree. Avoid heavy fertilizer this year; it stresses young roots. With patience, your blossoms will arrive in 3-5 years, and every spring after that, your yard will feel like a secret garden.
📚 In This Guide
- What you need
- Instructions
- Tips and common mistakes
- Wrapping up and next steps
What you need
- ● Cherry blossom tree (Prunus serrulata or hybrid): Choose a bare-root or container-grown sapling (1–3 inches in caliper for best establishment). Opt for disease-resistant varieties like 'Kwanzan' or 'Autumnalis'.
- ● Shovel or trowel: A round-point shovel (for digging) and a hand trowel (for precision).
- ● Compost or well-aged manure: 5–10 gallons, mixed with native soil to enrich nutrients.
- ● Mulch (wood chips or bark): 2–3 inches thick, covering the root zone (keep 3–4 inches away from the trunk).
- ● Watering can or hose with a gentle spray nozzle: For deep, slow watering (avoid splashing soil onto leaves).
- ● Pruning shears: Sharp, sterilized shears to trim damaged branches post-planting.
- ○ Staking supplies (optional but recommended for young trees): 2–3 wooden stakes (2–3 feet tall).
- ● Soft tree tie straps (not wire—it can girdle the trunk!).
- ● Soil test kit: Check pH (ideal: 6.0–7.0) and amend if needed (e.g., lime for acidic soil).
- ● Root stimulator: A mycorrhizal fungi or seaweed-based product to boost root growth.
- ● Fertilizer (slow-release, low-nitrogen): 10-10-10 or 5-10-10 blend (apply 6 months post-planting).
- ● Tree guard or protective wrap: For young trees in urban areas (prevents rodent damage).
- ● Garden gloves: To keep hands clean while handling soil and roots.
- ● Level: Ensures the tree is planted upright (no tilting!).
- ● Choose a sunny spot with at least 6 hours of direct sunlight daily.
- ● Ensure adequate space: Mature cherry blossoms can reach 20–30 feet wide—plant 15–20 feet from structures.
- ● Check soil drainage: Cherry blossoms hate soggy roots—amend clay soil with sand or compost.
- ● Schedule planting for early spring or fall (avoid extreme heat or frost).
Step-by-Step instructions for planting a cherry blossom tree
Here's how to plant your cherry blossom tree for a showstopping spring display that lasts for decades.
🌱 Step 1: Choose the Right Location and Prepare the Hole
Cherry blossom trees need full sun—at least 6-8 hours daily—to produce their iconic flowers. Scan your yard for a spot with no overhead branches or competing trees casting shade. The hole should be twice as wide as the root ball but only as deep—planting too deep suffocates the roots.
Use a shovel to loosen the soil around the edges of the hole. Mix the native soil with 3-4 inches of compost (from your materials) to improve drainage and nutrient content. This prevents waterlogging, which cherry blossoms hate. Tap the shovel gently against the sides of the hole to create a smooth slope for the roots to settle naturally.
🪴 Step 2: Remove the Tree from Its Container and Position It
Gently squeeze the sides of the container to loosen the root ball before sliding the tree out. If roots are circling tightly, use your fingers to tease them outward—this encourages outward growth instead of girdling. Place the tree in the hole so the top of the root ball sits 1-2 inches above ground level. Cherry blossoms need this slight elevation to prevent rot.
Check the position by kneeling and looking straight ahead—you should have at least 6 feet of clearance in all directions for mature growth. If the tree leans, adjust the hole depth or add soil to one side to level it. Once satisfied, backfill with the amended soil mixture, pressing lightly every 3-4 inches to eliminate air pockets.
💧 Step 3: Water Thoroughly and Apply Mulch
Water the tree deeply—about 10 gallons—to settle the soil and eliminate air gaps. You’ll know it’s enough when water drains from the bottom of the hole. Let it absorb for 15-20 minutes, then add another 5 gallons to ensure roots make contact with moist soil. Over the next 2 weeks, water 2-3 times weekly to encourage root establishment.
Spread 2-3 inches of mulch (from your materials) in a 3-foot diameter ring around the base, keeping it 6 inches away from the trunk. This conserves moisture and regulates soil temperature. Avoid piling mulch against the trunk—it traps moisture and invites disease. Replenish mulch annually as it decomposes.
☀️ Step 4: Stake and Protect for the First Year
Use 2 stakes driven 6 inches from the trunk at opposing angles. Attach them to the tree with soft ties (like tree straps) to prevent trunk damage. The goal is to stabilize the tree without restricting movement—cherry blossoms need to sway slightly in wind to strengthen their structure. Leave the ties loose enough to slide a finger between the strap and bark.
Install a tree guard (from your materials) or create a DIY version with wire mesh to deter rabbits and deer, which love young cherry blossoms. In late fall, remove the stakes and ties—by then, the roots should be anchored enough to stand alone. Prune only to remove any broken branches; avoid heavy pruning in the first year.
Tips & tricks for planting cherry blossom trees
Planting a cherry blossom tree is like setting the stage for a springtime masterpiece—these little details make all the difference between a thriving tree and one that struggles. Here's what I've learned after watching too many trees fail from common mistakes.
Location is Everything: That 6-8 hours of full sun isn't just a suggestion—it's non-negotiable for those iconic pink blooms. I've seen trees planted in partial shade that barely produced flowers. Check your yard at different times of day—morning sun is great, but afternoon shade can sneak up on you. Also, avoid planting near sidewalks or driveways where roots might get damaged later.
Root Ball Position Matters: That 1-2 inch elevation above ground level in Step 2 isn't just arbitrary—it's crucial for preventing rot. I once planted a tree with the root ball too deep, and it took years for the tree to recover. Use a level to check, and don't be afraid to add or remove soil until you're sure. The top of the root ball should be the highest point in the planting hole.
Watering Wisdom: Those 10 gallons initially and 5 gallons after 15-20 minutes might seem like a lot, but trust me—it's better to overdo it once than underwater. I learned this the hard way when a newly planted tree wilted because the roots didn't get enough moisture. Water slowly so it can soak in properly, and look for water draining from the bottom of the hole as your signal to stop.
Mulch Like a Pro: The 2-3 inches of mulch in a 3-foot ring isn't just decoration—it's a moisture regulator and temperature stabilizer. I've seen people pile mulch right against the trunk, which can cause rot. Keep that 6-inch gap and remember to replenish it annually as it breaks down. Organic mulch like wood chips works best for cherry blossoms.
Pro Tips for Cherry Blossom Tree Planting Guide
- Planting a cherry blossom tree is like setting the stage for a springtime masterpiece—these little details make all the difference between a thriving tree and one that struggles.
- Location is Everything: That 6-8 hours of full sun isn't just a suggestion—it's non-negotiable for those iconic pink blooms.
- Root Ball Position Matters: That 1-2 inch elevation above ground level in Step 2 isn't just arbitrary—it's crucial for preventing rot.
Frequently asked questions
Got questions about planting your cherry blossom tree?
You’re not alone! Here are answers to the most common queries to help you grow a stunning springtime centerpiece with confidence.
When is the best time to plant a cherry blossom tree?
The ideal window is late fall to early spring—before buds swell in spring or after leaves fall in autumn. This gives roots time to establish before summer heat. Pro tip: If planting in spring, water deeply every 2–3 days until roots settle (usually 6–8 weeks).
Can I plant a cherry blossom tree in winter?
Yes, but only in dormant season (late fall to early winter, before freezing temps). Bare-root trees thrive in cold soil, but avoid planting when ground is frozen or during hard freezes. Pro tip: Mulch heavily (3–4 inches) to insulate roots—just don’t smother the trunk!
What’s the best soil mix for cherry blossom trees?
They prefer well-draining, slightly acidic soil (pH 5.5–6.5). Amend heavy clay with compost or sand, and avoid soggy spots. A mix of 60% native soil, 30% compost, and 10% perlite works wonders. Troubleshoot: Yellow leaves? Test soil pH—lime may help if too acidic.
How close can I plant a cherry blossom tree to my house or fence?
Keep mature height (20–40 ft) and spread (15–25 ft) in mind! Plant at least 10–15 feet from structures to avoid root conflicts with foundations or underground pipes. For smaller varieties (like ‘Royal Celebration’), 8 feet is safer. Pro tip: Check local codes—some areas regulate tree placement near sidewalks.
Are cherry blossom trees messy? Do they need pruning?
Yes! They drop petals, leaves, and occasional fruit (if not pruned). Prune in late winter to shape and remove dead wood. Thin branches to improve airflow—this reduces disease and makes cleanup easier. Quick fix: Use a tarp under the tree during peak bloom to catch petals!
Will my cherry blossom tree bloom every year?
Not always! Young trees (under 3–5 years) may skip blooms to focus on root growth. Mature, healthy trees bloom reliably if they get full sun (6+ hours/day) and proper care. Boost blooms: Fertilize in early spring with a balanced 10-10-10 formula.
What if my cherry blossom tree isn’t thriving?
Check for common issues:
- Yellow leaves: Overwatering or poor drainage.
- No blooms: Too much shade or young age.
- Brown edges: Underwatering or salt buildup.
Adjust care and monitor for pests (like borers). Last resort: Consult a local arborist if problems persist.
Wrapping up and next steps
Planting a cherry blossom tree is a beautiful way to invite spring’s magic into your yard—just follow the right steps! 🌸 With the right location, soil prep, and care, your tree will thrive and reward you with stunning blooms for years to come.
Whether you’re a seasoned gardener or a beginner, this guide gives you everything you need to succeed.
Now that you’re ready, take the next step—mark your calendar, gather your tools, and start digging! Watching your cherry blossom grow is a journey worth celebrating, so get planting and enjoy the blossoms! 🌱