
Size
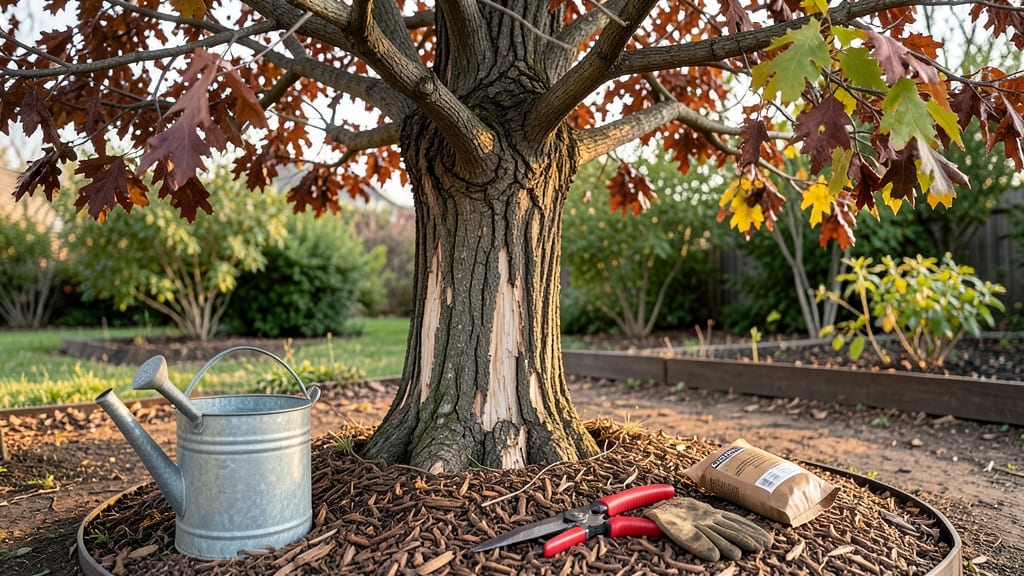
Bringing a tree back to life starts with one simple truth: most "dead" trees are just dormant or stressed. 🌳 I’ve nursed back trees that looked hopeless—just by checking the roots, adjusting water, and giving them a chance to breathe.
The key is knowing what to look for before you dig in.
First, rule out the obvious: is it truly dead or just sleeping? Scratch the bark—if it’s green underneath, there’s life. Check for pests like borers or signs of disease like oozing sap.
Then examine the soil: compacted, waterlogged, or bone-dry roots can’t recover without help. A basic toolkit—pruners, a shovel, and a moisture meter—is all you need to diagnose the problem.
Reviving a tree isn’t magic, but it’s close. Start with deep watering (think 1-2 inches per week), then loosen the soil around the roots to help oxygen flow.
Prune dead branches back to healthy growth, and if pests are the issue, a targeted spray of neem oil can work wonders. Patience is everything—some trees bounce back in weeks, others take months.
Here’s the hard truth: not every tree can be saved, but many more can than most gardeners realize. The ones that make it? They grow stronger than ever. Let’s figure out if yours is worth the effort.
📚 In This Guide
- What you need
- Instructions
- Tips and common mistakes
- Wrapping up and next steps
What you need
- ● Pruning shears or sharp bypass pruners – For trimming dead or damaged branches (sterilize with rubbing alcohol first!)
- ● Garden trowel or small shovel – To gently loosen soil around roots without causing harm.
- ● Watering can or hose with a gentle spray nozzle – For deep, even hydration (avoid blasting roots!).
- ● Well-draining potting mix or garden soil – Choose a blend rich in organic matter (e.g., compost or peat-based mix).
- ○ Rooting hormone (optional but helpful) – For bare-root trees or cuttings (follow label instructions!).
- ● Mulch (e.g., shredded bark or straw) – 2–3 inches thick to retain moisture and regulate soil temperature.
- ○ pH testing kit (optional) – To check soil acidity/alkalinity (ideal range: 6.0–7.0 for most trees).
- ● Fertilizer (balanced or slow-release) – Only if soil tests show deficiencies (avoid over-fertilizing!).
- ● Clear plastic wrap or humidity dome – For cuttings to retain moisture during propagation.
- ● Tree support stake (for young saplings) – To prevent wind damage while roots re-establish.
- ● Fungicide (if signs of disease) – Copper-based sprays work well for early intervention.
- ● Gloves and knee pads – Because gardening is easier (and cleaner) with protection! 😉
Step-by-Step guide to reviving a stressed tree
Even a tree on its last legs can bounce back with the right care—here’s how to diagnose and fix it.
🌱 Step 1: Assess the Damage and Identify the Problem
First, examine the tree closely. Look for yellowing leaves (often a sign of overwatering or nutrient deficiency), brown, crispy edges (usually underwatering or sunburn), or peeling bark and oozing sap (a fungal or pest issue). Run your fingers through the soil around the base—if it feels bone-dry 3 inches down, that’s your first clue. Grab a handful and squeeze: if it crumbles like dust, the roots are thirsty.
Check the trunk for cracks, holes, or sawdust-like frass (insect droppings). A healthy tree has smooth bark with no unusual growths. If you see mushrooms growing at the base, that’s a red flag for root rot. Note where the tree is planted—too close to a foundation or driveway can strangle roots, while poor drainage traps water and suffocates them.
💧 Step 2: Water Deeply and Correctly
Most struggling trees need deep, slow watering—not quick sprinkles that only wet the surface. Use a soaker hose or drip irrigation to deliver water 6-12 inches down into the root zone. If you’re using a hose, let it run for 30-60 minutes until water seeps out of the soil. For smaller trees, 5 gallons of water should soak in completely.
Water in the early morning or late afternoon to reduce evaporation. Avoid wetting the leaves—fungal diseases thrive in damp foliage. If the soil is clay-heavy, it may repel water like a pond. In that case, dig small holes around the base and pour water directly into them to encourage deeper root absorption.
☀️ Step 3: Adjust Light and Shelter as Needed
If your tree’s leaves are bleached or scorched, it’s getting too much direct sun. Move it to a spot with dappled shade (like under a taller tree) for a few weeks while it recovers. Conversely, if leaves are pale and leggy, it’s not getting enough light—6+ hours of sun is ideal for most trees. Rotate the pot (if container-grown) a quarter turn weekly to prevent leaning.
Young or weakened trees need protection from harsh winds. If your tree is in an exposed area, tie the trunk to a sturdy stake with soft tree wrap or burlap. Avoid plastic ties—they can girdle the bark as the tree grows. For container trees, bury the pot halfway in the ground to stabilize it and reduce stress.
✂️ Step 4: Prune Deadwood and Stimulate New Growth
Use clean, sharp pruning shears to remove any branches that are brown, brittle, or oozing sap. Cut just outside the branch collar (the swollen area where the branch meets the trunk). Avoid topping (cutting back to a stub)—this stresses the tree and invites disease. Instead, prune to maintain the tree’s natural shape and open the canopy for better airflow.
After pruning, apply a balanced, slow-release fertilizer (like 10-10-10) around the drip line (the edge of the tree’s shadow). Scratch it into the top 2 inches of soil to avoid burning roots. For severely stressed trees, a mycorrhizal fungus can help roots absorb water and nutrients more efficiently. Water deeply after fertilizing to help it dissolve into the soil.
🪴 Step 5: Monitor and Adjust Long-Term Care
Keep a watering log for the next 4-6 weeks, noting when you water and how the soil feels. A revived tree should show new growth at the tips of branches within 2-4 weeks. If you don’t see this, reassess light, water, and soil conditions. Mulch the base with 2-3 inches of organic mulch (like wood chips) to retain moisture and regulate soil temperature—just keep it 6 inches away from the trunk to prevent rot.
If the tree still looks weak after 3 months, consider a soil test to check pH and nutrient levels. Trees often need micronutrients like iron or magnesium if leaves show yellowing between veins (a classic deficiency sign). In extreme cases, root aeration (digging small holes around the root zone) can help compacted soil breathe again.
Tips & tricks for reviving wilted trees
Here's what nobody tells you about bringing trees back from the brink—these tricks make all the difference.
Diagnosis is Key: In Step 1, when you're checking for yellowing leaves or brown edges, pay extra attention to the leaf veins. If they're still green but the leaf is yellowing overall, it's likely a nutrient deficiency like nitrogen. If the veins are yellow too, you're probably dealing with a soil pH issue or iron deficiency. This distinction helps you target the right fix—whether it's fertilizer or soil amendments.
Watering Wisdom: For that critical 30-60 minute watering session in Step 2, I've found that morning watering works best because it gives roots time to absorb moisture before the heat of the day. If you're using a hose, place it at the base and let it run slowly—you should see water seeping out about 6 inches away from the trunk. This tells you the water's reaching the roots where it counts.
Light Balance: When adjusting light in Step 3, remember that dappled shade means partial sunlight filtering through leaves—not complete darkness. Think of it like a sun dappled forest floor. For container trees, that quarter turn weekly helps prevent them from leaning toward the light source, which can stress the trunk over time.
Pruning Precision: In Step 4, when removing dead branches, don't just cut them off—sterilize your pruners between cuts with rubbing alcohol. This prevents spreading any potential fungal spores from diseased branches. Also, avoid pruning when the tree is wet, as this increases the risk of infection through open wounds.
Pro Tips for Can You Bring A Tree Back To Life
- Here's what nobody tells you about bringing trees back from the brink—these tricks make all the difference.
- Diagnosis is Key: In Step 1, when you're checking for yellowing leaves or brown edges, pay extra attention to the leaf veins.
- Watering Wisdom: For that critical 30-60 minute watering session in Step 2, I've found that morning watering works best because it gives roots time to absorb moisture before the heat of the day.
Frequently asked questions
Got questions about reviving your dying tree? You’re not alone! Here are some of the most common concerns—and expert-backed answers—to help you bring your leafy friend back from the brink.
How do I know if my tree is truly dead or just dormant?
A dormant tree may have lost leaves or appear wilted, but its bark is usually intact, and you might spot tiny buds or new growth in spring. If the bark is cracked, peeling, or oozing sap, or if branches snap like dry twigs, it’s likely dead. Scratch a small section of bark—if it’s brown and mushy underneath, revival is unlikely.
How long does it take to revive a tree?
Patience is key! With proper care—like consistent watering, pruning dead branches, and soil amendments—you may see signs of recovery in 4–8 weeks. Some trees, especially deep-rooted species, can take months or even a full season to bounce back. Monitor progress monthly and adjust your approach as needed.
What if my tree’s soil is too compacted or waterlogged?
Compacted or soggy soil can strangle roots, even with watering. Loosen the top 6–12 inches of soil around the base using a garden fork, and mix in compost or perlite to improve drainage. If water pools after rain, consider adding a swale (a shallow trench) to redirect excess water away from the roots.
Can I use household items (like Epsom salt or coffee grounds) to revive my tree?
While Epsom salt (magnesium sulfate) can help with nutrient deficiencies, use it sparingly—too much can harm roots. Coffee grounds add nitrogen but should be buried 4–6 inches deep and used in moderation (1–2 cups per tree). For a safer bet, stick to balanced fertilizer or organic compost. Always research before experimenting!
Should I prune dead branches now or wait until spring?
Remove obviously dead or diseased branches immediately—they drain energy from healthy parts. For large cuts, wait until late winter or early spring (when the tree is dormant) to minimize stress. Use sterilized pruners and seal larger wounds with pruning paste to prevent pests or rot.
What if my tree doesn’t improve after trying everything?
Sometimes, trees are beyond revival due to severe root damage, disease, or pest infestations. If you’ve watered, fertilized, pruned, and adjusted the soil without success, it may be time to consult an arborist or consider planting a new tree. Don’t lose hope—some species (like willows or crepe myrtles) are more resilient than others!
Wrapping up and next steps
Bringing a tree back to life isn’t just possible—it’s a rewarding challenge that connects you to nature’s resilience! 🌱 Whether through proper pruning, hydration, or soil care, even the most wilted foliage can bounce back with patience and the right techniques.
Start small: assess your tree’s needs, act quickly, and celebrate progress, no matter how gradual.
Your next step? Grab your tools, roll up your sleeves, and give your tree the TLC it deserves. Every leaf saved is a victory—and every root revived is a promise of future growth. 🌿