
Pruning
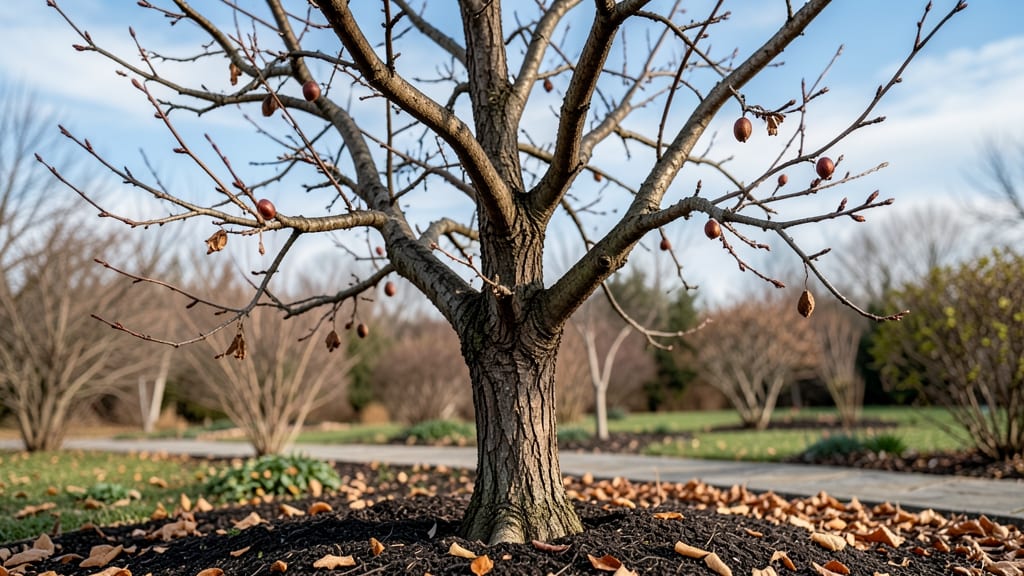
Winter is the perfect time to prune your apricot tree for a stronger harvest next summer. ✂️ I’ve learned that dormant-season trimming—when the tree is bare and cold-hardy—boosts airflow, removes dead wood, and sets up explosive spring growth.
Skip this step, and you risk crowded branches, disease, or weaker fruit production. The key is timing: wait until late winter (just before buds swell) when frost risk has passed.
Grab your pruners, sanitize them with rubbing alcohol, and focus on removing 15-20% of the canopy—no more, or you’ll stress the tree. Thin out crossing branches first, then cut back to outward-facing buds to encourage sunlight penetration.
By spring, you’ll see fresh green shoots where you made cuts, and those branches will bear heavier fruit than ever before. The tree’s energy goes into fewer, stronger limbs instead of struggling with overcrowding. Plus, open canopies dry faster after rain, cutting down on fungal issues.
Works for young trees, mature orchards, or even container-grown apricots. Just avoid pruning in frost or heavy snow—wait for a dry, above-freezing day. Ready to shape your tree’s future? Let’s get started.
📚 In This Guide
- What you need
- Instructions
- Tips and common mistakes
- Wrapping up and next steps
What you need
- ● Pruning shears – Bypass pruners (sharp, 6-8 inch blades) for cutting small branches (up to ½ inch thick). Anvil pruners are a budget-friendly alternative but can crush stems.
- ● Loppers – Bypass-style, 18-24 inch handles, for branches ½ to 1½ inches thick. Look for ratcheting models for easier cutting.
- ● Pruning saw – Curved-tooth saw for branches thicker than 1½ inches. A foldable or bypass saw is ideal for precision.
- ● Gloves – Heavy-duty, cut-resistant (e.g., mechanics’ or pruning gloves) to protect hands from thorns and rough bark.
- ● Disinfectant – 70% isopropyl alcohol or a pruning sealant (like Tanglefoot Tree Wound Pruning Sealer) to sterilize tools and prevent disease spread.
- ● Ladder or step stool – Sturdy, non-slip (e.g., aluminum extension ladder or foldable step stool) for reaching higher branches safely.
- ● Heavy-duty trash bags – 13-gallon or larger for collecting pruned branches and debris.
- ○ Marking twine or flags – Colored twine or biodegradable flags to tag branches for removal (optional but helpful for complex pruning).
- ● Pruning paint or wound dressing – Not always necessary, but can help seal large cuts (e.g., Tree Seal or copper-based fungicide for disease-prone areas).
- ● Safety glasses – Protects eyes from debris, especially when using a pruning saw.
- ● Work apron or tool belt – Keeps tools organized and hands free.
- ● Garden hose or bucket of water – For rinsing tools between cuts to prevent sap buildup.
Step-by-step guide to winter pruning for your apricot tree
Here's how I transform my apricot tree each winter—clean cuts lead to better fruit and stronger branches.
✂️ Step 1: Assess the Tree for Dead or Damaged Wood
Start by examining every branch from the ground up. Look for dead wood—it's brittle, snaps easily, and has no green underneath when you cut a small section. I always prune these first because dead branches harbor pests and diseases that can spread to healthy wood. Also watch for cracked or split limbs, which are safety hazards and won't produce fruit anyway.
Use your pruning saw to test suspicious branches. If it cuts cleanly through the wood without resistance, it's likely dead. Mark these branches with a piece of twine or flagging tape so you can find them easily in the snow. This step ensures you're removing only what needs to go—don't over-prune just because you can see bare spots.
✂️ Step 2: Remove Crossing and Rubbing Branches
Next, focus on branches that cross each other or rub against one another. These create wounds that let diseases like silver leaf fungus enter the tree. I look for branches growing inward toward the center of the tree—these compete for sunlight and nutrients, weakening the tree's overall health. Remove the smaller of the two crossing branches first, cutting all the way back to the trunk or a healthy lateral branch.
Use sharp hand pruners for branches up to ½ inch thick and a pruning saw for anything thicker. Make your cuts at a 45-degree angle, about ¼ inch above a bud that faces the outside of the tree. This encourages outward growth and better air circulation. If you're unsure which branch to remove, I always take the smaller one—it's less disruptive to the tree's structure.
✂️ Step 3: Thin Out Overcrowded Branches
Now it's time to thin the canopy to let light and air reach the center of the tree. Start at the outer edges and work your way in, removing branches that are growing too close together. Aim to create a balanced shape with an open center—this prevents fruit from shading and improves airflow, which reduces disease risk. I usually remove about 20% of the tree's branches during this step, but never more than 30% in a single season.
Look for branches that grow straight up or down—they don't contribute much to the tree's structure. Cut these back to a strong lateral branch or bud. For branches that are too thick to cut cleanly with hand pruners, use your pruning saw and make sure the cut is smooth. Avoid leaving stubs, as they can rot and invite pests. If you're unsure about a cut, I always err on the side of caution and leave the branch—you can always prune more next year.
✂️ Step 4: Shape the Tree for Optimal Growth
Now that you've removed the dead, damaged, crossing, and overcrowded branches, it's time to refine the tree's shape. Apricot trees benefit from an open-center form, which allows sunlight to reach the inner branches where most of the fruit develops. I focus on maintaining a central leader (the main upward-growing branch) while encouraging strong lateral branches to grow outward. Cut back any branches that grow too close to the ground or interfere with mowing or foot traffic.
Use your pruning saw to make clean cuts just above a bud that faces outward. Avoid cutting too close to the trunk, as this can create large wounds that take longer to heal. If you need to make a larger cut, use a pruning sealant to protect the wound and reduce the risk of infection. Step back occasionally to check the tree's balance—you want a symmetrical shape that allows sunlight to penetrate evenly.
🌿 Step 5: Clean Up and Protect the Tree
After pruning, gather all the debris and dispose of it properly. Never leave branches on the ground near the tree, as they can harbor pests and diseases. I burn or chip the debris immediately to prevent it from spreading any potential problems. Next, apply a layer of mulch around the base of the tree, keeping it 2-3 inches thick and 6 inches away from the trunk. This helps retain moisture and regulate soil temperature.
Finally, consider applying a dormant oil spray to protect the tree from overwintering pests like scale and mites. I do this in late winter, just before buds begin to swell. Avoid fertilizing during winter, as the tree is dormant and won't use the nutrients until spring. Instead, focus on giving it a good pruning and a clean start for the growing season ahead. Your apricot tree will thank you with stronger growth and a better fruit crop next year.
Tips & tricks for perfect winter apricot tree pruning
Winter pruning transforms your apricot tree—here's how to avoid common mistakes and get the best results.
Tool Sharpness Matters: I can't stress this enough—dull pruners and saws tear wood instead of making clean cuts. Before you start, sharpen your tools or use a honing file to keep blades razor-sharp. Clean cuts heal faster and look professional. A quick way to test sharpness is to cut a small piece of paper—if it tears, your tool needs sharpening. This simple step prevents jagged edges that invite disease.
Timing is Everything: Prune your apricot tree during its dormant season, typically in late winter when the tree has no leaves but before buds begin to swell. This timing ensures the tree can heal properly before spring growth begins. In most regions, February or early March works best. If you're in a warmer climate, wait until just before buds show signs of activity. The goal is to give the tree time to recover before active growth starts.
Visual Cues for Pruning Decisions: When deciding which branches to remove, look for these visual clues: branches that cross or rub against each other create friction wounds, while dead wood often appears grayish-brown and snaps easily. Healthy buds should be plump and firm, while weak ones are shriveled. I always make my cuts just above a healthy outward-facing bud—this encourages new growth in the right direction. If you're unsure about a branch, it's better to leave it and reassess next year.
Safety First: Never work on a ladder or climb the tree while pruning—it's dangerous and can damage the tree. Instead, use a pole pruner to reach higher branches safely. Always wear gloves to protect your hands from thorns and sharp tools. I also recommend wearing long sleeves and sturdy shoes to prevent scratches and slips. Remember, you can always prune more next year if you miss something—safety comes first.
Pro Tips for Apricot Tree In Winter
- Winter pruning transforms your apricot tree—here's how to avoid common mistakes and get the best results.
- Tool Sharpness Matters: I can't stress this enough—dull pruners and saws tear wood instead of making clean cuts.
- Timing is Everything: Prune your apricot tree during its dormant season, typically in late winter when the tree has no leaves but before buds begin to swell.
Frequently asked questions
Got questions about winter apricot tree care? You’re not alone! Here are answers to the most common concerns about dormant-season pruning—so you can tackle your tree with confidence.
When is the exact best time to prune an apricot tree in winter?
The ideal window is late winter, after the coldest temperatures but before buds swell—typically February to early March in most U.S. zones (3–9). Prune too early, and frost damage risks increase; too late, and you’ll encourage early growth that could be nipped by late frosts. Check your local frost dates for precision!
Can I prune an apricot tree if it’s still covered in snow?
Nope! Wait until snow melts and the ground thaws—pruning frozen branches can snap them or stress the tree. If your area gets heavy snow, prune before winter storms hit. Pro tip: Shake snow off gently with a broom to avoid branch damage.
What if my apricot tree has no branches to prune—should I still trim?
Even if your tree looks sparse, light pruning is still beneficial. Focus on:
- Removing dead, diseased, or crossing branches (even if few exist).
- Thinning the canopy by 20–30% to improve airflow and sunlight.
- Shaping the tree for future growth—think of it as a "growth reset."
I pruned too much—will my apricot tree survive?
Don’t panic! Apricot trees are resilient, but over-pruning (cutting >30% of foliage) can stress the tree. If you’ve gone overboard:
- Leave the rest untouched this year—let it recover.
- Focus on watering deeply and fertilizing lightly in spring.
- Next winter, prune only dead wood and minimal shaping.
Are there any apricot tree varieties that don’t need winter pruning?
While all apricot trees benefit from winter pruning, some dwarf varieties (like ‘Goldcot’ or ‘Tilton’) need less aggressive cuts due to their smaller size. However, skip pruning entirely only if your tree is:
- Very young (<1 year old).
- Heavily damaged by disease/pests (prioritize treatment first).
- In a high-wind zone (prune minimally to avoid storm risks).
What’s the best way to sterilize pruning tools between cuts?
Diseases like bacterial leaf spot or silver leaf fungus can lurk on tools. After each cut:
- Wipe blades with a 70% isopropyl alcohol spray or cloth.
- Or use a 10% bleach solution (1 part bleach to 9 parts water), rinsing tools afterward.
- For stubborn sap, scrub with soapy water and dry thoroughly.
Wrapping up and next steps
Winter is the perfect time to give your apricot tree the care it needs for a bountiful spring! By pruning during dormancy, you’re setting the stage for healthier branches, better fruit production, and a stronger, more vibrant tree. Don’t wait—grab your tools and get started!
Ready to take your apricot tree to the next level? Start small—even a few cuts can make a difference. For more tips, check out our guide on spring apricot care or join a local gardening group for hands-on advice. Your tree (and future harvest) will thank you! 🌱✨