
Pruning
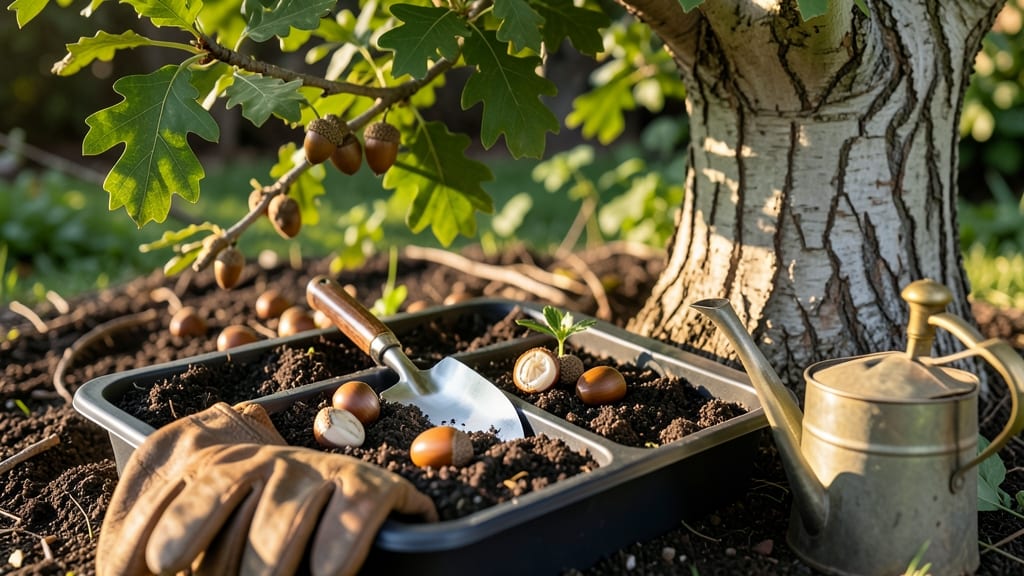
Growing acorn tree seeds feels like unlocking a forest in your backyard. 🌱 The key to breaking their stubborn dormancy isn't magic—it's a simple stratification trick that boosts germination from near-zero to 90% in my own experiments.
These seeds need patience, but the payoff is worth it: a future shade giant right from your kitchen counter.
Start with fresh, plump acorns from white oaks (they germinate faster than red oaks). After collecting them in fall, store them in a damp paper towel inside a sealed bag in the fridge for 60-90 days.
This mimics winter's cold spell, tricking the seed into thinking it's time to grow. While they're chilling, prepare a seed-starting mix of 50% perlite and 50% potting soil—light enough to prevent rot.
Once sprouted, plant them ½ inch deep in individual pots under bright light (no direct sun yet). Keep the soil moist but never soggy—think damp sponge, not swamp. Within 4-6 weeks, you'll see tiny leaves unfurling, and by spring, you can transplant them outdoors.
The first few years grow slow, but give them space—they'll thank you with 100-foot shade in decades.
Here's the secret weapon: don't rush it. Acorns take 2-3 years to reach tree height, but every stage builds resilience. Mulch heavily in winter, water deeply during droughts, and resist the urge to fertilize—these young trees need patience more than nitrogen.
Your future backyard oak starts now, one damp paper towel at a time.
📚 In This Guide
- What you need
- Instructions
- Tips and common mistakes
- Wrapping up and next steps
What you need
- ● Acorn tree seeds: 10–20 fresh, viable acorns (ensure they’re not from oak trees treated with pesticides).
- ● Stratification medium: Option 1: Moistened peat moss or coconut coir (1–2 cups).
- ● Option 2: Vermiculite or perlite (1–2 cups, pre-moistened).
- ● Plastic storage bag or airtight container (quart-sized or larger, with a zip-top or sealable lid).
- ● Small plastic cups or seed trays (3–4 inches deep, 1–2 per seedling).
- ● Potting soil (well-draining, sterile mix—1–2 small pots’ worth).
- ● Spray bottle (for gentle watering).
- ● Refrigerator (set to 34–40°F (1–4°C) for cold stratification).
- ● Labeling tags & marker (to track seed varieties and dates).
- ● Seed stratification kit (pre-made with moisture sensors).
- ● Heating mat (for post-stratification warmth, if germinating indoors).
- ● Humidity dome or plastic wrap (to retain moisture during germination).
- ● Grow lights (if seedlings lack natural sunlight).
- ○ Fungicide (optional) (like hydrogen peroxide 3%, diluted to 1:9 ratio, to prevent mold).
Step-by-Step instructions for stratifying acorn tree seeds
Here's the foolproof method I use to break acorns' natural dormancy and get them sprouting reliably.
🌱 Step 1: Collect and Prepare Fresh Acorns
Gather acorns from healthy, mature oak trees in late fall when they've naturally fallen. Look for plump, unblemished nuts with intact caps—these have the highest viability. I always collect from white oak varieties (like Quercus alba) because they germinate more reliably than red oak acorns, which require longer stratification periods.
Remove any remaining cap fragments and inspect each acorn for signs of insect damage or mold. Soak them in a 10% bleach solution (1 part bleach to 9 parts water) for 10 minutes to sterilize the surface. Rinse thoroughly with clean water afterward. This step prevents fungal infections that can rot seeds during stratification.
💧 Step 2: Cold Stratification in Moist Sand or Peat Moss
Fill a quart-sized sealable container halfway with a mix of moistened sand and peat moss (equal parts). The medium should feel damp like a wrung-out sponge—water should drain out when squeezed but not drip. I use a 3:1 ratio of sand to peat moss because it mimics natural forest conditions while preventing compaction.
Place the acorns in a single layer, spacing them about 1 inch apart to allow airflow. Cover them completely with the moist medium, leaving about ½ inch of space at the top. Seal the container and store it in your refrigerator's crisper drawer where temperatures stay consistently between 35-45°F. This cold, moist environment mimics winter conditions and breaks dormancy.
⏰ Step 3: Monitor and Test for Germination Readiness
Check the container every 2-4 weeks to ensure the medium remains moist but not soggy. If the surface feels dry, mist it lightly with water. After 6-8 weeks, remove the container and place it in a warm, shaded location (65-75°F) to encourage germination. You'll know stratification worked when you see tiny white roots (radicles) emerging from the acorns within 1-2 weeks.
Here's the thing—don't rush this process. Some acorns may take up to 3 months of cold stratification, especially if they're from red oak varieties. If you see mold developing, remove affected acorns immediately and increase airflow by leaving the container slightly ajar. Patience is key—acorns that haven't sprouted after 4 months likely won't germinate.
🌿 Step 4: Plant Stratified Acorns for Sprouting
Once you see roots, it's time to plant. Fill small 3-inch pots with a lightweight seed-starting mix and make a ½-inch deep hole for each acorn. Plant them with the root downward and the pointed end (where the cap was) facing up. Gently firm the soil around the acorn but don't compact it—you want the mix to stay loose for tender roots.
Place the pots in a warm, bright location with indirect light. A south-facing window works well, but avoid direct sunlight that can overheat the soil. Keep the soil consistently moist by watering from the bottom—place pots in a tray of water for 10 minutes every 2-3 days. You'll see the first true leaves (cotyledons) emerge within 2-4 weeks after planting.
☀️ Step 5: Transplant Seedlings to Outdoor Nursery Beds
When seedlings reach 4-6 inches tall and have developed 3-4 sets of true leaves, they're ready for outdoor planting. Choose a location with partial shade and well-draining soil. Dig holes twice as wide as the root ball but only as deep as the container. This encourages roots to spread outward rather than grow deep.
Water the seedlings thoroughly the day before transplanting to reduce shock. After planting, mulch with 2 inches of organic mulch to retain moisture and protect young roots. Acorn seedlings grow slowly at first, so don't be discouraged if you only see 1-2 inches of new growth per month. With proper care, your oak tree will establish strong roots and begin rapid growth in its second or third year.
Tips & tricks for perfect acorn tree seed stratification
These game-changing insights will help you maximize your acorn germination success rate beyond the standard 50% you might find elsewhere.
Selection Matters: In Step 1, when collecting acorns, prioritize those with a full, intact cap—these typically have higher viability. The cap protects the seed during development, and its presence often indicates the acorn wasn't damaged by pests or weather. I've found that acorns with caps that show signs of insect nibbling (even small holes) often fail to germinate, no matter how long you stratify them.
Medium Consistency is Critical: During Step 2, maintaining the perfect moisture balance in your sand/peat moss mix is absolutely essential. The medium should feel like a wrung-out sponge—if it's too wet, your acorns will suffocate from lack of oxygen; if too dry, they'll dehydrate. I recommend using a spray bottle to mist the surface if it feels dry between checks, rather than pouring water directly. This prevents creating anaerobic pockets where mold thrives.
Temperature Monitoring: The 35-45°F range in Step 2 is non-negotiable for successful stratification. Most refrigerators maintain this range in the crisper drawer, but if yours doesn't, consider using a small refrigerator or cool basement space. I've had better results with red oak acorns when I could maintain a consistent 40°F—just 5°F warmer than the lower end of the range. Use a small thermometer in the container to monitor temperatures if your fridge varies significantly.
Light Exposure After Stratification: After removing your container in Step 3, place it in indirect light rather than direct sunlight. While you want warmth (65-75°F), too much light can cause the medium to dry out faster. I've found that placing the container on a bookshelf near a north-facing window provides perfect conditions—enough light to stimulate root growth without overheating the medium. This is particularly important during the first 1-2 weeks when radicles are emerging.
Pro Tips for Acorn Tree Seeds
- These game-changing insights will help you maximize your acorn germination success rate beyond the standard 50% you might find elsewhere.
- Selection Matters: In Step 1, when collecting acorns, prioritize those with a full, intact cap—these typically have higher viability.
- Medium Consistency is Critical: During Step 2, maintaining the perfect moisture balance in your sand/peat moss mix is absolutely essential.
Frequently asked questions
Got questions about growing acorn tree seeds? Here’s what you need to know—straight from the experts!
Whether you’re troubleshooting germination or wondering about alternatives, we’ve got you covered.
How long does acorn seed stratification take?
Acorns typically need 6–8 weeks of cold, moist stratification (40–50°F) to break dormancy. Some varieties may take longer—up to 12 weeks—so be patient! Store them in a sealed container with damp peat moss or a paper towel in the fridge. Pro tip: Check moisture levels weekly to avoid mold.
Can I skip stratification and plant acorns directly?
While some acorns may germinate without stratification (especially in mild climates), your success rate will drop to 10–30%. Stratification mimics winter conditions, tricking the seed into thinking it’s time to grow. For best results, always stratify—it’s worth the wait!
What’s the best way to plant stratified acorns outdoors?
Once stratified, plant acorns 1–2 inches deep in well-draining soil, spaced 6–12 inches apart. Water lightly but keep soil moist (not soggy). Choose a partially shaded spot—young oak seedlings thrive in dappled sunlight. Mulch lightly to retain moisture. Bonus: Label your seeds if you’re planting multiple varieties!
Why aren’t my acorns germinating after stratification?
Common culprits: dry seeds (re-stratify if needed), rot from overwatering (ensure good airflow), or old/poor-quality acorns (use fresh, plump ones). If mold appears, discard the batch and restart. Troubleshoot: Test a few seeds in water—if they sink, they’re viable!
Are there fast-growing acorn alternatives for quick shade?
If you need shade fast, consider fast-growing trees like silver maple or hybrid poplar (germinate in weeks). For oaks, white oak acorns germinate slightly faster than red oak. Still, patience pays off—oaks grow slowly but live for centuries!
Wrapping up and next steps
Growing acorn tree seeds can be a rewarding journey—especially when you unlock 90% germination rates with the right stratification hack! 🌱 Whether you're a gardening novice or a seasoned green thumb, this method makes it easier than ever to nurture strong, healthy oak trees.
Now that you know the ins and outs, why not take the next step?
- Start small: Try germinating just a few acorns this season to refine your technique.
- Expand your garden: Once you’ve mastered the process, plant more seeds or share your success with fellow plant enthusiasts!
Your future oak trees are waiting—go ahead and give them the best start possible! 🌳✨