
Pruning
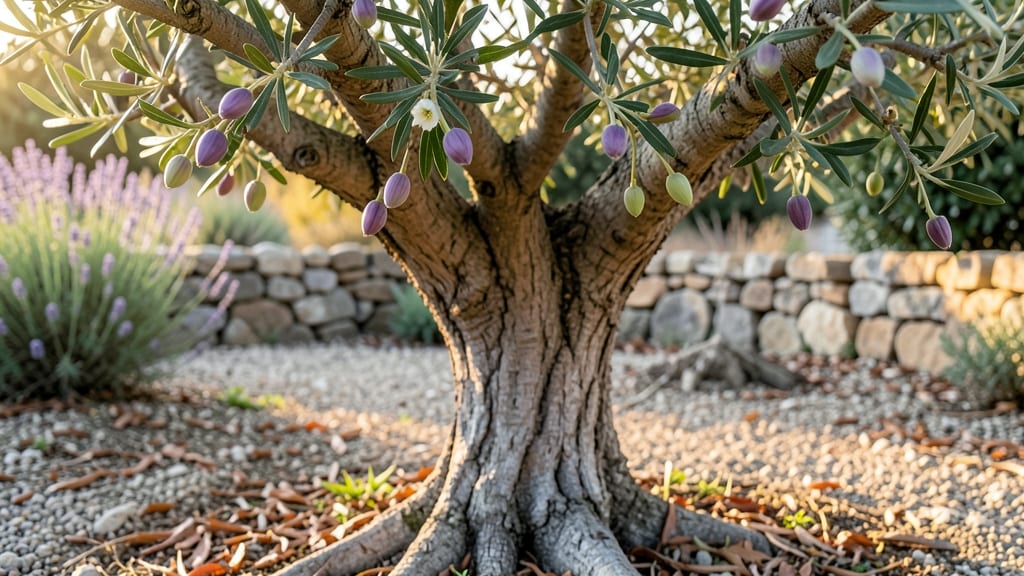
Olive tree buds are where it all begins—those tiny green specks that promise next year’s harvest if you prune them right. 🌱 I’ve spent years watching my Mediterranean olive tree transform from a tangled mess into a structured, productive beauty, all by understanding when and how to shape those buds.
The key isn’t just cutting branches; it’s reading the tree’s signals and timing your cuts to encourage the strongest growth.
Bud formation starts in late spring after the previous year’s harvest, but the magic happens in winter when dormant buds prepare for new life. A sharp pair of pruners and a clear day are all you need to begin—no fancy tools required.
The goal? Open the canopy to sunlight and air, which prevents disease and encourages more buds to form. I’ve seen trees go from sparse budding to bursting with potential just by making a few strategic cuts in the right season.
When done correctly, your olive tree will reward you with thicker foliage and more abundant fruit the following year. The buds themselves will swell into vibrant green shoots by early spring, signaling success.
Even container-grown olives respond well to this method, as long as you’re mindful of root space and pruning limits. The payoff? A tree that looks healthier and produces more than ever before.
Seasonal timing is everything—prune too early or too late, and you risk stunting growth or inviting pests. Frost can also damage tender new buds, so keep an eye on the forecast.
Whether you’re trimming a backyard tree or a potted olive, the principles stay the same: precision, patience, and a little bit of trust in the tree’s natural rhythm. Let’s get those buds thriving!
📚 In This Guide
- What you need
- Instructions
- Tips and common mistakes
- Wrapping up and next steps
What you need
- ● Pruning shears: Bypass pruners (sharp, 6-8 inch blades) for clean cuts on smaller branches. Quantity: 1 pair.
- ● Loppers: For medium-sized branches (1-2 inches thick). Quantity: 1 pair.
- ○ Pruning saw: For thick branches (2+ inches). Quantity: 1 (optional if branches are small).
- ● Disinfectant: 70% isopropyl alcohol or rubbing alcohol to sterilize tools between cuts. Quantity: Small bottle.
- ● Garden gloves: Heavy-duty, cut-resistant gloves for safety. Quantity: 1 pair.
- ○ Pruning sealant: Optional for larger cuts to prevent disease (e.g., tree wound paint). Quantity: Small tube.
- ● Extension pole: For high branches (10-12 feet). Quantity: 1 (if needed).
- ● Ladder: Sturdy, non-slip ladder for hard-to-reach areas. Quantity: 1 (if tree is tall).
- ● Marking spray: Temporary spray to mark branches for removal (e.g., white paint). Quantity: Small can.
- ● Trash bags: For collecting pruned branches. Quantity: 2-3 large bags.
- ● Notebook & pen: To jot down notes on cuts or tree health observations.
- ● Check local regulations: Some areas require permits for large-scale pruning.
- ● Know your olive tree’s age and health—young trees need gentler trimming!
- ● Choose a dry, sunny day to avoid spreading disease.
Step-by-step guide to pruning olive tree buds for spring growth
Spring is the perfect time to coax new life from your olive tree—here’s how to trim buds with confidence.
☀️ Step 1: Time Your Pruning for Optimal Growth
Prune olive tree buds in early spring, just as the buds begin to swell but before any leaves emerge. This timing ensures you’re shaping the tree for the growing season ahead while avoiding late frosts that could damage fresh cuts. In most climates, this falls between late February and early April, but wait until nighttime temperatures stay consistently above 40°F.
Here’s the thing—olive trees are resilient, but pruning too early can stimulate weak growth that won’t harden off before summer heat. Watch for buds to plump slightly and develop a slight green tint under the bark. That’s your cue they’re ready for a trim. If you’re unsure, snap off a small branch: if the bud inside is firm and slightly sticky, it’s time to prune.
✂️ Step 2: Gather the Right Tools and Prepare for Clean Cuts
Use sharp, sterilized pruning shears (or a pruning saw for thicker branches) to make clean cuts at a 45-degree angle, about ¼ inch above a bud or branch collar. Dull tools crush branches, inviting disease. Wipe your shears with rubbing alcohol between cuts to prevent spreading bacteria. I also keep a small bucket of water nearby to dip tools in occasionally—this helps keep them cool and clean.
Before you start, remove any dead, diseased, or crossing branches first. These compete with new buds for energy and can harbor pests. You’ll know a branch is dead if it’s brittle, lacks buds, and snaps easily when bent. Cut these back to healthy wood—look for green undertones or a slight bend when pressure is applied.
🌿 Step 3: Prune for Shape and Airflow
Olive trees thrive with an open, airy structure, so focus on removing overcrowded branches and those growing inward. Aim to create a balanced canopy that allows sunlight to reach the center of the tree. Start by thinning out one-third of the oldest wood to encourage new growth. For mature trees, prioritize branches thicker than ½ inch—these are the ones that will produce the most fruit and robust buds next season.
When trimming, cut back to an outward-facing bud to encourage growth away from the center. This simple trick prevents a dense, shaded interior where buds struggle to develop. Step back every few cuts to check your progress—you’re looking for a tree that looks like it’s breathing, with space between branches. Avoid "lion’s tailing," where you shear branches flat; olive trees respond best to selective pruning.
💧 Step 4: Post-Pruning Care for Strong Recovery
After trimming, water deeply to help the tree recover, especially if spring has been dry. Olive trees are drought-tolerant, but fresh cuts need moisture to heal properly. Focus water at the base of the tree, avoiding the foliage to prevent fungal issues. A 2-3 inch layer of mulch (like wood chips) around the trunk retains moisture and regulates soil temperature—just keep it 6 inches away from the trunk to avoid rot.
Monitor the tree for new growth in 4-6 weeks. Healthy buds will swell into small green shoots, while weak or stressed branches may produce sparse foliage. If you see yellowing leaves or wilting, it could signal over-pruning or stress. In that case, reduce watering slightly and wait for the tree to adjust. Olive trees are forgiving, but they do best when given time to recover after a major trim.
Tips & tricks for precision olive tree bud trimming
These insider tricks will help you transform your olive tree's spring awakening from guesswork into a confident, fruitful process.
Timing is Everything: The late February to early April window is critical because olive buds need warm nights above 40°F to avoid frost damage while still being dormant enough to handle pruning. I've learned the hard way—pruning too early can stimulate tender growth that won't survive summer heat. Check for that slight green tint under the bark as your definitive cue, not just calendar dates. This visual signal tells you the tree's internal clock is ready for trimming.
Tool Prep Matters More Than You Think: Sterilizing your pruning shears between cuts isn't just about cleanliness—it's about preventing bacterial infections that can spread through fresh cuts. I keep a small spray bottle of rubbing alcohol handy and wipe tools after every 3-4 cuts, especially when working with multiple branches. For thicker branches, switch to a pruning saw—shears will crush the wood and create jagged edges that heal poorly. The 45-degree angle cut isn't just aesthetic; it helps water run off and prevents moisture buildup that leads to rot.
Shape with Purpose: When you're thinning out one-third of the oldest wood, think of your tree like a sculpture—every cut should serve a purpose. Focus on creating "windows" in the canopy where sunlight can reach the center. I always step back every 5-6 cuts to visualize the tree's new shape. The goal is to create a structure that looks like it's breathing, with space between branches. This open structure prevents fungal diseases that thrive in dense, shaded interiors and encourages stronger fruit production on the remaining branches.
Post-Trim Recovery Strategy: That 2-3 inch mulch layer isn't just decoration—it's insulation. Wood chips regulate soil temperature and retain moisture right where the roots need it most. I've seen trees recover beautifully after pruning when given this simple care, but neglect this step and you'll notice slower regrowth. Water deeply at the base (not the foliage!) to encourage root development rather than leaf growth. The 4-6 week monitoring period is crucial—this is when you'll see whether your pruning was successful or if the tree needs adjustment.
Pro Tips for Olive Tree Buds
- These insider tricks will help you transform your olive tree's spring awakening from guesswork into a confident, fruitful process.
- Timing is Everything: The late February to early April window is critical because olive buds need warm nights above 40°F to avoid frost damage while still being dormant enough to handle pruning.
- Tool Prep Matters More Than You Think: Sterilizing your pruning shears between cuts isn't just about cleanliness—it's about preventing bacterial infections that can spread through fresh cuts.
Frequently asked questions
Got questions about olive tree buds and pruning? You’re not alone! Here are some common inquiries to help you navigate the springtime trimming process with confidence.
When is the best time to trim olive tree buds for optimal growth?
The ideal time to prune olive trees is late winter to early spring (just before buds swell but before new leaves emerge). This timing ensures you encourage healthy bud development while avoiding frost damage. Avoid pruning in fall—it can stress the tree and leave it vulnerable to disease.
How do I know if I’m cutting olive tree buds correctly?
Look for healthy, plump buds that are firm to the touch. Cut just above a bud (about ¼ inch) at a 45-degree angle to promote better water runoff. Avoid cutting into old wood or leaving stubs—this can invite pests or disease. Pro tip: Use sharp, clean pruners to make precise cuts!
What if my olive tree buds aren’t opening after pruning?
If buds aren’t opening, check for environmental stressors like cold snaps, drought, or over-pruning. Ensure the tree gets 6+ hours of sunlight daily and consistent water (but not soggy soil). If buds are shriveled or black, it may signal fungal issues—treat with copper fungicide if needed.
Can I use olive tree buds for anything other than pruning?
Olive tree buds are edible and packed with antioxidants. Harvest young, tender buds in spring, blanch them, and use them in salads, teas, or as a garnish. Just ensure they’re pesticide-free if foraging from wild trees. Fun fact: They’re a staple in Mediterranean cuisine!
What mistakes should I avoid when trimming olive tree buds?
- Over-pruning: Never remove more than 25% of the canopy in one season—this weakens the tree.
- Ignoring dead wood: Always remove diseased or dead branches first to prevent spread.
- Pruning during wet weather: Moisture can introduce bacteria; wait for dry, sunny days.
Need a visual guide? Check out our step-by-step pruning diagram for clarity!
Wrapping up and next steps
Mastering the art of trimming olive tree buds isn’t just about aesthetics—it’s about nurturing healthier growth and bountiful harvests for seasons to come. 🌿 Whether you’re a seasoned gardener or just starting, precision pruning ensures your olive tree thrives with vigor.
Now that you’re equipped with the right tools, techniques, and answers to common questions, it’s time to roll up your sleeves and give your tree the care it deserves!
Ready to take the next step? Start small—trim a single branch today and observe how your olive tree responds. Keep refining your approach, and soon, you’ll be the proud caretaker of a flourishing, well-shaped olive tree! 🌱