
Trees
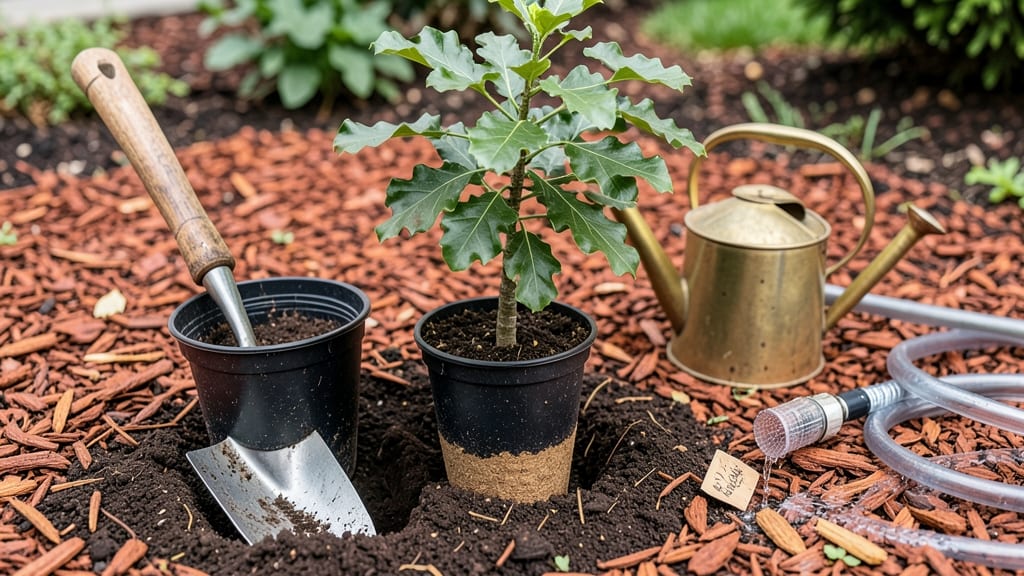
Growing oak tree starts from seed is a long game that begins with patience and ends with a future shade giant. 🌳 I’ve watched acorns turn into sturdy saplings over three seasons, and the key to success lies in mimicking the natural conditions these trees crave—moisture, shade, and time.
The first 90 days are critical: keep your starts in a humid, shaded spot with consistent moisture, and avoid transplant shock by hardening off seedlings before moving them outdoors. Most gardeners fail here by rushing the process—oak seedlings need gentle care, not aggressive growth tactics.
By month three, you’ll see strong root systems and 3-6 inch stems ready for permanent planting. The real magic happens when you let them grow wild, with minimal interference, so they develop natural resilience against pests and drought.
This method works for red, white, or pin oak varieties, though white oaks germinate faster. The payoff? A tree that could live for centuries, starting with just one acorn.
📚 In This Guide
- What you need
- Instructions
- Tips and common mistakes
- Wrapping up and next steps
What you need
- ● Acorns (or oak tree starts): 10–20 fresh, uncracked acorns (from white oak Quercus alba or red oak Quercus rubra for best results)
- ○ Optional: Pre-sprouted acorns (soak in water for 24–48 hours to check viability)
- ● Growing containers: 3–5 small pots (4–6 inches deep) with drainage holes (required for seeds)
- ● 1–2 gallon-sized containers (for saplings, 8+ inches deep)
- ● Potting mix: 1 bag of well-draining seed-starting mix (sterilized, peat-free preferred)
- ○ Optional: Perlite or vermiculite (10–20% mix) for aeration
- ● Tools: Small hand trowel or spoon (for planting)
- ● Spray bottle (for gentle watering)
- ● Labels & markers (to track varieties)
- ○ Optional: Heat mat (70–80°F for faster germination)
- ● Location: Bright, indirect sunlight (east or north-facing window, or grow lights 12–14 hrs/day)
- ● Outdoor option: Partial shade in spring/fall (avoid frost)
- ● Temperature: Ideal germination range: 60–70°F (15–21°C)
- ● Saplings tolerate 40–80°F (4–27°C) once established
- ● Humidity: Keep soil consistently moist (not soggy!)
- ● Pro tip: Cover pots with plastic wrap until sprouts appear (💡 remove once leaves emerge)
- ● Grow light setup (LED full-spectrum bulbs for 10–12 hrs/day)
- ● Fertilizer: Balanced 5-5-5 or organic compost (diluted to half-strength)
- ● Mulch (shredded bark or straw for outdoor saplings)
- ● Tree collar protector (for young saplings in windy areas)
Step-by-step instructions for growing oak tree starts
Here's how to transform acorns into sturdy saplings ready for transplanting in just three months.
🌱 Step 1: Select and Prepare Acorns for Planting
Gather mature acorns from healthy oak trees—look for plump, intact nuts with no cracks or insect holes. I prefer white oak acorns (Quercus alba) for their faster germination, but red oak (Quercus rubra) works too. Place them in a container of water and let them soak for 24 hours to soften the shell and speed up germination.
After soaking, place the acorns between damp paper towels in a sealed plastic bag. Store them in a warm spot (70-75°F) and check daily. Within 4-8 weeks, you'll see the first signs of root growth—tiny white tendrils emerging from the bottom. This is your cue that the acorn is ready to plant.
🪴 Step 2: Plant Acorns in a Controlled Environment
Fill small pots (3-4 inches deep) with a mix of 50% potting soil and 50% perlite for drainage. Plant the acorns 1 inch deep, placing them horizontally with the pointed end facing downward. This mimics natural forest conditions and encourages roots to grow downward while the shoot emerges upward.
Keep the soil consistently moist but never soggy—oak seedlings are sensitive to waterlogged roots. Place the pots in a shaded area (indirect light only) until the first true leaves appear, which typically takes 6-12 weeks. Avoid direct sunlight at this stage, as young seedlings can scorch easily.
☀️ Step 3: Transition to Outdoor Conditions
Once the seedlings develop 2-3 sets of true leaves (not the initial seedling leaves), they're ready for gradual outdoor exposure. Start by placing them in a sheltered spot (partial shade) for 2-3 hours daily, then slowly increase their time outside over 2 weeks. This process, called hardening off, helps them adapt to wind, sun, and temperature fluctuations.
After hardening, move the seedlings to a sunny location with at least 6 hours of direct sunlight. Oak trees thrive in full sun, but young saplings need time to adjust. Water deeply once a week, ensuring the soil stays moist but well-drained. Yellowing leaves signal overwatering, while crispy edges mean the soil is too dry.
✂️ Step 4: Prune and Support for Strong Growth
As the saplings grow, focus on shaping their structure. Remove any weak or crossing branches to encourage a strong, open canopy. I prune just above a leaf node (the bump where leaves attach) to promote new growth. Avoid heavy pruning—oaks respond poorly to aggressive cuts and may develop weak regrowth.
By the 3-month mark, your saplings should be 12-18 inches tall with a sturdy stem. If they're leggy or top-heavy, stake them lightly to prevent bending. Use a soft tie (like a strip of old fabric) to secure the stem without restricting growth. This support helps them withstand future wind and storms.
🌿 Step 5: Prepare for Transplanting
Before transplanting, water the saplings deeply 24 hours ahead to reduce shock. Dig a hole twice as wide as the root ball but only as deep as the container. Gently remove the sapling, keeping the root system intact, and place it in the hole. Backfill with native soil, tamping lightly to remove air pockets.
Mulch around the base with 2-3 inches of organic mulch (like wood chips) to retain moisture and regulate soil temperature. Keep the mulch 6 inches away from the trunk to prevent rot. Water thoroughly after planting and monitor for 2 weeks to ensure the sapling establishes well. If leaves yellow or wilt, it may need more frequent watering or better drainage.
Tips & tricks for perfect oak tree starts
Turning acorns into thriving saplings takes patience—and these pro tips will help you avoid common pitfalls while maximizing success.
Germination Timing: The 24-hour soak is non-negotiable—it softens the acorn shell and kickstarts root development. Place your acorns in a container with enough water to cover them completely, then let them soak at room temperature. After 24 hours, drain and place them between damp paper towels in a sealed bag. Check daily for moisture—condensation inside the bag is normal, but if the towels dry out, spritz them lightly with water. This controlled environment mimics forest floor conditions where acorns naturally germinate.
Soil Mix Secrets: The 50/50 blend of potting soil and perlite isn't just about drainage—it's about creating the right air-to-moisture ratio oak seedlings crave. Perlite prevents compaction while allowing roots to breathe. When planting your 1-inch-deep acorns horizontally, the pointed end should face downward to encourage natural root growth. Pro tip: Sterilize your potting soil by baking it in the oven at 200°F for 30 minutes before use to kill any fungal spores that could harm your delicate seedlings.
Light Transition Strategy: The shift from indirect light to full sun is where most beginners struggle. Start your hardening process by placing seedlings in partial shade for just 2-3 hours daily—this gradual exposure prevents sunburn while building resilience. I've seen seedlings go from healthy green to crispy brown overnight when moved too quickly. After your 2-week hardening period, transition to full sun by moving them to a location with morning sun and afternoon shade for the first week, then gradually increase their sun exposure.
Pruning Precision: When shaping your saplings in Step 4, focus on creating an open canopy by removing only the most problematic branches. Oak trees develop weak regrowth when pruned too aggressively, so limit cuts to what's necessary. Use clean, sharp pruners and make cuts just above a leaf node—the bump where leaves attach—to encourage new growth. The goal is to maintain a strong central leader (main vertical stem) while allowing sunlight to reach all branches. This technique prevents future structural issues and promotes vigorous growth.
Pro Tips for Oak Tree Starts
- Turning acorns into thriving saplings takes patience—and these pro tips will help you avoid common pitfalls while maximizing success.
- Germination Timing: The 24-hour soak is non-negotiable—it softens the acorn shell and kickstarts root development.
- Soil Mix Secrets: The 50/50 blend of potting soil and perlite isn't just about drainage—it's about creating the right air-to-moisture ratio oak seedlings crave.
Frequently asked questions
Got questions about growing oak tree starts from seed? You're not alone! Here are some of the most common queries—and their straightforward answers—to help you get started with confidence.
How long does it take for an oak seed to sprout?
Oak seeds can take anywhere from 2 weeks to 6 months to sprout, depending on the species and conditions. White oaks often germinate faster (4-8 weeks), while red oaks may take longer. Patience is key! Cold stratification (mimicking winter) can speed up the process—try chilling moist seeds in the fridge for 30-60 days before planting.
Do I need to cold-stratify oak seeds before planting?
Yes! Most oak seeds require cold stratification to break dormancy. Place seeds in a damp paper towel or sand, then refrigerate for 60-90 days. This mimics natural winter conditions and boosts germination rates. Skip this step, and you might wait years—or never see sprouts at all!
Can I grow an oak tree from a seed I find in my yard?
Collect acorns from mature oak trees (preferably fresh ones) and follow the cold-stratification process. Just ensure the acorn is plump and pest-free. Avoid seeds from ornamental oaks—they may not produce true-to-type trees. Pro tip: Label your seeds! Track the species for better long-term planning.
What’s the best soil mix for oak tree starts?
Oak seedlings thrive in well-draining, slightly acidic soil (pH 5.0-6.5). Mix equal parts peat moss, perlite, and compost for ideal conditions. Avoid heavy clay or soggy soil—oak roots hate waterlogging. A 50/50 blend of store-bought potting soil and sand works too!
Why isn’t my oak seed germinating after months?
If your seeds refuse to sprout, check these common issues:
- Improper stratification: Ensure seeds were moist but not waterlogged during cold treatment.
- Old seeds: Acorns lose viability quickly—plant fresh ones (current year’s crop).
- Poor soil conditions: Test drainage and pH; oak seeds need air and warmth to break dormancy.
- Pests or rot: Discard mushy or moldy seeds.
Wrapping up and next steps
Starting an oak tree from seed is a rewarding journey that blends patience with nature’s magic! 🌱 While it takes three months to see those first sprouts, every small step—from selecting acorns to nurturing your sapling—builds a stronger connection to the earth.
Remember, consistency is key, and even tiny progress matters.
Ready to take the next step? Plant your acorns this weekend and watch your green thumb grow alongside your future oak! Need inspiration? Share your progress with fellow gardeners or tag us—we’d love to cheer you on. 🌳✨