
Pruning
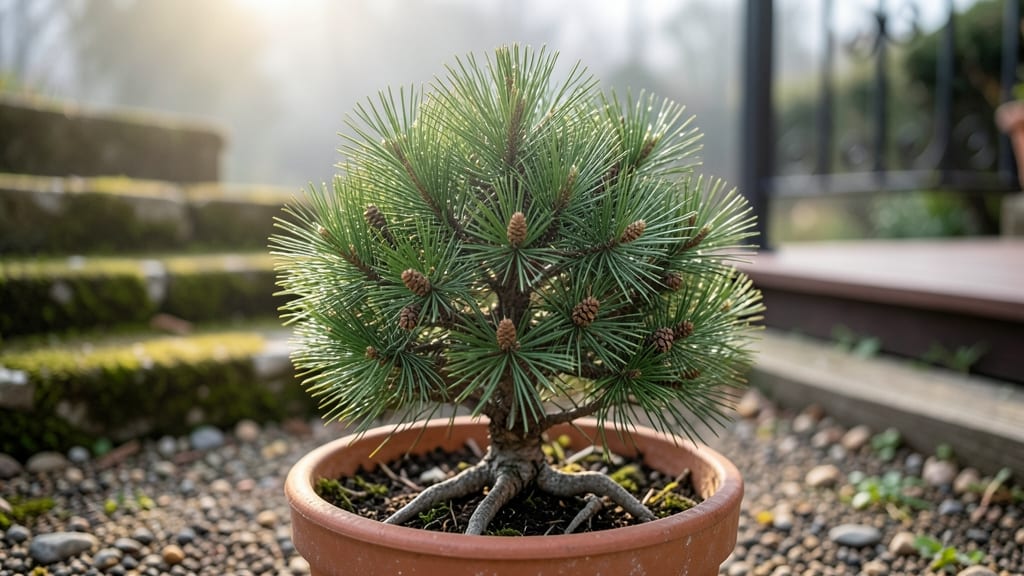
Real mini pine trees bring holiday cheer without the seasonal stress. 🌲 I’ve grown Pinus mugo and Pinus sylvestris 'Beuvron' for years—they stay compact (3-5 feet tall), thrive year-round, and smell like Christmas every day.
The key? Choosing the right species and giving them the care they actually need, not just holiday-season pampering.
These pines love full sun (6+ hours daily) and well-draining soil—rocky or sandy works best. If your yard has heavy clay, amend it with gritty compost or crushed gravel. Water deeply but infrequently; their roots hate soggy feet, and they’re tough enough to handle drought once established.
Containers? Use a mix of potting soil, perlite, and a handful of sand for drainage.
Pruning keeps them shaped and healthy—just snip back leggy growth in early spring. They’ll reward you with dense, fragrant foliage that stays vibrant even in winter.
The best part? No needles drop like they do with fake trees, and they grow slowly, so you won’t outgrow their charm in a few years.
Perfect for small yards, patios, or even as a living centerpiece. Start with a 1-gallon sapling, and in 3-5 years, you’ll have a lush, evergreen focal point that works year-round—not just for holidays. Ready to grow yours?
📚 In This Guide
- What you need
- Instructions
- Tips and common mistakes
- Wrapping up and next steps
What you need
- ● Miniature pine tree: Choose a real dwarf or bonsai pine (e.g., Pinus mugo or Pinus thunbergii) with a trunk diameter of 1–3 inches and a height of 12–24 inches.
- ● Pruning shears: Sharp, bypass-style shears (avoid anvil shears to prevent crushing tender branches).
- ● Rooting hormone: A gel or powder (e.g., Clonex) for propagating cuttings if expanding your tree.
- ● Well-draining potting mix: A blend of 50% peat moss, 30% perlite, and 20% coarse sand (or a pre-mixed bonsai soil).
- ● Small pot or container: With drainage holes, 6–12 inches in diameter (terracotta or plastic).
- ● Watering can or spray bottle: For gentle hydration (avoid soggy soil!).
- ● Support stakes or wire: 18–22-gauge copper wire or lightweight stakes to shape branches.
- ● Miniature holiday ornaments: Tiny lights, beads, or handmade decorations (use weatherproof materials).
- ● Tree stand or pedestal: Elevates your tree for display (look for 3–6 inch heights).
- ● Slow-release fertilizer: Balanced 10-10-10 or organic options like fish emulsion (apply every 2–3 months).
- ● Humidity tray: A shallow tray with pebbles and water to combat dry indoor air.
- ● Pruning sealant: (e.g., Tree Seal) to protect cuts if propagating.
How to grow and care for miniature pine trees year-round
Bring that festive feeling to every season with these tiny, real pine trees—easy to grow and perfect for small spaces!
🌱 Step 1: Select the Right Miniature Pine Variety
Choose dwarf or slow-growing pine species like Mugo pine (Pinus mugo), Ponderosa pine (Pinus ponderosa 'Glauca Globosa'), or Scots pine (Pinus sylvestris 'Beuvronensis'). These stay compact (under 3 feet tall) and thrive in containers. I always pick a 3-5 gallon container at the nursery—it gives you an established plant ready for styling right away.
Look for healthy specimens with deep green needles and no brown patches. Avoid trees with sparse foliage—they won’t recover. If you’re starting from seed, expect 3-5 years before your pine reaches miniature size. For instant holiday charm, buy a 1-2 gallon container from a specialty nursery.
🪴 Step 2: Plant in Well-Draining Soil and Containers
Use a fast-draining potting mix (I blend 60% peat moss, 30% perlite, and 10% sand) to prevent root rot—mini pines hate soggy feet. Fill your 10-15 inch diameter container (larger for mature trees) with 2-3 inches of gravel at the bottom for drainage, then add soil up to 1 inch below the rim. This keeps water from pooling and ensures roots stay aerated.
Gently remove the tree from its nursery pot and loosen the roots if they’re circling. Place it in the center of the container, then backfill with soil, pressing lightly to eliminate air pockets. Water deeply until it drains from the bottom, then let it sit for 10 minutes before adding decorative stones or mulch.
☀️ Step 3: Position for Light and Shelter
Mini pines need full sun (6+ hours daily) for vibrant color, but they’ll tolerate morning sun and afternoon shade in hot climates. I place mine on a south-facing patio where they get bright, indirect light during summer afternoons. In winter, move them to a covered porch or under an eave to protect from freezing winds and salt spray.
If growing indoors, place near a south-facing window or under a grow light for 12-14 hours daily. You’ll notice pale, stretched needles if light is insufficient—this is your cue to move the tree closer or upgrade to artificial lighting. Rotate the container a quarter turn weekly so the tree grows evenly.
💧 Step 4: Water and Fertilize for Year-Round Health
Water when the top 1-2 inches of soil feel dry—stick your finger in to check. Mini pines are drought-tolerant once established, but container-grown trees dry out faster. I water deeply every 7-10 days in summer and every 2-3 weeks in winter. Avoid wetting the needles, which can cause fungal issues—water at the base only.
Fertilize once in early spring with a slow-release, acid-loving plant fertilizer (like 10-10-10 or 16-4-8). Follow the package instructions—over-fertilizing burns roots and causes needle drop. I also add a handful of pine needle mulch around the base to mimic their natural habitat and retain moisture.
✂️ Step 5: Prune and Style for Holiday Appeal
Shape your mini pine in late winter or early spring before new growth begins. Use clean, sharp pruning shears to trim back overgrown branches to just above a bud or needle cluster. Avoid cutting into old wood—new growth won’t regenerate. I prune to create a tapered, conical shape, keeping the bottom branches slightly longer for a fuller look.
For holiday decorating, add miniature lights, ornaments, or a tiny star in late November. Use LED string lights (they stay cool) and secure them with floral wire wrapped around branches. Remove decorations by mid-January to avoid needle damage from prolonged exposure. Brush off any debris with a soft-bristle brush to keep the tree looking fresh.
Tips & tricks for perfect miniature pine trees
These little trees bring holiday magic year-round—here's how to keep them thriving and looking their best.
Lighting is Everything: Miniature pines need that 6+ hours of sunlight daily for vibrant color, but don't panic if you can't provide full sun. I've kept mine thriving in bright indirect light during summer afternoons, especially when placed on a south-facing patio. The key is to watch for pale, stretched needles—that's your cue to move them closer to a light source or upgrade to a grow light for 12-14 hours daily if growing indoors. Rotating the container a quarter turn weekly prevents lopsided growth from leaning toward the light.
Root Health Starts at Planting: The 10-minute drainage wait after watering is crucial—it prevents soggy soil that leads to root rot. I always fill the bottom of the 10-15 inch diameter container with 2-3 inches of gravel first, then add that fast-draining mix of 60% peat moss, 30% perlite, and 10% sand. When repotting, gently loosen any circling roots to encourage outward growth. This simple step makes all the difference in keeping your mini pine healthy for years.
Winter Protection is Non-Negotiable: Freezing winds and salt spray can damage your tree's delicate needles. I move mine to a covered porch or under an eave during winter months, which creates a microclimate that shields them from harsh conditions. If you live in a particularly cold climate, consider wrapping the container with burlap or frost cloth for extra protection. The goal is to maintain that deep green color all year round.
Pruning for Holiday Appeal: Timing is everything when shaping your mini pine. I always prune in late winter or early spring before new growth begins, using clean pruning shears to trim back to just above a bud or needle cluster. This creates a tapered, conical shape that's perfect for holiday decorating. For instant holiday charm, add miniature lights or ornaments in late November, but remember to remove them by mid-January to prevent needle damage from prolonged exposure.
Pro Tips for Mini Pine Tree Real
- These little trees bring holiday magic year-round—here's how to keep them thriving and looking their best.
- Lighting is Everything: Miniature pines need that 6+ hours of sunlight daily for vibrant color, but don't panic if you can't provide full sun.
- Root Health Starts at Planting: The 10-minute drainage wait after watering is crucial—it prevents soggy soil that leads to root rot.
Frequently asked questions
Got questions about keeping your mini pine tree real looking festive and healthy? Here are some answers to the most common ones!
How do I keep a mini pine tree real looking fresh for months?
A few key tricks help! First, trim the bottom branches to create a fuller shape. Mist the needles lightly with water every 2–3 days to prevent drying. Place it in a cool spot (like a basement or garage) away from heaters or direct sunlight. For extra longevity, wrap the base in damp sphagnum moss and cover loosely with plastic for 24 hours before bringing it back indoors.
Can I reuse a mini pine tree real year after year?
With proper care, your mini pine tree can stay vibrant for years. Store it outdoors in a shaded area during off-seasons, and give it a fresh trim before each holiday. Avoid overwatering or letting it sit in extreme temperatures (below freezing or above 80°F), as this can stress the tree. A little TLC goes a long way!
What’s the best way to prune a mini pine tree real to maintain its shape?
Use sharp, clean pruning shears to trim in early spring or late fall. Focus on removing brown or sparse branches first, then shape the top and sides for balance. Avoid cutting more than one-third of the foliage at once. For a bushier look, trim just above a leaf cluster or bud. Always sterilize your tools with rubbing alcohol to prevent disease.
Are there alternatives to a mini pine tree real for holiday decor?
If you’re looking for low-maintenance options, consider artificial mini pine trees (realistic or whimsical) or dried pine cones arranged in a vase. For a natural touch, try a small potted Norfolk Island pine—it’s evergreen, drought-tolerant, and thrives indoors. Just avoid real trees like fir or spruce, as their needles drop quickly indoors.
Why are my mini pine tree’s needles turning brown or falling off?
Brown needles or shedding usually mean dryness, stress, or pests. Check for spider mites or aphids (tiny webs or sticky residue are red flags). Increase humidity with a pebble tray or misting. If the soil feels dry, soak the base for 10–15 minutes. Overwatering can also cause root rot—ensure the pot has drainage holes and the soil isn’t soggy.
Wrapping up and next steps
Bringing a mini pine tree real into your space is more than just a festive touch—it’s a year-round celebration of nature’s beauty in a compact, manageable form.
Whether you’re a pruning pro or a beginner, these tiny trees offer endless creativity and joy, proving that holiday cheer doesn’t need to take over your home. 🌲✨
Ready to dive in? Start small—grab your tools, pick a pot, and let your green thumb shine! Your next project (or cozy corner) is waiting.