
Pruning
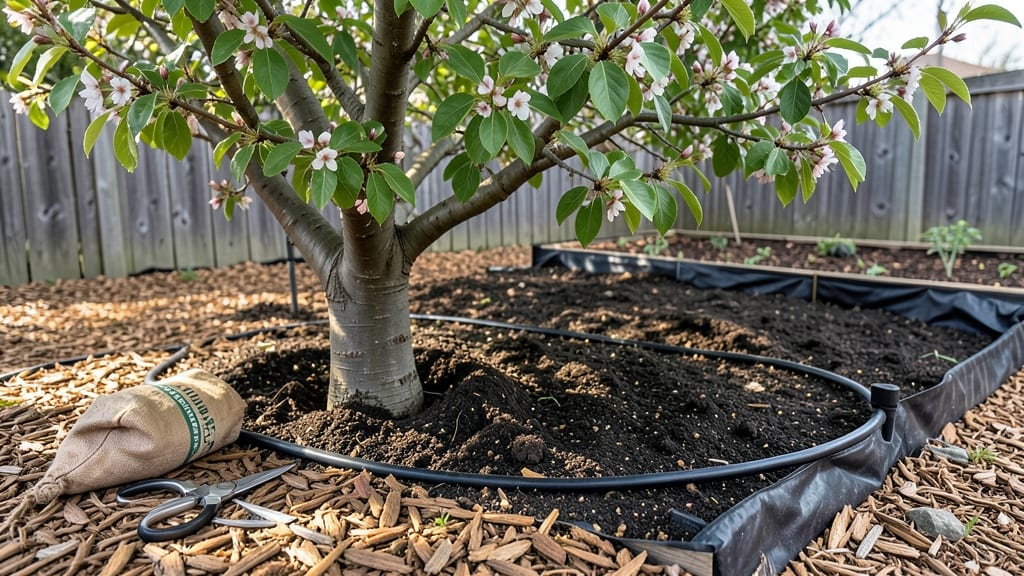
The care of a Japanese plum tree rewards you with stunning spring blooms and sweet summer fruit—but only if you prune them right. 🌸 I’ve learned the hard way that skipping winter pruning means fewer flowers and smaller harvests, while proper cuts keep the tree healthy for decades.
The secret isn’t just cutting branches; it’s understanding when and why to shape the tree at every season.
Start with the basics: sharp pruners, a ladder (for taller trees), and a disinfectant to prevent disease spread. Japanese plums bloom on both old and new wood, so timing matters—prune late winter (before buds swell) and summer (after fruiting) to encourage next year’s blooms.
Over time, this creates an open canopy that lets sunlight reach every branch, boosting fruit production.
By following this schedule, you’ll see thicker blooms and bigger plums within two seasons. The tree stays compact, resists pests better, and produces fruit reliably—no more sparse harvests or weak growth. Even if you’ve struggled before, these steps make it simple.
Works for dwarf varieties in containers or standard trees in full sun. Let’s get those branches trimmed for a tree that thrives year after year.
📚 In This Guide
- What you need
- Instructions
- Tips and common mistakes
- Wrapping up and next steps
What you need
- ● Pruning shears: Sharp, bypass-style shears (4-6 inch blades) for clean cuts.
- ● Pruning saw: A curved-tooth saw for thicker branches (2-3 inch diameter).
- ● Gloves: Heavy-duty, gardening gloves (size medium/large) for protection.
- ● Disinfectant: 70% isopropyl alcohol or bleach solution (1 part bleach to 9 parts water) to sterilize tools.
- ○ Pruning sealant: Tree wound paint (optional but recommended for large cuts).
- ● Ladder: Sturdy, extension ladder (16-20 ft) for high branches (if needed).
- ● Bucket: 5-gallon water bucket for cleaning tools and disposing of clippings.
- ● Sharpie or marker: Permanent outdoor marker for labeling cuts (if training branches).
- ● Lopper: Felco-style lopper for medium branches (1-2 inch diameter).
- ● Pole pruner: Extendable bypass pruner (10-12 ft) for high branches.
- ● Safety glasses: Protective gardening goggles for debris.
- ● Tree ties: Soft cloth or rubber ties for supporting new growth.
- ● Compost bin: For repurposing pruned branches into mulch.
Step-by-Step guide to Japanese plum tree pruning
This is how I keep my Japanese plum trees flowering abundantly while producing sweet fruit—no guesswork, just precise timing and technique.
✂️ Step 1: Late Winter Dormant Pruning (February-March)
Start with your most aggressive pruning when the tree is fully dormant but before buds swell. This is the only time you'll remove one-third of the tree's total growth—focus on removing dead, crossing, or inward-growing branches first. Use sharp bypass pruners to make clean cuts just outside the branch collar, where the branch meets the trunk.
Look for water sprouts (thin, vertical shoots) and suckers (shoots from the base)—these compete with fruit production and should be cut back to the ground. I mark each cut with a small dab of pruning sealant to prevent disease entry, though Japanese plums heal quickly with proper technique.
☀️ Step 2: Post-Bloom Summer Pruning (June-July)
After flowering but before fruit sets, perform light structural pruning to improve air circulation and sunlight penetration. Remove any branches that grew excessively during spring—these are often weak, leafy shoots that won't support heavy fruit. Cut back to a strong lateral branch or bud that faces outward.
This is also when I thin out overcrowded fruit clusters to 6-8 plums per spur (the short fruiting branches). Too many plums lead to small, poor-quality fruit. Use your fingers to gently twist off excess fruit rather than cutting—it's less traumatic for the tree.
🌿 Step 3: Autumn Light Pruning (October-November)
In late autumn, focus on removing diseased or damaged wood and any branches that grew during summer but didn't produce fruit. Japanese plums are prone to silver leaf disease, so sterilize your tools between cuts with 70% isopropyl alcohol. Look for branches with yellowing leaves, blackened bark, or excessive dieback—these need immediate removal.
This is also the time to shape the tree by shortening overly long branches by one-third to encourage bushier growth. Make cuts just above an outward-facing bud to promote future fruit-bearing spurs. Avoid heavy pruning now—you want the tree to enter dormancy strong.
⏰ Step 4: Winter Maintenance (December-January)
During winter, perform minimal pruning—only remove ice-damaged branches or those broken by snow. Japanese plums are cold-hardy, but heavy ice can snap limbs. Make clean cuts at the branch collar and dispose of debris immediately to prevent fungal spores from overwintering.
This is also when I inspect the tree's structure for potential weak points. Look for co-dominant stems (two main branches growing at similar angles)—these often split under fruit weight. If you spot them now, you can make corrective cuts to encourage one dominant leader.
Tips & tricks for perfect Japanese plum tree pruning
These precision techniques will help you maintain your plum tree's health and productivity without the guesswork.
Timing is Everything: The February-March dormant pruning window is critical—buds must still be tight, but the tree must be fully dormant. I test by scraping a bud: if it's still hard, you're good to go. If buds are swelling, wait a week. This precise timing ensures the tree doesn't waste energy healing wounds during active growth.
Branch Angle Matters: When making cuts in Step 2, always look for outward-facing buds (about 45° from the branch). These will grow into strong fruiting spurs. I use a small mirror to check angles on tricky branches—it's worth the extra minute to avoid future structural problems. Remember, the goal is to open up the canopy for sunlight while maintaining the tree's natural shape.
Disease Prevention: Japanese plums are particularly vulnerable to silver leaf disease, so I sterilize tools between cuts with 70% isopropyl alcohol (as mentioned in Step 3). For large pruning sessions, I keep a spray bottle of diluted bleach solution (1 part bleach to 9 parts water) to wipe tools between trees. This simple habit prevents cross-contamination that could spread throughout your orchard.
Winter Inspection Strategy: During winter maintenance, I prioritize removing co-dominant stems first—they're the weakest points. I mark these with colored tape during summer so I can identify them easily in winter. This proactive approach prevents the dramatic splits that often occur when fruit loads become heavy in spring.
Pro Tips for Japanese Plum Tree Care
- These precision techniques will help you maintain your plum tree's health and productivity without the guesswork.
- Timing is Everything: The February-March dormant pruning window is critical—buds must still be tight, but the tree must be fully dormant.
- Branch Angle Matters: When making cuts in Step 2, always look for outward-facing buds (about 45° from the branch).
Frequently asked questions
Got questions about keeping your Japanese plum tree thriving?
Here are answers to the most common ones—from pruning to pests and beyond!
When is the best time to prune a Japanese plum tree for blooms?
The ideal time is late winter or early spring (before buds swell but after the coldest months). This encourages strong growth and abundant blooms. Avoid pruning after mid-spring—it can reduce next year’s flowers! For heavy pruning, split it into two sessions: first in late winter, then again in early summer to shape the tree.
How much can I prune a Japanese plum tree without harming it?
Remove no more than 25-30% of the tree’s canopy in a single session to avoid stress. Focus on:
- Dead, diseased, or crossing branches
- Suckers at the base
- Overcrowded growth inside the canopy
What pests or diseases should I watch for in Japanese plum trees?
Common issues include:
- Plum curculio (weevil): Small holes in fruit—handpick or use neem oil.
- Powdery mildew: White fungal coating on leaves—prune for airflow and apply fungicide.
- Silver leaf fungus: Causes leaf discoloration—remove infected branches immediately.
Can Japanese plum trees survive harsh winters?
Yes, but young trees or newly planted ones need extra protection. Wrap the trunk with burlap or tree guard to prevent sunscald. In extreme cold (<10°F), mound soil around the base for insulation. Established trees (3+ years old) usually handle winter well, but avoid heavy pruning in late fall—it reduces cold hardiness.
Why isn’t my Japanese plum tree producing fruit?
Fruit production depends on pollination, age, and care:
- Young trees (1-3 years) focus on growth—be patient!
- Plant a second variety nearby for cross-pollination (e.g., ‘Santa Rosa’ + ‘Methley’).
- Check for poor pruning (over-thinning can reduce blooms) or nutrient deficiencies (test soil for nitrogen/phosphorus).
Wrapping up and next steps
Caring for your Japanese plum tree is a rewarding journey that combines patience, skill, and a little seasonal magic. 🌸 With the right pruning techniques—whether for spring blooms or summer fruit—you’ll unlock a tree that thrives year-round.
Start small, stay consistent, and soon you’ll be harvesting sweet plums or admiring stunning blossoms like a pro!
Ready to take the next step? Grab your tools, mark your calendar for pruning seasons, and watch your tree flourish! 🌱