
Pruning
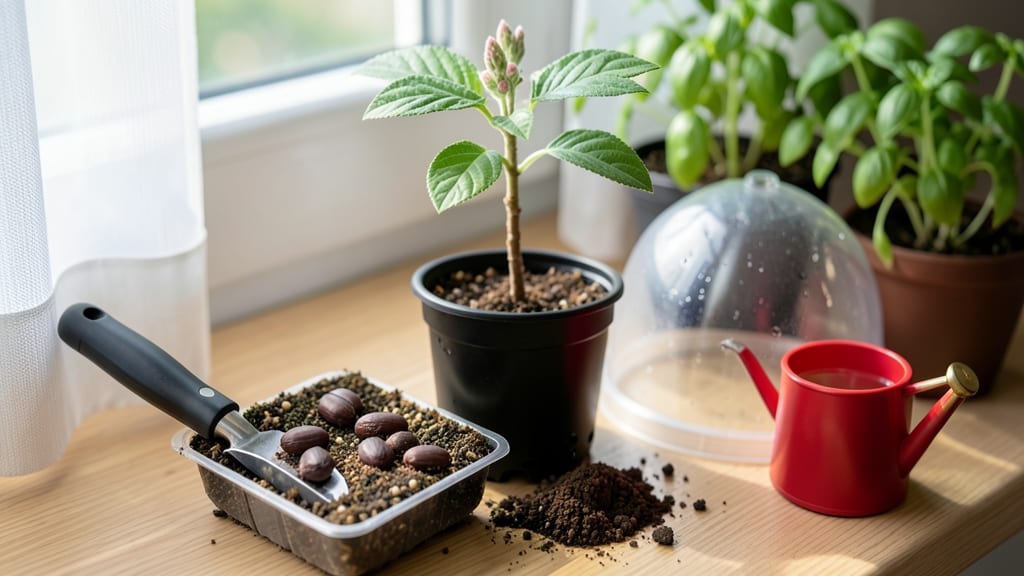
Growing Japanese cherry trees from seeds means waiting years for blooms—but the journey starts with cold-stratified sprouts in just 3 months. 🌱 I’ve struggled with stubborn seeds that refused to germinate until I cracked the cold-soak trick, and now my seedlings thrive where others give up.
The secret lies in mimicking nature’s winter dormancy, which breaks dormancy faster than any store-bought shortcut.
You’ll need fresh seeds from a trusted source (store-bought seeds often lack the genetic diversity of wild types), a mix of potting soil and perlite, and a fridge or cold frame.
The process is simple but requires patience—stratifying seeds for 4-6 weeks in damp paper towels or soil before planting ensures they’ll sprout within 8-12 weeks. Most gardeners skip this step and wonder why their seeds never wake up.
By the time those first pale green leaves unfurl, you’ll have a 3-6 inch sapling ready for transplanting. These seedlings won’t bloom for 5-10 years, but the roots will be deep and resilient, unlike grafted trees that fruit faster but often lack hardiness.
The trade-off? A tree with character, grown entirely from your own hands.
For faster blooms, consider grafting later—but if you love the challenge, this method delivers authentic, hardy trees that’ll outlive any nursery plant. The key is consistency: keep soil moist, avoid overwatering, and protect young trees from late frosts. Here’s how to make it work without the guesswork.
📚 In This Guide
- What you need
- Instructions
- Tips and common mistakes
- Wrapping up and next steps
What you need
- ● Japanese cherry tree seeds (Prunus serrulata) – 20-30 seeds (more = higher success rate!). Ensure they’re fresh (harvested within the last year) for best germination.
- ● Cold-stratification setup – Choose one of these: A sealed plastic bag with a damp paper towel (for small batches).
- ● A refrigerator with a humidity tray (for larger batches).
- ● A cold frame or outdoor cold stratification area (if your climate allows).
- ● Well-draining potting mix – 2-3 gallons (use a blend of 50% peat moss, 30% perlite, and 20% vermiculite for optimal aeration).
- ● Small seedling pots or trays – 10-15 biodegradable pots (2-3 inches deep) or a seed tray with cells.
- ● Spray bottle – For gentle watering to avoid disturbing seeds.
- ● Plastic wrap or humidity dome – To maintain moisture during germination.
- ● Grow lights or sunny windowsill – 12-16 hours of light daily (south-facing window or LED grow lights work best).
- ● Seedling heat mat – Speeds up germination (set to 70-75°F).
- ● pH meter or test kit – Ideal pH for cherry seeds: 6.0-6.5.
- ● Fertilizer (balanced, low-nitrogen) – Like 5-5-5 or 3-4-6 (use half-strength once sprouts appear).
- ● Pruning shears – For future thinning of seedlings (not needed now, but handy later!).
- ● Label markers – To track seed varieties and planting dates.
Step-by-step instructions for cold-stratifying Japanese cherry tree seeds
Here's how I turn tiny, stubborn cherry seeds into strong saplings ready for planting.
🌱 Step 1: Extract and Prepare the Seeds
Japanese cherry seeds need their outer shells softened before stratification. I start by carefully cracking open the pits (never use a hammer—it damages the seed inside) and removing the single seed from each. Place them in a small bowl and cover with lukewarm water for 24 hours. This softens the hard outer coat so moisture can penetrate during cold treatment.
After soaking, gently rub the seeds between your fingers to remove any remaining flesh. You'll see a small, smooth seed inside—this is what we'll stratify. Don't skip this step; seeds with residual fruit pulp won't germinate properly. I like to rinse them once more to remove any debris before moving to the next phase.
❄️ Step 2: Create the Cold Stratification Mix
Fill a clean plastic container with a mix of 50% moist peat moss and 50% perlite—this keeps the medium airy while retaining moisture. The mix should feel like a damp sponge, not dripping wet. I use a quart-sized container for about 4-6 seeds since they need space to grow.
Sterilize the mix by microwaving it for 2 minutes to kill any pathogens. Let it cool slightly before handling. This prevents mold from developing during the long cold period. Spread the seeds about 1 inch apart in the mix, then cover them with an additional ½ inch of the same medium.
⏰ Step 3: Stratify in the Refrigerator
Place the container in a sealed plastic bag with a few small holes for airflow—this traps humidity while preventing rot. Store it in your refrigerator's crisp drawer, where temperatures stay consistently between 35-45°F. Check the mix every 2 weeks; if it feels dry, mist lightly with water.
Stratification takes 3 months, but don't rush it. The seeds need this cold period to break dormancy. You'll know it's working when tiny white roots appear—this usually happens around 6-8 weeks. I mark the container with the date to track progress.
☀️ Step 4: Germinate Under Grow Lights
Once stratified, transfer the container to a warm, bright spot (around 65-70°F). I use a grow light on a 14-hour daily cycle to simulate spring conditions. Keep the mix consistently moist but not soggy—water from the bottom by placing the container in ½ inch of water for 10 minutes.
Germination can take 2-4 weeks after stratification. You'll see the first true leaves emerge as small, rounded cotyledons. Be patient—cherry seeds are slow starters. Once sprouts reach 2 inches tall, transplant them into individual 3-inch pots with fresh potting mix.
🌿 Step 5: Harden Off and Plant Outdoors
After 6-8 weeks of indoor growth, your seedlings will be ready for outdoor life. Start by placing them outside in a shaded, sheltered spot for 2 hours daily. Gradually increase exposure over 2 weeks, ending with full sun. This prevents shock and builds resilience.
Plant outdoors after the last frost when soil temperatures reach 60°F. Cherry seedlings need well-draining soil and full sun to thrive. Space them 15 feet apart—they'll grow into large trees! Water deeply after planting to settle the roots, and mulch with 2 inches of organic matter to retain moisture.
Tips & tricks for perfect Japanese cherry tree seed stratification
Turning cherry pits into thriving saplings requires patience—and these pro tips will help you avoid the most common pitfalls along the way.
Seed Preparation: After the 24-hour soak in lukewarm water, I recommend adding a drop of mild dish soap to the rinse water. This helps remove any remaining fruit oils that could inhibit germination. The seeds should feel slippery when you rub them between your fingers—this confirms the outer coating is properly softened.
Sterilization Shortcut: While microwaving the peat moss/perlite mix for 2 minutes kills pathogens, you can also sterilize it by spreading it on a baking sheet and baking at 200°F for 30 minutes. This works especially well if you're dealing with multiple batches. The key is ensuring the mix is completely dry before microwaving or baking to prevent steam buildup.
Temperature Monitoring: The 35-45°F range in your refrigerator's crisp drawer is ideal, but some models run cooler. If your fridge's coldest setting is below 35°F, consider using a seed stratification fridge or placing the container on the top shelf of a standard fridge where temperatures are slightly warmer. A simple fridge thermometer will help you track this precisely—these seeds are sensitive to temperature fluctuations.
Germination Timeline: When you see those first tiny white roots around 6-8 weeks, resist the urge to rush the warm-up phase. The seeds need this gradual transition from cold to warmth to prevent shock. I've seen seedlings that sprouted too quickly during warm-up develop weak stems—take your time increasing light exposure and temperature over at least 2 weeks.
Pro Tips for Japanese Cherry Tree Seeds
- Turning cherry pits into thriving saplings requires patience—and these pro tips will help you avoid the most common pitfalls along the way.
- Seed Preparation: After the 24-hour soak in lukewarm water, I recommend adding a drop of mild dish soap to the rinse water.
- Sterilization Shortcut: While microwaving the peat moss/perlite mix for 2 minutes kills pathogens, you can also sterilize it by spreading it on a baking sheet and baking at 200°F for 30 minutes.
Frequently asked questions
about growing Japanese cherry tree seeds—here’s what you need to know before starting your cold-stratified adventure!Can I grow a Japanese cherry tree from seeds I find under a tree in my neighborhood?
While you can harvest seeds from wild or cultivated cherry trees, the results may not match the parent tree’s beauty or fruit quality. Many Japanese cherries (like Prunus serrulata) are grafted hybrids, so seed-grown trees often produce smaller, less predictable blooms. For guaranteed results, buy seeds from a reputable nursery labeled for your climate zone.
How long does cold stratification really take for cherry seeds?
Typically 3–4 months in the fridge (34–40°F), but some seeds need up to 6 months for full dormancy break. Test viability by soaking seeds in warm water for 24 hours—if they sink, they’re viable! Patience is key; rushing stratification can lead to mold or failed germination.
What’s the best soil mix for planting stratified cherry seeds?
Use a light, well-draining mix like:
- 50% peat moss or coconut coir
- 30% perlite or vermiculite
- 20% sand or pumice
Why aren’t my cherry seeds germinating after stratification?
Common culprits:
- Improper stratification: Seeds need consistent cold (no thawing cycles). Use a sealed container with damp paper towels.
- Depth issues: Plant seeds only ½ inch deep—too deep = poor oxygen flow.
- Temperature shock: Let seeds acclimate to room temp for 24 hours before planting.
- Old seeds: Cherry seeds lose viability after 1–2 years. Store them in the fridge in a sealed bag with dry sand.
Are there faster alternatives to growing cherry trees from seed?
Yes! If you’re eager for blooms, consider:
- Grafting: Buy a rootstock (e.g., Prunus mahaleb) and graft a cherry scion—results in 2–3 years vs. 5+ for seeds.
- Layering: Bend a low branch to the ground, cover with soil, and wait for roots to form (takes 1–2 seasons).
- Young saplings: Nurseries sell Prunus serrulata seedlings (3–4 feet tall) ready for transplanting.
Wrapping up and next steps
Growing Japanese cherry tree seeds with cold stratification is a rewarding journey that blends patience with nature’s beauty! 🌱 By understanding the key steps—from seed selection to proper stratification and planting—you’re well on your way to nurturing a stunning tree that’ll bloom for decades.
Whether you’re a seasoned gardener or a curious beginner, your efforts will soon be rewarded with delicate pink blossoms.
Ready to take the next step? Start with a small batch of seeds—experiment with different stratification methods, and document your progress. Share your blooming success with fellow gardening enthusiasts, or even gift saplings to friends!
The magic of cherry blossoms is just three months (and a little love) away. 🌸