
Size
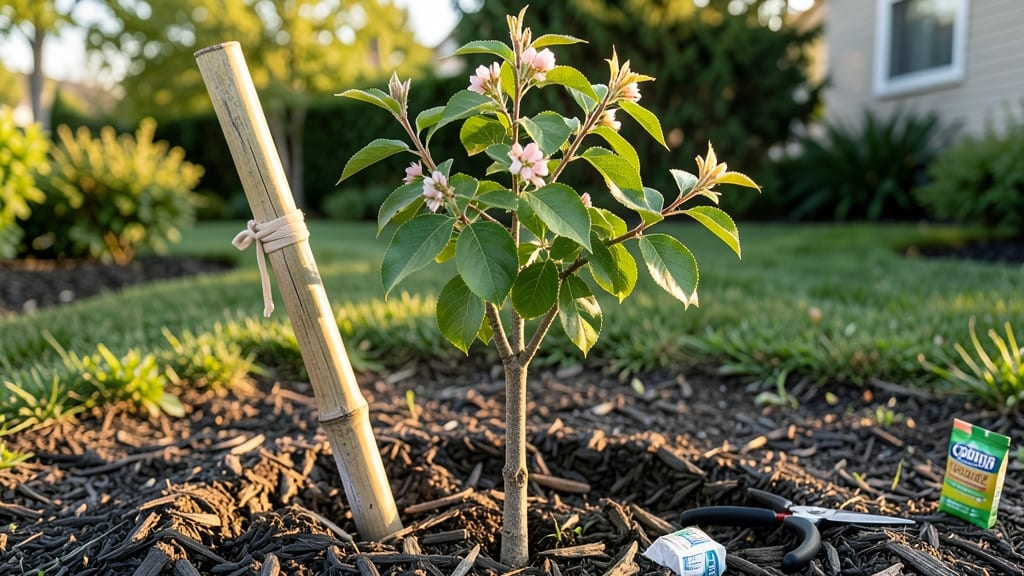
How to make a tree grow straight starts with a 45-degree angle when you plant it. 🌳 I’ve watched saplings twist into gnarled messes because of one small mistake—planting too deep or cutting the root ball wrong. The secret to straight growth isn’t just staking; it’s the angle you prune and how you support the tree in its first critical years. Most gardeners overlook the first pruning cut—the one that sets the branch angle. Cut too close to the trunk, and you’ll get weak crotches; cut too far out, and you stunt growth. I learned this the hard way with my first apple tree, which now has branches that grow at perfect angles and produce bushels of fruit. The key is pruning in late winter when the tree is dormant but about to burst with new growth. By summer’s end, you’ll see the difference: a strong central leader (that’s the main upward-growing stem) with branches spreading naturally, not flopping or crossing. The tree won’t just stand straight—it’ll grow with structural integrity, resisting wind and snow damage for decades. Even if you’ve got a wonky sapling now, it’s never too late to guide it. This works for young fruit trees, shade trees, and even bonsai—just adjust the pruning angle slightly based on the species. The worst mistake? Waiting too long to intervene. Start now, and in 5 years, you’ll have a tree that’s the envy of the neighborhood.
📚 In This Guide
- What you need
- Instructions
- Tips and common mistakes
- Wrapping up and next steps
What you need
- ● Young tree sapling (bare-root or container-grown, 1–3 feet tall, depending on species)
- ● Sturdy stakes (3–4) (1–2 inches in diameter, 4–6 feet long, untreated wood or metal)
- ● Garden twine or tree ties (biodegradable or soft plastic, ¼-inch wide)
- ● Pruning shears or loppers (sharp, clean, and sanitized to avoid disease)
- ● Gloves (gardening gloves for protection)
- ● Watering can or hose (with a gentle spray nozzle)
- ● Mulch (2–3 inches of organic mulch like wood chips or straw)
- ● Tree spiral supports (plastic or metal, for extra stability)
- ● Pruning paint or sealant (to cover large cuts and prevent infection)
- ● Soil moisture meter (to monitor hydration levels)
- ● Fertilizer (balanced or slow-release) (if planting in poor soil)
- ● Sunlight meter or app (to track light exposure for optimal growth)
Step-by-Step guide to pruning for straight tree growth
Your tree’s future shape starts with the right cuts—here’s how to guide it toward strong, upright growth.
🌱 Step 1: Identify the Leader and Main Branches
Find the central leader—the fastest-growing, straightest shoot at the top of the tree. This will be your guide for vertical growth. Look for branches growing at a 45-degree angle or less from the trunk; these are your main structural branches. Remove any branches growing straight upward (called "water sprouts") or downward—they’ll compete with your leader.
I like to use a sharp pruning saw for thicker branches (over ½ inch) and bypass pruners for smaller ones. Make your first cuts just outside the branch collar (the swollen area where the branch meets the trunk). This ensures the wound heals faster and reduces disease risk. If you’re unsure which branches to keep, hold your hand above the branch—if it points toward the leader, it’s likely a good candidate for pruning.
☀️ Step 2: Prune at the Right Angle for Natural Growth
The key to straight growth is cutting branches at a 30-45-degree angle just above an outward-facing bud. This angle encourages the branch to grow away from the trunk and fill out the canopy naturally. Use your pruners to make a clean cut, avoiding tearing the bark. If the branch is thick, step back and visualize how the cut will affect the tree’s balance—you want to maintain symmetry.
Here’s the thing—if you cut too close to the trunk or at a sharp angle, the branch may grow back crooked or die. I always check the bud below the cut: it should face outward and slightly upward to promote healthy growth. For young trees, focus on removing branches that grow toward the center of the tree; these will rub against each other and create weak spots.
✂️ Step 3: Thin Out Crowded Branches for Airflow
Remove one-third of the smallest branches to improve airflow and sunlight penetration. Start at the bottom and work your way up, thinning branches that cross or rub against each other. You’ll see the tree’s natural structure more clearly once you remove the clutter. For example, if two branches are growing parallel to each other, keep the stronger one and prune the weaker competitor.
Don’t overdo it—your goal is to shape, not strip the tree. A good rule of thumb is to leave 6-8 main branches on a young tree, spaced evenly around the trunk. If you’re pruning a mature tree, limit yourself to removing no more than 25% of the foliage in one session. This prevents stress and keeps the tree healthy while encouraging straight, upright growth.
🪴 Step 4: Monitor and Adjust Growth Seasonally
Check your tree’s progress every 4-6 weeks during the growing season. If you notice branches growing too close together or leaning toward the leader, prune them back immediately. Summer is the best time for corrective pruning because you can see how the tree is reacting to sunlight and wind. Avoid heavy pruning in late summer or fall, as new growth won’t harden off before winter.
Real talk: You might need to repeat this process for 2-3 years to get a perfectly straight tree, especially if it’s young. I’ve seen trees that needed a little extra love—like a stubborn branch that kept growing back. In that case, I’d cut it back again the next season and apply a wound dressing (like tree sealant) to protect the cut. Patience is key; your tree will thank you with a strong, upright form.
Tips & tricks for perfect tree pruning
Your tree's straight growth starts with the right technique—here's how to avoid common mistakes and get professional results.
Branch Angle is Everything: When pruning in Step 2, that 30-45-degree angle isn't just a suggestion—it's the difference between straight growth and awkward branches. I've seen too many trees where people cut too close to the trunk, which creates weak spots. Always make your cut just outside the branch collar (that swollen area) and visualize the branch growing outward from that angle. This simple technique prevents future leaning problems.
Season Matters More Than You Think: The instructions mention summer is best for pruning, and I can't stress this enough. Pruning in late fall or winter can shock your tree since new growth won't have time to harden off before cold weather. If you must prune outside summer, do it in early spring when the tree is just starting to show new buds—not when it's dormant. This timing gives your tree time to recover and grow straight through the season.
Visual Cue for Branch Selection: That hand trick in Step 1—holding your hand above the branch—works better than you'd think. When your hand points toward the leader, you're usually looking at a branch that should stay. I've used this method for years and it's saved me from removing branches that actually helped shape the tree. It's a simple visual cue that makes pruning decisions much easier, especially for beginners.
Wound Care Makes a Difference: For thicker branches (over ½ inch), applying a wound dressing like tree sealant after pruning can prevent disease and encourage faster healing. I've seen cases where trees developed infections at pruning wounds because they weren't properly sealed. This is especially important if you're doing corrective pruning on mature trees where you might need to make larger cuts. Think of it as bandaging the tree's cuts to help it heal properly.
Pro Tips for Make A Tree Grow Straight
- Your tree's straight growth starts with the right technique—here's how to avoid common mistakes and get professional results.
- Branch Angle is Everything: When pruning in Step 2, that 30-45-degree angle isn't just a suggestion—it's the difference between straight growth and awkward branches.
- Season Matters More Than You Think: The instructions mention summer is best for pruning, and I can't stress this enough.
Frequently asked questions
Got questions about growing straight, sturdy trees? You’re not alone! Here are some of the most common concerns—and their answers—to help you nurture a tree that stands tall with confidence.
How do I know if my tree is growing straight or leaning?
Check for symmetry from all sides. A straight tree should align vertically with the sun overhead (no noticeable tilt). If it leans more than 15 degrees, it’s time to intervene with staking or pruning. Young trees often bend toward light—rotate them occasionally to encourage even growth.
At what age should I start correcting a tree’s growth?
Begin as soon as you notice a lean, ideally within the first 1–2 years of planting. Young trees (under 5 years) adapt best to training. Older trees may resist correction, but gentle pruning and staking can still improve their structure over time. Patience is key!
Can I prune a tree to make it grow straight, or is staking better?
Both methods work, but they serve different needs. Pruning removes competing branches that pull the tree off-center, while staking physically supports weak trunks. For severe leans, combine both: prune to reduce weight and stake to guide growth. Avoid over-staking—remove supports after 6–12 months.
Will my tree grow straight if I plant it in full sun?
Sunlight alone won’t guarantee straight growth—trees lean toward light sources (like windows or fences). To minimize issues, plant in partial shade if your yard has uneven light exposure. For full-sun spots, rotate the sapling weekly in its first month to encourage balanced growth.
My tree’s trunk is crooked—can I fix it, or should I remove it?
Remove the tree only if the crook is severe (e.g., splits, rot, or irreversible bending). For minor curves, prune to redirect energy upward and stake temporarily. Some species (like willows or birches) naturally grow with character—embrace their shape if it’s healthy! Consult an arborist for persistent issues.
| Quick Fix? | Best For |
|---|---|
| Rotate young sapling weekly | Preventing early leans |
| Prune competing branches | Correcting mild tilts |
| Use flexible stakes + ties | Supporting weak trunks |
Wrapping up and next steps
Growing a straight, healthy tree is all about patience, proper technique, and consistent care—not magic! 🌱 By mastering the pruning angle, staking young saplings, and providing the right support, you’ll guide your tree toward a strong, upright structure.
Remember, every cut and adjustment is a step toward a beautiful, long-lasting tree.
Ready to see your efforts pay off? Start small—try these methods on a young tree today, and watch it thrive! For even more tips, explore advanced pruning guides or join a local gardening group to share your progress. Happy growing! 🌿