
Blooming
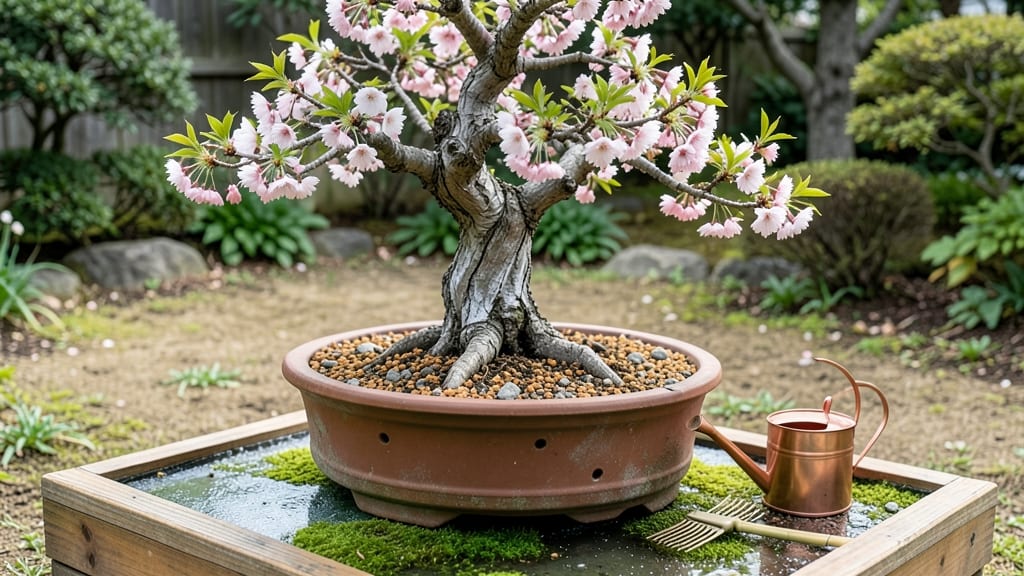
Caring for a cherry blossom bonsai tree transforms your space into a living springtime masterpiece—if you master the delicate balance of pruning, patience, and precision. ✨ The key isn’t just trimming branches; it’s understanding when to encourage blooms, when to shape growth, and how to keep that signature delicate foliage thriving year-round.
I’ve pruned mine for three seasons now, and the difference between a leggy, sparse tree and one bursting with blossoms comes down to three things: timing (prune after blooms fade), technique (use sharp tools at 45-degree angles), and soil health (well-draining mix with 30% akadama).
Most beginners over-prune in spring, which kills next year’s flowers—so we’ll fix that.
By summer, you’ll see new growth that’s denser and more vibrant, with buds forming for next spring’s display. The secret is gentle, frequent maintenance: a light trim every 6 weeks keeps the tree compact while preserving its natural elegance.
Even indoor bonsai thrive with this approach—just adjust watering for lower humidity.
Outdoor trees need winter protection (a frost cloth for Zone 5+), while indoor ones benefit from bright, indirect light. The payoff? A bonsai that looks like it’s been growing for decades, not just a few years. Let’s get your tree blooming beautifully every season.
📚 In This Guide
- What you need
- Instructions
- Tips and common mistakes
- Wrapping up and next steps
What you need
- ● Bonsai Pot: 1 shallow, well-draining pot (3–6 inches deep) with drainage holes. Tip: Glazed ceramic or unglazed clay works best.
- ● Cherry Blossom Bonsai Seedling or Sapling: 1 healthy Prunus serrulata (Japanese cherry) or hybrid bonsai, aged 2–5 years.
- ● Bonsai Soil Mix: 1 bag (10–20 lbs) of akadama, pumice, and lava rock (60% akadama, 20% pumice, 20% lava rock). Pro Tip: Add 10% organic matter (like compost or peat) for nutrients.
- ● Pruning Tools: 1 pair of concave bonsai shears (for branch pruning).
- ● 1 sharp bonsai knife (for precise cuts).
- ● 1 wire cutter (for removing training wire).
- ● Root Pruning Tools: 1 bonsai root hook (for gentle root lifting).
- ● 1 small hand saw (for thick roots).
- ● Training Wire: 1–2 rolls of aluminum or copper wire (1–3mm thickness, depending on branch size).
- ● Mulch: 1 bag of gravel or small stones (for surface drainage and aesthetics).
- ● Watering Can: 1 with a rose attachment for gentle watering.
- ● Misting Bottle: 1 (to maintain humidity, especially during blooming season).
- ● 1 humidity tray (to create a mini greenhouse effect).
- ● 1 bonsai fertilizer (balanced 10-10-10 or organic options like fish emulsion).
- ● 1 pH test kit (to monitor soil acidity, ideal range: 5.5–6.5).
- ● 1 bonsai display stand (for showcasing your masterpiece!).
- ● 1 grafting tool (if propagating from cuttings).
Step-by-step guide to pruning your cherry blossom bonsai
Pruning this delicate tree isn't just about shaping—it's about preserving those iconic blooms while encouraging healthy, graceful growth. Here's how I maintain mine year-round.
✂️ Step 1: Perform Light Pruning After Blooming Season
Wait until 2-3 weeks after flowering when spent blossoms have fallen but new leaves are still soft. This timing ensures you don't sacrifice next year's blooms. I use sharp bonsai scissors to trim back any overly long branches by about 1/3 of their length, focusing on maintaining the natural V-shaped silhouette.
Look for branches that cross or grow inward—these compete for energy and should be removed at the base. The goal is to create an open canopy that allows sunlight to reach all parts of the tree. I always make cuts just above a leaf node where new growth can emerge.
🌿 Step 2: Conduct Structural Pruning in Late Summer
Between July and early August, when your tree is actively growing but before fall dormancy, perform your most aggressive pruning. This is when you shape the tree's future structure. I remove any branches that would disrupt the natural flow of the trunk or create awkward angles.
For thicker branches, I use a thinning cut—removing entire branches back to their origin point rather than just trimming the ends. This opens up the tree's interior and prevents dense, shaded areas that can harbor pests. Watch for new shoots that appear after pruning—they'll give you a preview of next year's shape.
⏰ Step 3: Implement Winter Dormancy Pruning
During dormant season (December-February), when the tree has no leaves, is the perfect time for major structural adjustments. I remove any dead, diseased, or weak branches completely. For healthy branches, I can make more dramatic cuts since the tree won't be flowering or growing new leaves immediately.
This is also when I address any awkward growth that appeared during the growing season. I might shorten some branches by up to half their length if they're growing too vigorously. The key is to work with the tree's natural shape while gradually guiding it toward your vision.
☀️ Step 4: Spring Growth Maintenance
In early spring (March-April), before new leaves emerge but after the last frost, do a final light pruning pass. Remove any remaining dead wood and trim back any overly vigorous shoots that appeared over winter. This keeps the tree's energy focused on developing strong new growth rather than maintaining unnecessary branches.
I also check for any new shoots growing from the trunk or major branches—these should be removed immediately to prevent multiple trunks from forming. The goal is to maintain that single, elegant trunk that's characteristic of cherry blossom bonsai. Watch for new leaf buds forming—this is your signal that the tree is ready for its growing season.
💧 Step 5: Post-Pruning Care Routine
After any significant pruning, increase watering frequency for 1-2 weeks as the tree recovers. Pruned branches have increased surface area that can dry out quickly. I also apply a light bonsai fertilizer every 2 weeks during active growth periods to compensate for the energy used in new growth.
Watch for new growth emerging from pruned areas—this is your confirmation that the cuts were successful. If you see yellowing leaves or wilting, it might indicate over-pruning or stress. In that case, reduce watering slightly and provide extra shade until the tree stabilizes. The first flush of new growth after pruning is always the most critical period for recovery.
Tips & tricks for perfect cherry blossom bonsai pruning
These seasoned insights will help you preserve those delicate blossoms while shaping your tree with confidence.
Timing is Everything: The 2-3 week window after flowering in Step 1 is critical—waiting too long risks next year's blooms, while pruning too soon can stress the tree. I mark my calendar with the last bloom date and count forward to ensure perfect timing. This delicate balance between bloom preservation and shaping is what separates good bonsai from exceptional bonsai.
Tool Precision Matters: Using sharp bonsai scissors isn't just about clean cuts—it's about minimizing damage to the branch's vascular system. Dull scissors crush tissue, which can introduce disease. I invest in high-quality scissors and sharpen them annually. For thicker branches in Step 2, I use a thinning cut technique, removing entire branches at their origin rather than just trimming ends, which prevents dense growth patterns that block sunlight.
Seasonal Strategy: Winter dormancy pruning (Step 3) is your chance for major structural adjustments since the tree isn't actively growing. This is when I make the most dramatic cuts—up to half the branch length—because the tree can recover without competing with new growth. The key is working with the tree's natural shape while gradually guiding it toward your vision. I always visualize the final shape before making any cuts during this period.
Recovery Observation: After any significant pruning, the first 1-2 weeks of increased watering are crucial. I check the soil moisture daily during this period and watch for new growth emerging from pruned areas—this is your confirmation that the cuts were successful. If you see yellowing leaves or wilting, it's a sign of over-pruning or stress. In that case, I reduce watering slightly and provide extra shade until the tree stabilizes.
Pro Tips for Cherry Blossom Bonsai Tree Care
- These seasoned insights will help you preserve those delicate blossoms while shaping your tree with confidence.
- Timing is Everything: The 2-3 week window after flowering in Step 1 is critical—waiting too long risks next year's blooms, while pruning too soon can stress the tree.
- Tool Precision Matters: Using sharp bonsai scissors isn't just about clean cuts—it's about minimizing damage to the branch's vascular system.
Frequently asked questions
Got questions about keeping your cherry blossom bonsai thriving? You’re not alone! Here are answers to the most common concerns—from pruning puzzles to seasonal care—so you can enjoy those delicate blooms year after year.
How often should I prune my cherry blossom bonsai?
Prune lightly after flowering (late spring) to shape the tree, and do a harder trim in late summer to encourage next year’s blooms. Avoid heavy pruning in fall/winter—this disrupts dormancy. For young trees, focus on structural cuts; mature trees need selective pruning to maintain balance. See our step-by-step guide for specifics!
Can I keep my cherry blossom bonsai outdoors year-round?
Yes, but with caution! These trees love cool winters (down to 10°F/-12°C) but hate wet roots or strong winds. In harsh climates, move it to a protected porch or garage during frost. If indoors, place it near a bright window (no direct sun) and increase humidity with a pebble tray or humidifier.
Why isn’t my cherry blossom bonsai blooming?
Blooms need 3 key things:
- Age: Most bonsai need 5+ years to flower.
- Chill hours: They require 600–1,000 hours below 45°F (7°C) in winter. Use a refrigerator trick (place in a fridge for 6–8 weeks) if your climate is too warm.
- Balanced care: Over-fertilizing or root-bound pots can stress the tree. Prune after blooming and use low-nitrogen fertilizer in spring.
What’s the best soil mix for a cherry blossom bonsai?
Use a well-draining, acidic mix (pH 5.0–6.5) with:
- 50% akadama (clay granules)
- 30% pumice or perlite (for aeration)
- 20% organic matter (peat moss or composted pine bark)
Repot every 2–3 years in early spring. Avoid heavy garden soil—it causes root rot!
Are there bonsai alternatives if cherry blossoms are too tricky?
If you love blooms but want easier care, try:
- Japanese maple (Acer palmatum): Stunning foliage, tolerates shade, and blooms in spring.
- Azalea bonsai: Vibrant flowers, thrives in acidic soil, and handles cooler climates.
- Japanese black pine (Pinus thunbergii): Low-maintenance, evergreen, and drought-resistant.
All three are beginner-friendly compared to cherry blossoms!
Wrapping up and next steps
Caring for a cherry blossom bonsai is a rewarding journey that blends patience, precision, and passion. 🌸 With the right techniques—like year-round pruning, proper watering, and seasonal adjustments—you’ll nurture a tree that bursts with delicate blooms and timeless elegance.
Every trim and tweak brings you closer to a masterpiece that reflects your dedication.
Ready to watch your bonsai thrive? Start by reviewing your pruning schedule and observing your tree’s growth—then take the next step! Whether it’s refining your technique or sharing your progress with fellow bonsai enthusiasts, your cherry blossom’s beauty is just one careful step away. Happy pruning! ✂️🌿