
Propagation
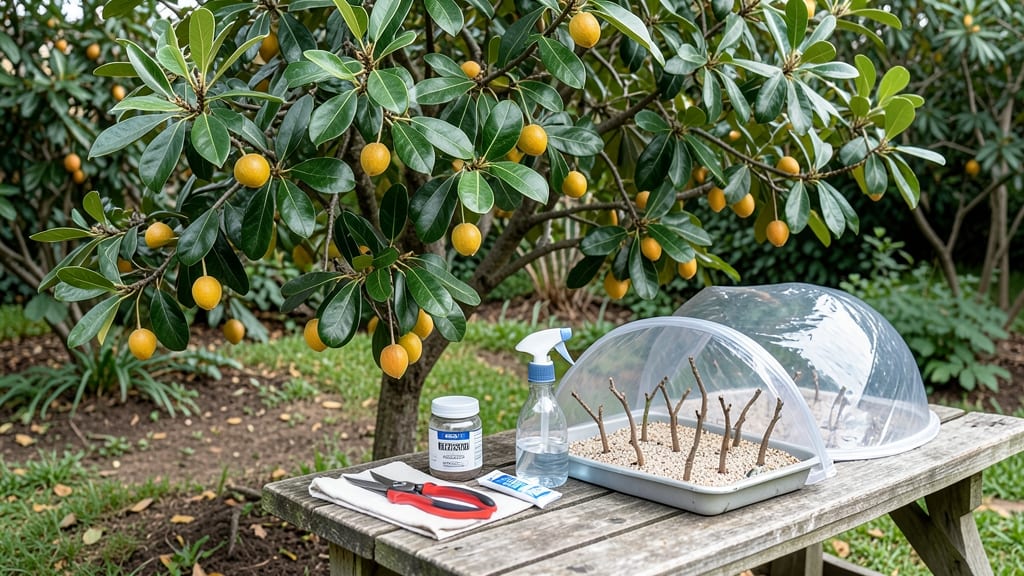
Growing a loquat tree from seed propagation is simpler than you think—no fancy tools or greenhouses required. 🌱 I’ve turned tiny seeds into sturdy saplings that now produce sweet, fragrant fruit, and the process is foolproof once you know the tricks.
The key is patience and a few simple supplies that likely already sit in your garage or pantry.
Start with fresh seeds from ripe loquats (or buy them online) and a basic seed-starting mix. You’ll need small pots, a spray bottle, and a sunny windowsill or grow light.
Germination takes 4-6 weeks, but once those first leaves appear, you’re on your way to a tree that could live for decades. The real magic happens when you transplant them into the ground—just don’t rush it.
By the time your saplings hit 12 inches tall, they’ll be ready for their forever home in the garden. Loquats thrive in warm climates but can handle light frosts once established.
The best part? You’ll harvest fruit in just 3-5 years, and the trees reward you with years of low-maintenance growth. No pruning, no fuss—just sweet, golden fruit waiting to be picked.
Even if you’ve failed before, this method works for beginners and pros alike. The secret is consistency: keep the soil moist but not soggy, and give them plenty of light.
Skip the guesswork with these 6 simple steps, and you’ll have a thriving loquat tree before you know it. Let’s get those seeds growing!
📚 In This Guide
- What you need
- Instructions
- Tips and common mistakes
- Wrapping up and next steps
What you need
- ● Loquat seeds or semi-ripe cuttings – 5–10 seeds (if starting from seed) or 3–5 healthy cuttings (4–6 inches long) for propagation.
- ● Well-draining potting mix – A blend of peat moss, perlite, and sand (or a cactus/succulent mix) for optimal root growth.
- ● Small pots or seed trays – 4–6 inch pots (for seeds) or 6–8 inch pots (for cuttings), with drainage holes.
- ○ Rooting hormone – Optional but recommended for cuttings to boost success rates.
- ● Clear plastic bags or domes – To create a humidity tent for cuttings.
- ● Spray bottle – For gentle watering and misting.
- ● Fertilizer (balanced, low-nitrogen) – A 10-10-10 or 5-5-5 formula (use sparingly after roots establish).
- ● Pruning shears or sharp knife – For clean cuts on stems (sterilized with rubbing alcohol).
- ● Gloves – To protect hands while handling soil or sharp tools.
- ● Sunlight or grow lights – Loquats need bright, indirect light (6+ hours daily).
- ○ Thermometer (optional) – Ideal germination temps: 70–80°F (21–27°C).
- ● Patience! 😉 – Seeds may take 4–12 weeks to sprout; cuttings, 2–4 weeks to root.
Step-by-Step instructions for loquat tree propagation
Here's the straightforward method I've used to grow strong loquat saplings from seed—no fancy tools required.
🌱 Step 1: Extract and Prepare the Seeds
Loquat seeds are nestled inside the fruit's pit, so start by scooping out the flesh and rinsing the pit clean. Use a sharp knife to carefully cut through the hard outer shell—don't rush this, as cracking too aggressively can damage the seed inside. Once exposed, you'll find a single seed encased in a papery membrane.
Soak the seeds in lukewarm water for 12-24 hours to soften the membrane. This step is crucial because the outer coating slows germination, and a good soak helps the seedling break free faster. After soaking, gently rub the seed between your fingers to remove the membrane completely. You'll know it's ready when the seed feels smooth and the outer layer peels away easily.
💧 Step 2: Plant the Seeds in Moist Starting Mix
Fill small pots—around 3-4 inches deep—with a well-draining seed-starting mix. I like to mix in a little perlite to ensure excess water drains quickly, as loquat seeds rot easily if left soggy. Moisten the mix until it's damp but not dripping, then press it lightly to settle.
Plant the seeds ½ inch deep, spacing them about 1 inch apart in the pot. Cover them lightly with additional mix, just enough to hide the seeds without burying them too deeply. Water gently with a spray bottle until the soil surface looks evenly moist. Place the pots in a warm, shaded spot—70-75°F is ideal for germination.
☀️ Step 3: Provide Warmth and Wait for Sprouts
Loquat seeds can take 2-4 weeks to germinate, so patience is key. Keep the soil consistently moist but never waterlogged—tap the pot gently to check moisture levels. If the top inch feels dry, it's time to water again. A clear plastic bag draped loosely over the pot helps retain humidity without suffocating the seeds.
Once you see the first tiny sprouts pushing through the soil, remove the plastic immediately. This prevents damping-off, a fungal disease that can kill seedlings overnight. Place the pot in bright, indirect light—direct sun at this stage can scorch the delicate new leaves. You'll know the seedlings are thriving when they develop their first set of true leaves, which will look different from the initial seed leaves.
🌿 Step 4: Transplant Seedlings to Larger Pots
When the seedlings reach about 4-6 inches tall and have 3-4 sets of true leaves, it's time to transplant them into 6-inch pots. Use the same well-draining mix, and this time, add a slow-release fertilizer to give them a nutrient boost. Gently loosen the roots before transferring them to their new pots to avoid damaging the delicate root system.
Water thoroughly after transplanting, then place the pots in a spot with morning sun and afternoon shade. Loquat seedlings need protection from harsh afternoon rays, which can stress young plants. Over the next few weeks, gradually introduce them to more sunlight, watching for signs of stress like yellowing leaves or wilting. If this happens, move them back to a shadier spot for a few days.
⏰ Step 5: Harden Off and Prepare for Outdoor Planting
About 4-6 weeks before your last frost date, start hardening off your loquat saplings. Begin by placing them outside in a sheltered spot for 1-2 hours the first day, then gradually increase their outdoor time by 1 hour daily. This process helps them adjust to wind, sun, and temperature fluctuations without going into shock.
Once the saplings can tolerate a full day outside without wilting, they're ready for their permanent home. Choose a location with full sun to partial shade and well-draining soil. Dig a hole twice as wide as the root ball but no deeper, then plant the sapling at the same level it was in the pot. Water deeply to settle the soil and remove any air pockets around the roots.
Tips & tricks for perfect loquat tree propagation
Growing loquat trees from seed is simpler than it seems—here's how to avoid the common pitfalls that trip up beginners.
Seed Prep Precision: When cutting open the loquat pit in Step 1, use a sharp, clean knife to avoid damaging the seed inside. I've cracked too many seeds by rushing—take your time to expose that papery membrane cleanly. After the 12-24 hour soak, you'll notice the membrane softens dramatically; this is when it peels away most easily. If it resists, soak another 6 hours—never force it, or you'll risk damaging the seed.
Soil Science Matters: In Step 2, that perlite mix is non-negotiable for loquat seeds. I've seen beginners skip it and end up with rotten seeds within days. The key is creating that perfect balance—damp but never soggy. After planting, press the soil lightly to eliminate air pockets, which helps maintain consistent moisture around the seeds. A gentle squeeze should leave the soil holding its shape without crumbling.
Germination Patience: Those 2-4 weeks of waiting in Step 3 can feel endless, but don't be tempted to move the pots to brighter light too soon. The first true leaves are your green light—they'll look more robust than the initial seed leaves. I've had seedlings collapse when moved to direct sun too early; always keep them in bright, indirect light until you see those true leaves emerge. The plastic bag trick works wonders for humidity, but remember to remove it immediately when sprouts appear to prevent fungal issues.
Transplanting Technique: When moving to 6-inch pots in Step 4, focus on the roots—gently loosen them rather than pulling. I've seen too many seedlings shock and stop growing after rough handling. After transplanting, place the pots where they'll get morning sun and afternoon shade. This gradual light introduction prevents the yellowing leaves that signal sun stress. Watch for wilting as your indicator—if leaves droop, move to shade immediately.
Pro Tips for Loquat Tree Propagation
- Growing loquat trees from seed is simpler than it seems—here's how to avoid the common pitfalls that trip up beginners.
- Seed Prep Precision: When cutting open the loquat pit in Step 1, use a sharp, clean knife to avoid damaging the seed inside.
- Soil Science Matters: In Step 2, that perlite mix is non-negotiable for loquat seeds.
Frequently asked questions
Got questions about growing your own loquat tree? You’re not alone! Here are answers to the most common queries to help you propagate like a pro.
When is the best time to propagate a loquat tree?
The ideal time is late winter to early spring (just before new growth starts). For seeds, sow them as soon as they’re ripe (fall/winter). Air layering or cuttings work best in warm, humid conditions—spring or early summer. Avoid extreme heat or cold, which can stress young plants.
Can I propagate a loquat tree from store-bought fruit?
Yes, but expect unpredictable results. Store-bought loquats are often hybrids, so seed-grown trees may not match the parent’s flavor or fruit quality. For consistent traits, use cuttings or air layering from a known tree. If you try seeds, be patient—germination can take 4–8 weeks!
Why aren’t my loquat cuttings rooting?
Common culprits: poor humidity, wrong cutting type, or overwatering. Use semi-hardwood cuttings (not too soft, not too woody), dip in rooting hormone, and maintain 70–80% humidity with a plastic bag or propagator. Yellowing leaves? You’re overwatering—let the soil dry slightly between waterings.
Do loquat trees grow well from seed, or should I use cuttings?
Seeds are easier for beginners but produce unpredictable trees (slow growth, variable fruit). Cuttings or air layering replicate the parent tree’s traits faster—perfect for grafting or cloning your favorite variety. If you love experimentation, try seeds! Otherwise, cuttings are the gold standard.
How cold-hardy are young loquat trees?
Loquats are tropical/subtropical—mature trees tolerate 20–25°F, but seedlings/saplings need protection below 30°F. Use mulch, frost cloth, or containers you can move indoors. In Zone 8+, plant in sheltered spots; colder zones? Grow in pots for flexibility.
Wrapping up and next steps
Growing a loquat tree from seed or cutting is a rewarding journey that connects you to nature’s sweet surprises! Whether you’re a beginner or a seasoned gardener, these six simple steps make propagation approachable and fun.
With patience and care, you’ll soon be savoring homegrown loquats—or even sharing saplings with fellow plant lovers.
Ready to take the next step? Start small: Choose your preferred method (seeds or cuttings), gather your supplies, and give it a try! Even if your first attempt isn’t perfect, every gardener learns through experience. Happy planting—and may your loquat tree thrive! 🌱✨